Adjust the type on a path position, Change the start or end position of type on a path, Slide type along a path – Adobe InDesign CS4 User Manual
Page 226: Flip type on a path
218
USING INDESIGN CS4
Combining text and objects
Note: The Spacing value compensates for the way characters fan out around a curve or sharp angle. It has no effect on
characters positioned on straight segments. To change spacing of characters anywhere along the path, select them, and
then apply kerning or tracking.
Adjust the type on a path position
You can change the start or end position of type on a path, slide type, and change the path position in other ways.
Change the start or end position of type on a path
1 Using the Selection tool
, select the type on a path.
2 Position the pointer over the path type’s start or end bracket until a small icon appears next to the pointer
. Do
not position it over the bracket’s in port or out port.
Zoom in on the path to more easily select the bracket.
3 Drag the start or end bracket along the path.
Position the pointer on start or end bracket, and then drag to reposition boundary of type on a path.
Note: If you apply a paragraph indent value, it’s measured from the start and end brackets.
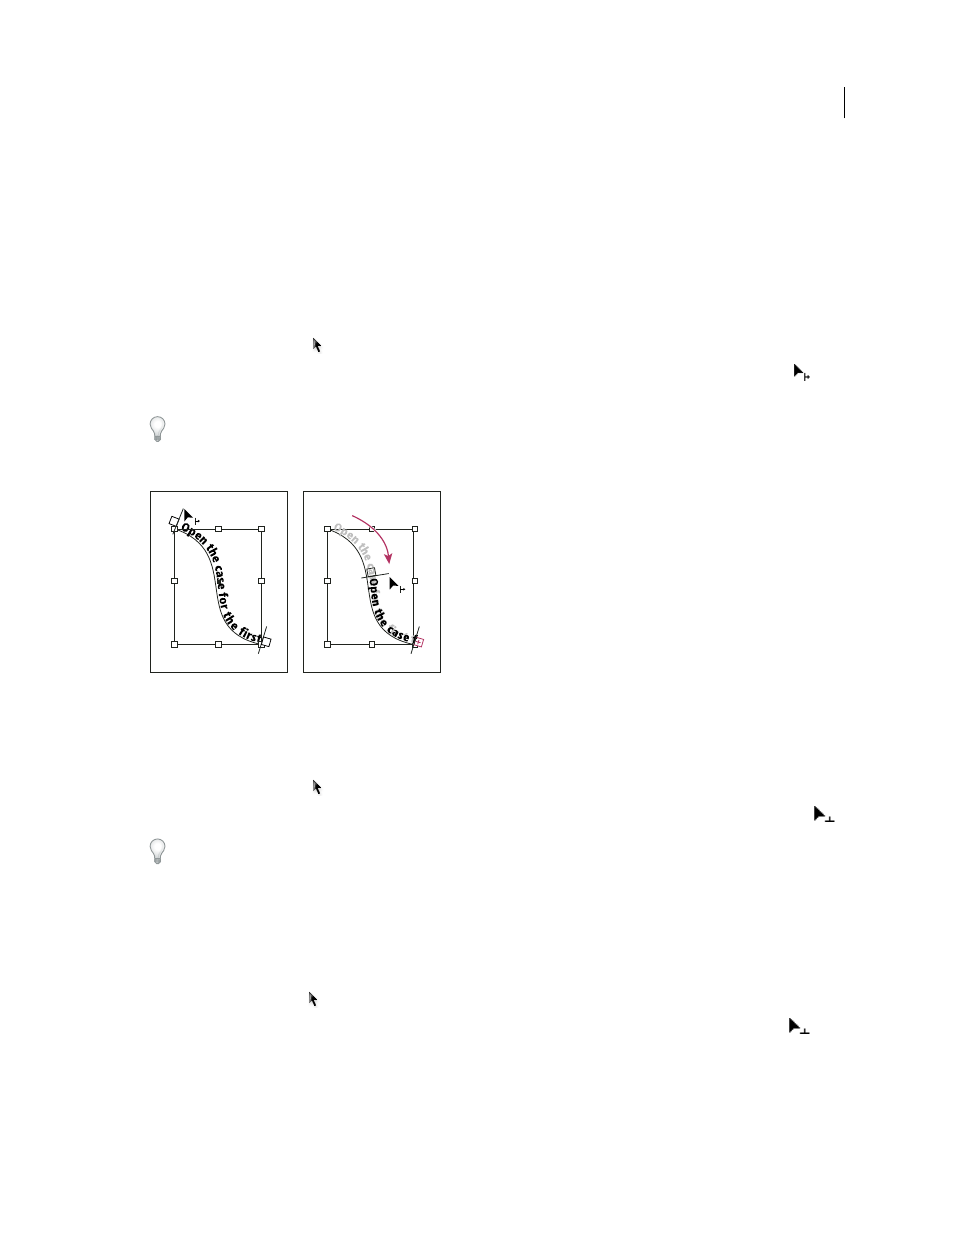
Slide type along a path
1 Using the Selection tool
, select the type on a path.
2 Position the pointer over the path type’s center bracket until a center bracket icon appears next to the pointer
.
Zoom in on the path to more easily select the bracket.
3 Drag the center bracket along the path.
Note: The text won’t move if both the start and end brackets are at the ends of the path. To create some space for dragging
text, drag the start or end bracket away from the ends of the path.
Flip type on a path
1 Click the Selection tool
, and select the type on a path.
2 Position the pointer over the type’s center bracket until a center bracket icon appears next to the pointer
.
3 Drag the center bracket across the path.
Updated 18 June 2009