SkyTrak 6042 Service Manual User Manual
Page 99
3.53
Model 6042 Legacy
Origin 7/02
Boom
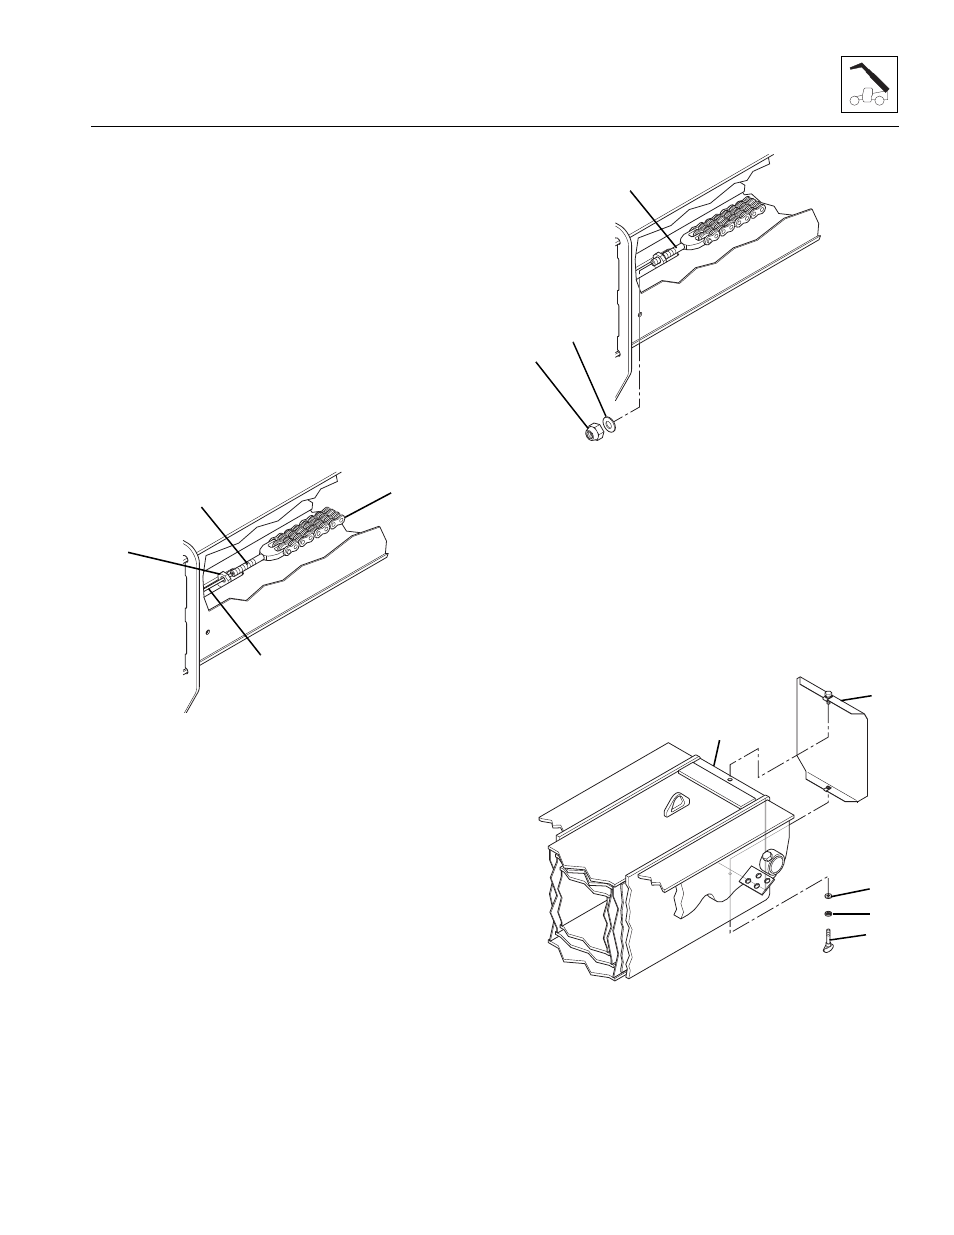
If no string or wire was installed to the end of the
clevis:
18. From the rear of the boom, one person should push
the threaded clevis end (Fig. 3-112, 1) of the retract
chain (2) under the chain sheave and down between
the intermediate boom and the outer boom. Keep
the retract chain (2) to the right side of the boom,
push the threaded clevis down to the tab (3) at the
front underside of the outer boom.
19. The person at the front of the boom should guide the
threaded end of the clevis (Fig. 3 -112, 1) through
the hole in the tab (3) using a Phillips screwdriver (4).
Insert the screwdriver through the hole in the tab and
catch the countersunk hole in the end of the clevis.
Guide the threaded clevis out as the person at the
rear of the boom pushes the retract chain forward.
Figure 3-112 Chain Clevis through Tab in Outer Boom
Once the threaded clevis is through the tab on the
outer boom:
20. Reassemble the flat washer (Fig. 3-113, 1), saved,
and a new 3/4-16 elastic locknut (2) onto the threaded
clevis (3). Tighten the locknut until the threaded end
of the clevis is flush with the top of the locknut.
21. Tighten the elastic locknut (Fig. 3-113, 2) on the
retract chain clevis (3) until the amount of threads
protruding beyond the elastic locknut is the same as
the measurement recorded during removal of the
retract chain.
22. Adjust retract chain tension. (Refer to Section 3.4.3,
Figure 3-113 Retract Chain Clevis to Tab in Outer Boom
23. After adjustment is complete, assemble the rear cover
to the rear of the outer boom. At the rear of the outer
boom (Fig. 3-114, 1), position the rear cover (2) in
place. Secure the cover in place with the 5/16" flat
washer (3), saved, lockwasher (4), saved, and
thumbscrew (5), saved. Insert the thumbscrew
through the bottom of the outer boom and into the
rear cover. Tighten the thumbscrew securely to hold
the cover in place.
Figure 3-114 Assembly of Rear Cover to Outer Boom
MA9520
2
1
3
4
MA9510
3
1
2
MA9820
3
4
5
1
2