Door and latches – SkyTrak 6042 Service Manual User Manual
Page 144
Cab and Covers
4.24
Model 6042 Legacy
Origin 7/02
4.4.5
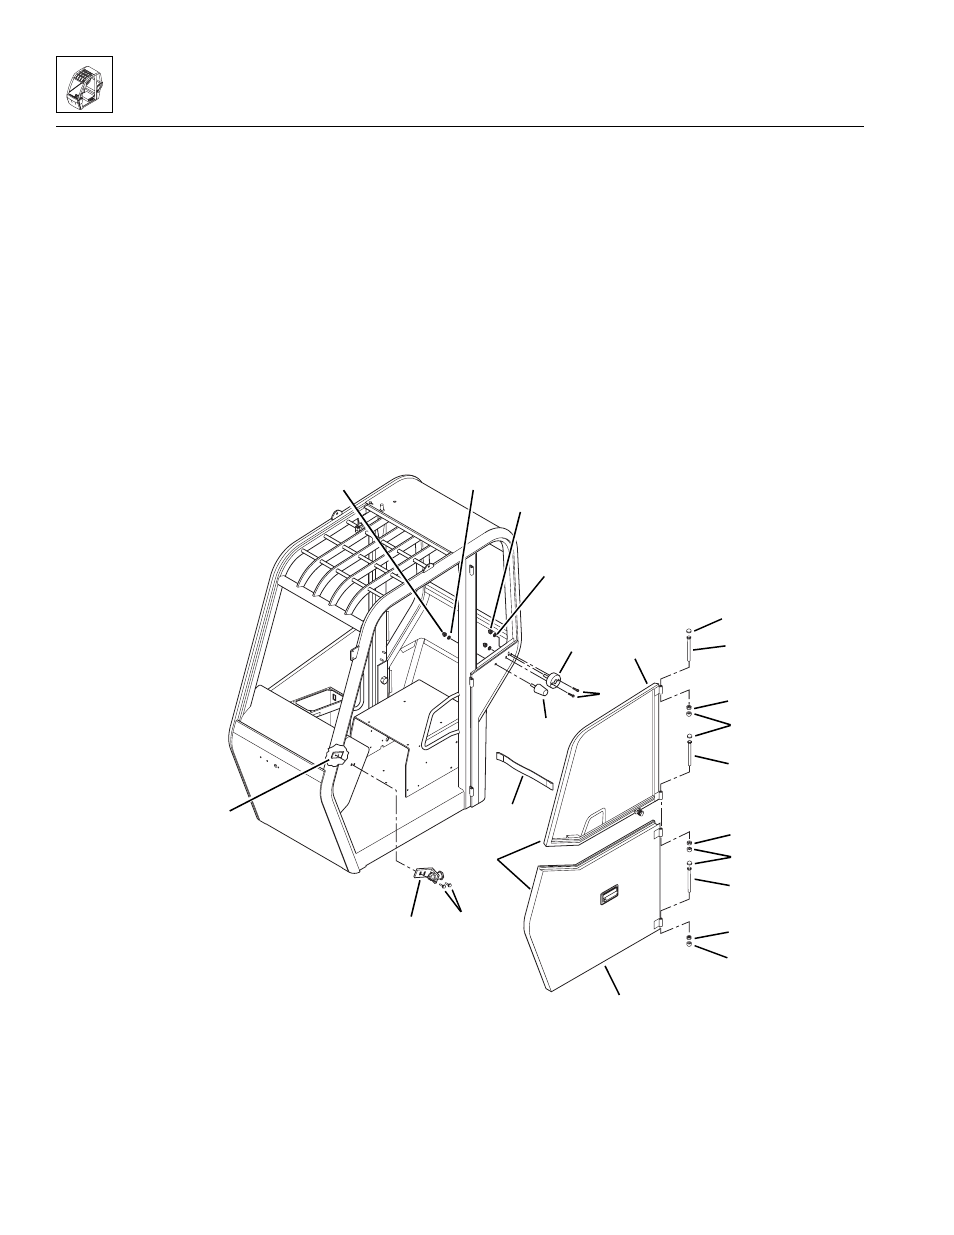
Door and Latches
1. Open and securely support the door assembly
(Fig. 4-39, 1).
2. Remove the strap (Fig. 4-39, 2), by slipping the
looped ends of the strap through the openings in the
“C” rings welded to the cab frame and door.
3. Remove the six caps (Fig. 4 -39, 3) from the three
door hinge hex-head capscrews (4, 5 and 6) and
three hex nuts (7, 8 and 9).
4. Remove the hex nuts (Fig. 4-39, 7 and 8) from the
upper two door hinge hex-head capscrews (4 and 5).
5. Support the upper door section (Fig. 4-39, 10) and
remove the upper two door hinge hex-head
capscrews (4 and 5). Remove the upper door
section.
6. Remove the hex nut (Fig. 4-39, 9) and hex-head
capscrew (6). Remove the lower door section (11).
7. Remove two acorn nuts (Fig. 4-39, 12) two
lockwashers (13), two screws (14) and the female
door retainer (15).
8. Remove one acorn nut (Fig. 4 -39, 16), one
lockwasher (17) and the door bumper (18).
Note: Record the position of the striker plate assembly
to ensure correct adjustment during installation.
9. Remove two lockscrews (Fig. 4-39, 19) and remove
the striker assembly (20) and nutplate (21).
10. Transfer all parts to the new cab.
Figure 4-39 Door and Latches
MA8760
16
17
12
13
15
3
4
3
7
5
14
18
2
1
19
20
21
11
8
3
9
6
3
10