SkyTrak 6042 Service Manual User Manual
Page 105
3.59
Model 6042 Legacy
Origin 7/02
Boom
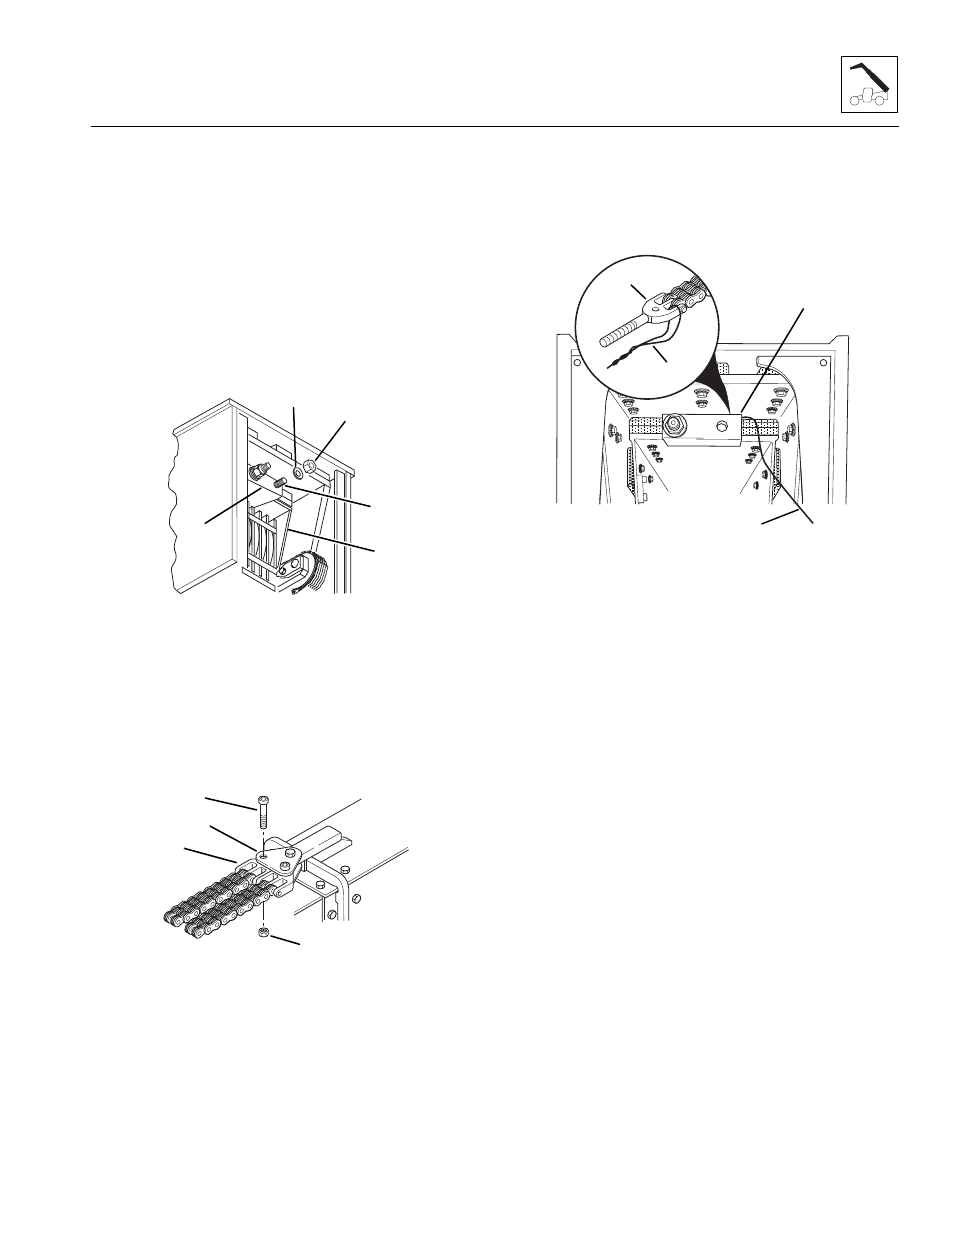
4. At the rear of the boom, locate the extend chain
elastic locknuts (Fig. 3 -130, 1). Record the amount
of threads extending beyond both the elastic
locknuts. These measurements will be the starting
point for adjustment of the extend chains after
installation.
5. Remove and replace the extend chains one at a
time. Remove the right side elastic locknut
(Fig. 3-130, 1) and flat washer (2), holding the right
side extend chain clevis (3) to the anchor plate (4) on
the inner boom (5). Save the flat washer and discard
the elastic locknut.
Figure 3-130 Extend Chain Locknuts
6. At the front of the outer boom, remove the hex
socket head capscrew (Fig. 3-131, 1) and elastic
locknut (2), holding the right side extend chain clevis
(3) to the yoke plates (4). Discard the elastic locknut.
Inspect the hex socket head capscrew for signs of
wear or damage. Replace with a new hex-socket
head capscrew if damaged or worn.
Figure 3-131 Extend Chain Clevis to Outer Boom
7. At the rear of the boom, attach one end of a wire
(Fig. 3 -132, 1) to the threaded clevis (2) on the right
side extend chain. Loop the wire around and twist
together to form a loop. Route the wire around the
right side of the clevis anchor plate (3).
Figure 3-132 Wire Loop on Threaded Clevis
8. Have a second person assist with the removal of the
extend chain. One person should pull the chain from
the front of the boom while the second person
guides the wire into the boom from the rear. Remove
the wire from the clevis, but not from inside the
boom.
9. Inspect wear and condition of the booms, chains,
clevis’, chain sheaves, extend/retract cylinder, chain
rods, clevis anchors and all mounting hardware.
Replace any worn or damaged parts. DO NOT
attempt to make any repairs to the chain.
IMPORTANT: Chains and clevis’ are wear items and
experience the same stress. DO NOT attempt to repair a
chain. Replace a stretched or damaged chain with a new
part. Always replace both the chain and the clevis’.
10. Coat the threads of the threaded clevis (Fig. 3-132, 4)
with multi-purpose grease.
MH0911
1
2
3
4
5
SH1810
3
4
1
2
SH1830
3
1
1
2