SkyTrak 6042 Service Manual User Manual
Page 141
4.21
Model 6042 Legacy
Origin 7/02
Cab and Covers
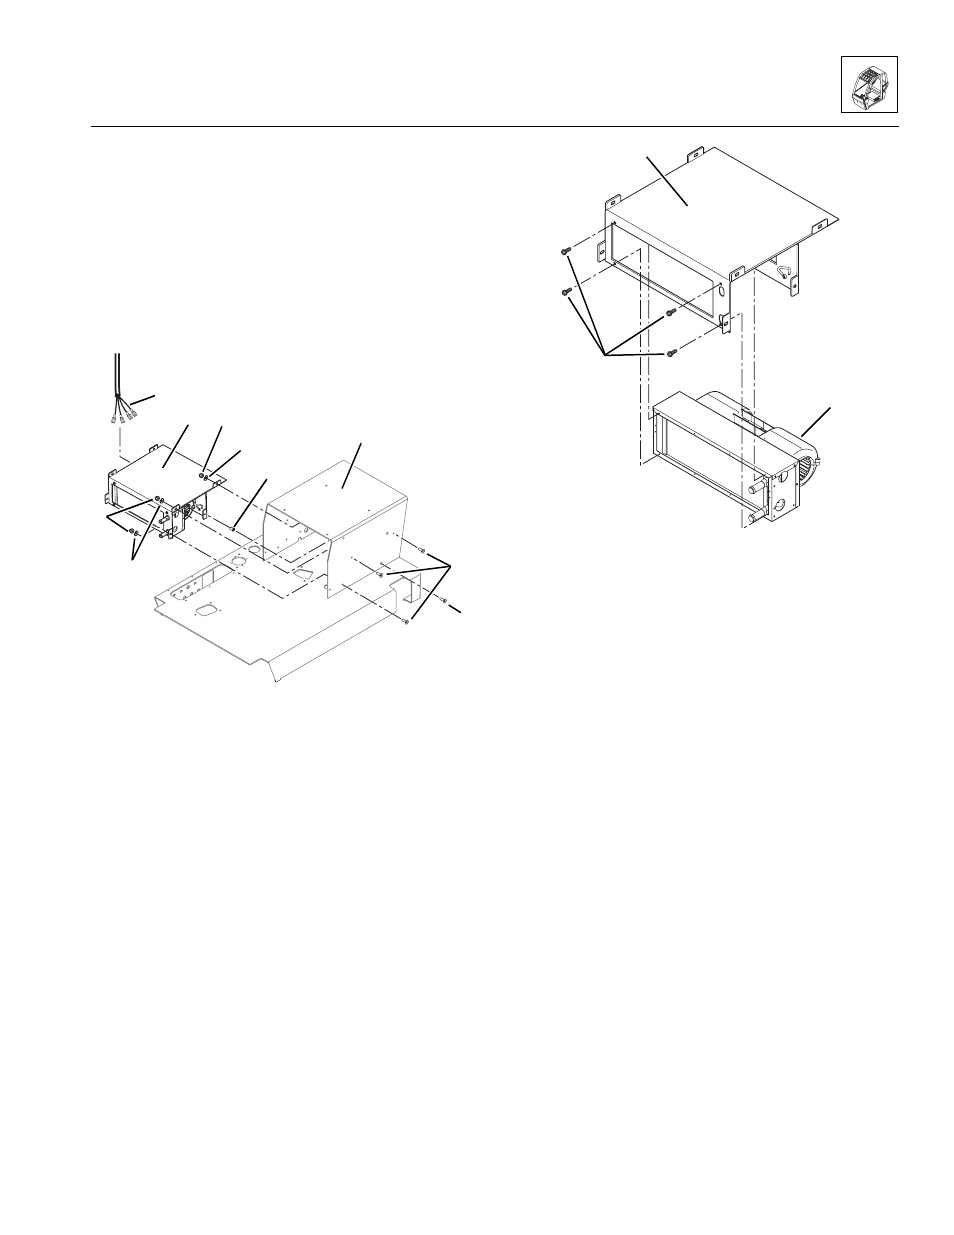
Note: The button-head screw (Fig. 4 -35, 1) at the lower
rear position on each side of the heater will be secured
with an insert nut (2).
11. Remove eight button-head screws (Fig. 4-35, 3 and 1),
six nuts (4) and six lockwashers (5).
12. Carefully pull the heater assembly (Fig. 4-35, 6)
forward. Label and disconnect the wiring harness
connections (7) at the blower.
13. Remove the heater assembly (Fig. 4 -35, 6).
Figure 4-35 Remove Heater Assembly
14. If the heater assembly is to be replaced: Remove
four hex-slotted capscrews (Fig. 4-36, 1), and
remove the mounting bracket (2) from the heater
assembly (3).
Figure 4- 36 Remove Heater Assembly from
Mounting Bracket
b. Heater Assembly Installation
1. Connect the wiring harness connections
(Fig. 4-35, 7) to the blower.
Note: The button-head screw (Fig. 4-35, 1) at the lower
rear position on each side of the heater will be secured
with an insert nut (2).
2. Slide the heater/mounting bracket assembly
(Fig. 4 -35, 6) into the seat riser (8), and secure with
eight button-head screws (3 and 1), six
lockwashers (5) and six nuts (4).
MA8730
7
~
3
1
2
6
4
4
5
5
~
8
MA8710
1
3
~
2