Steer select switches – SkyTrak 6042 Service Manual User Manual
Page 492
Electrical System
9.122
Model 6042 Legacy
Origin 7/02
9.15.8
Steer Select Switches
For additional information, refer to Section 9.7.15, “Front
Steer Circuit and Troubleshooting.”
a. Steer Select Switch Removal
1. Disconnect the negative (–) battery cable at the
negative battery terminal (Fig. 9-110, 1).
Figure 9-110 Battery Cable Connections
2. Carefully pry the switch (Fig. 9-111, 1) and wiring
out of the mounting hole in the switch bezel.
3. Label and disconnect the wiring from the switch.
Note and mark the “front” or top of the switch in
relation to the switch wiring terminals, and remove
the switch from the vehicle.
b. Steer Select Switch Disassembly, Inspection and
Replacement
DO NOT disassemble the switch. Replace a defective or
faulty switch with a new one.
Inspect the switch and the wiring harness connector terminals
for continuity and shorting in all three switch positions.
Inspect the switch terminals for continuity in the “UP” and
“DOWN” positions and for shorting in the “MIDDLE” position.
Replace a defective or faulty switch with a new one.
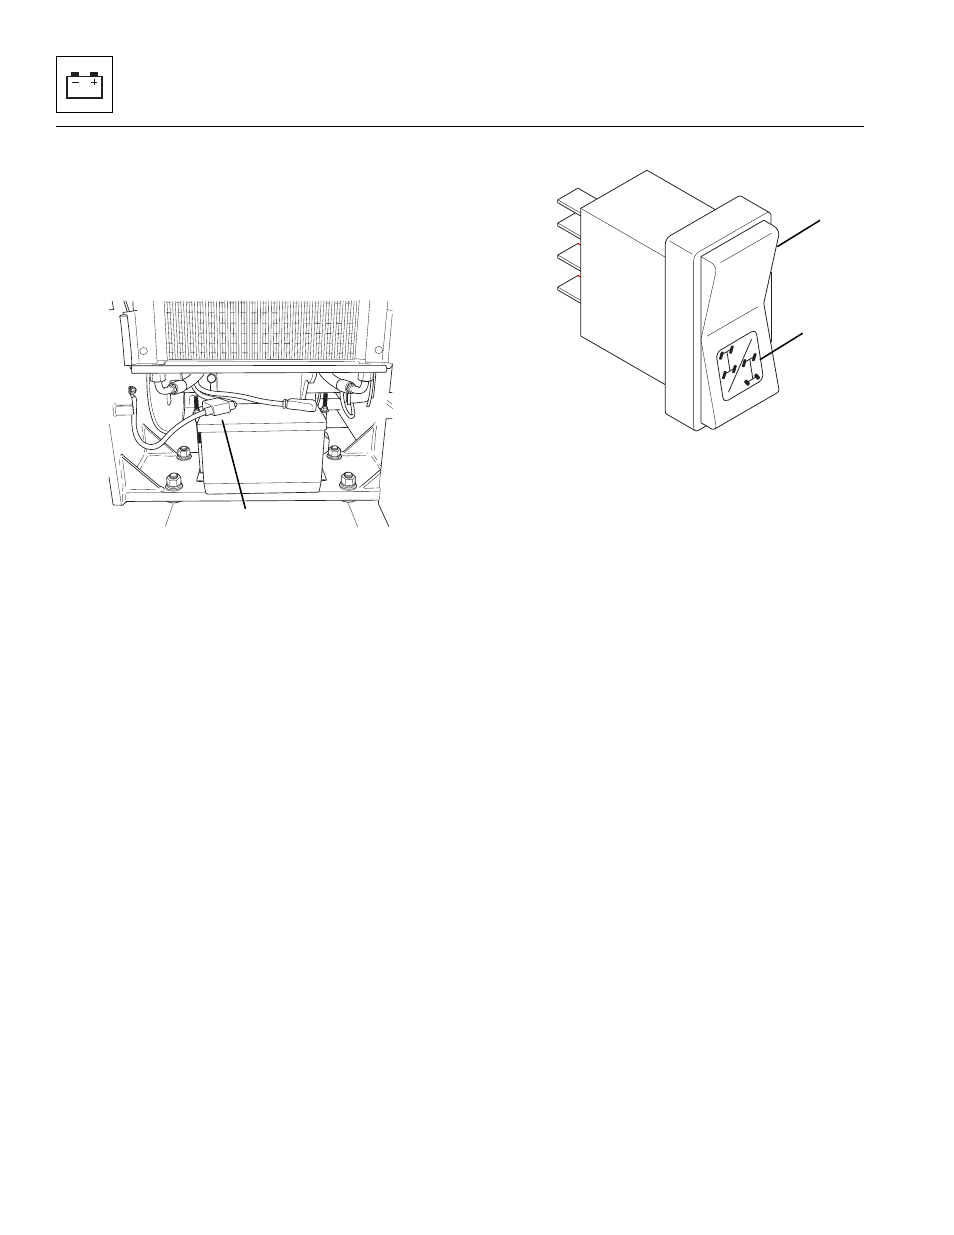
Figure 9-111 Steer Select Switch Installation Position
c. Steer Select Switch Installation and Testing
1. Route the wiring through the dash and switch bezel,
then connect the wiring to the switch (Fig. 9 -111, 1)
as labeled during switch removal (the pin connector
only goes on one way).
2. Properly position the switch for assembly. The switch
is properly positioned when the display window (2) is
at the bottom of the switch. Press or “snap” the
switch into place in the bezel.
3. Connect the negative (–) battery cable to its battery
terminal (Fig. 9-110, 1).
4. Clear the area around the vehicle of personnel and
any obstructions to vehicle travel.
5. Start the engine and check the operation of the steer
select switch functions with the switch in all three
positions. If the vehicle has the rear steer option,
also test the rear steer mode for proper operation.
MA8410
1
MA10,0130
1
2