SkyTrak 6042 Service Manual User Manual
Page 22
General Information and Specifications
2.8
Model 6042 Legacy
Origin 7/02
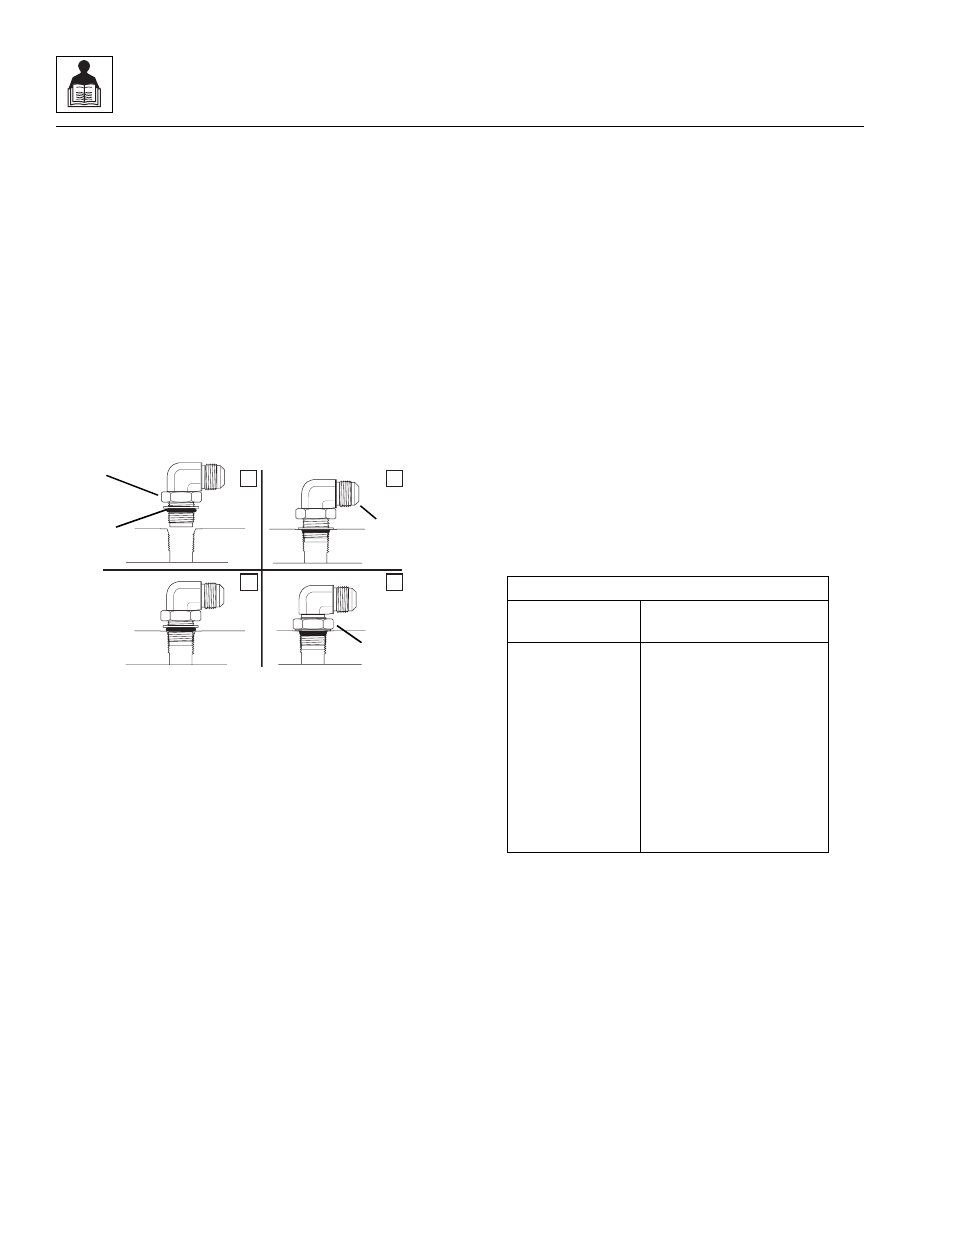
c. Adjustable (Angle) O-Ring Boss Fittings To
O-Ring Boss Ports
Improper assembly of this joint will result in a leaking joint.
Failure to position the locknut properly will result in
damage to the o-ring. Under tightening of the fitting will
result in the fitting loosening during normal operation and
the joint leaking. Damaging the o-ring during assembly
will result in immediate joint leakage.
1. Inspect components to ensure that male and female
port threads and sealing surfaces are free of burrs,
nicks, or scratches, or any foreign material. If any
damage is found the bad part must not be used.
Clean any foreign material from the mating parts
before assembly.
Figure 2-3 Adjustable Fitting to Port
2. Back off the locknut as far as possible (Fig. 2 -3, 1).
Make sure the back-up washer is not loose. If the
back-up washer is loose the fitting must be replaced.
3. Lubricate the o-ring (Fig. 2-3, 2) and male thread
with a clean petroleum based lubricant.
4. Screw the fitting into the port as far as possible by
hand (Fig. 2-3, B & C).
5. To align the tube end (Fig. 2-3, 3) of the fitting to
accept the mating tube or hose, unscrew the fitting
as required but not more than one turn.
6. Using two wrenches, hold the fitting in the desired
position and tighten the locknut (Fig. 2 -3, 4) to the
appropriate torque value listed in the table in Section
2.3.3, b. “Straight O-Ring Boss Fittings To
O-Ring Boss Ports.”
d. Pipe Fittings to Pipe Ports
Improper assembly of this joint will result in a leaking joint
and possible damage to the port.
1. Inspect the port and fitting to insure that there are no
burrs, nicks, or foreign material. If any thread
damage is found the part must not be used. Clean
off any foreign material.
2. Apply sealant/lubricant to male pipe thread. If Teflon
tape is used it should be wrapped 1.5 to 2 turns in a
clockwise direction when viewed from the pipe
thread end. With any sealant the first 1 to 2 threads
should be left uncovered to avoid system
contamination.
3. Screw the connector into the port finger tight.
4. Wrench tighten the fitting to the appropriate Turns
From Finger Tight (TFFT) from Table 4. Make sure
that angle fittings are aligned with the mating tube or
hose within the listed number of turns. Never back
off (loosen) pipe thread connectors to achieve
alignment.
C
D
B
A
MF0620
2
1
3
4
Pipe Fittings To Pipe Ports
Pipe Thread Size Turns From Finger Tight
(T.F.F.T
1/8"
2 - 3
1/4"
2 - 3
3/8"
2 - 3
1/2"
2 - 3
3/4"
2 - 3
1"
1-1/2 - 2-1/2
1-1/4"
1-1/2 - 2-1/2
1-1/2"
1-1/2 - 2-1/2
2"
1-1/2 - 2-1/2