SkyTrak 6042 Service Manual User Manual
Page 488
Electrical System
9.118
Model 6042 Legacy
Origin 7/02
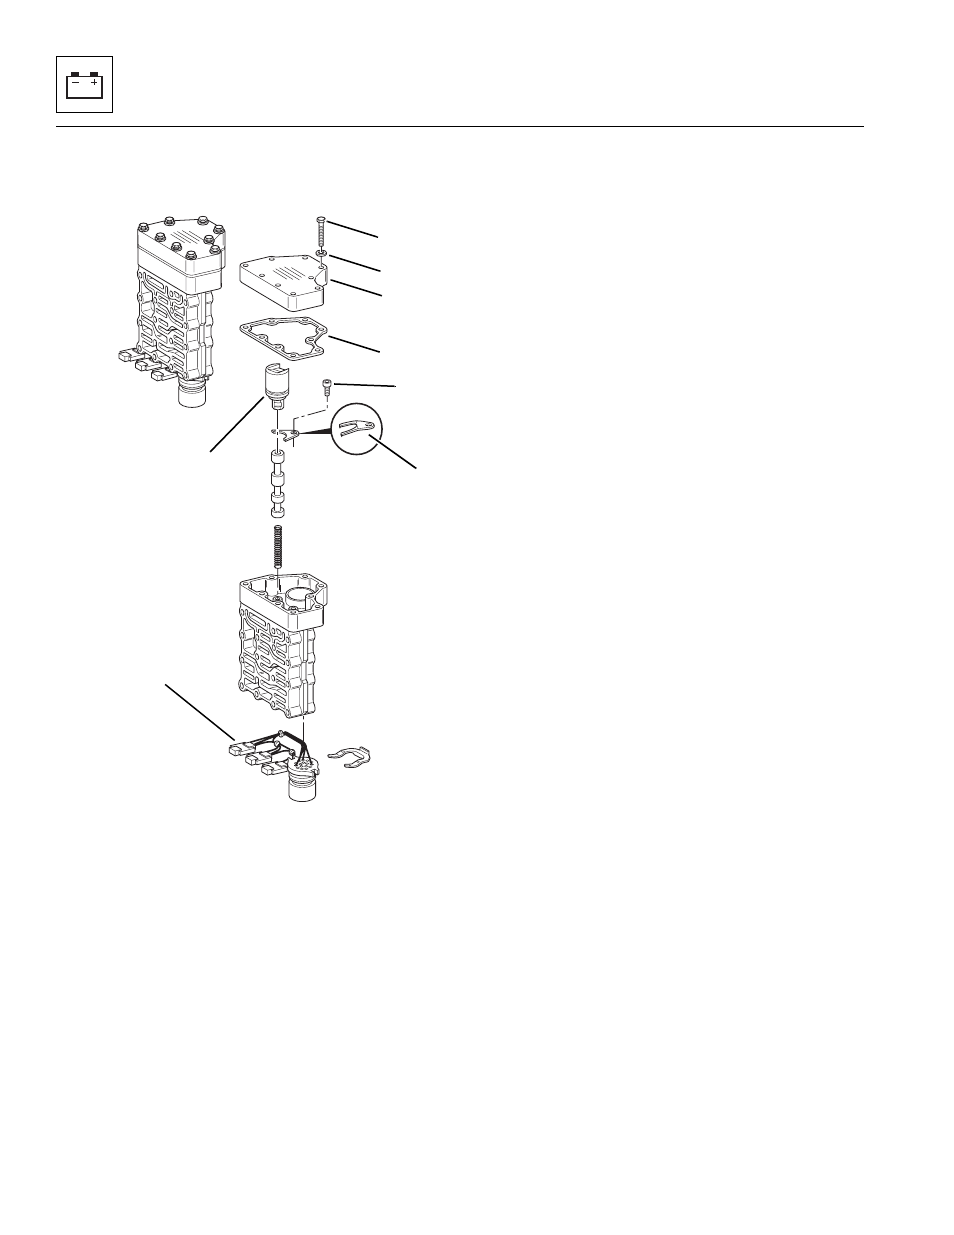
6. Remove the nine lower valve body protective cover
screws (Fig. 9-104, 1), lockwashers (2) protective
cover (3) and gasket (4)
Figure 9-104 Lower Valve Housing Solenoid Replacement
7. Disconnect the internal wire connector (Fig. 9 -104, 5)
from the solenoid valve that is being removed. Label
the internal wire connections if removing more than
one solenoid valve.
8. Remove the solenoid capscrew (Fig. 9-104, 6) and
retaining plate (7), securing the solenoid valve (8) to
the transmission.
9. Remove the solenoid valve (Fig. 9 -104, 8) and
replace.
f.
Transmission Lower Valve Body Solenoid
Installation
Note: When installing the solenoid valve into the valve
body, position the solenoid valve wires so they do not
interfere with the protective cover plate.
1. Install the solenoid valve (Fig. 9-104, 8) and
retaining plate (7). Connect the internal wire
connector (5) to the solenoid. Insure that the claw
side (7) of the retaining plate is facing down toward
the valve body surface.
2. Install the solenoid capscrew (Fig. 9-104, 6) and
torque to 53 lb/in (6 Nm).
3. Install the protective cover gasket (Fig. 9-104, 4)
onto the valve body. Position the protective cover (3)
over the gasket. Install lockwashers (2) and
capscrews (1), and tighten until the cover plate is
compressed and it sits flush over the gasket. Torque
to 84 lb/in (9,5 Nm).
4. Install the upper transmission valve body gasket and
upper valve body assembly to transmission.
5. Install the lockwashers and capscrews, and torque
screws to 84 lb/in (9,5 Nm).
4
3
2
1
7
8
6
5
MT2480