SkyTrak 6042 Service Manual User Manual
Page 70
Boom
3.24
Model 6042 Legacy
Origin 7/02
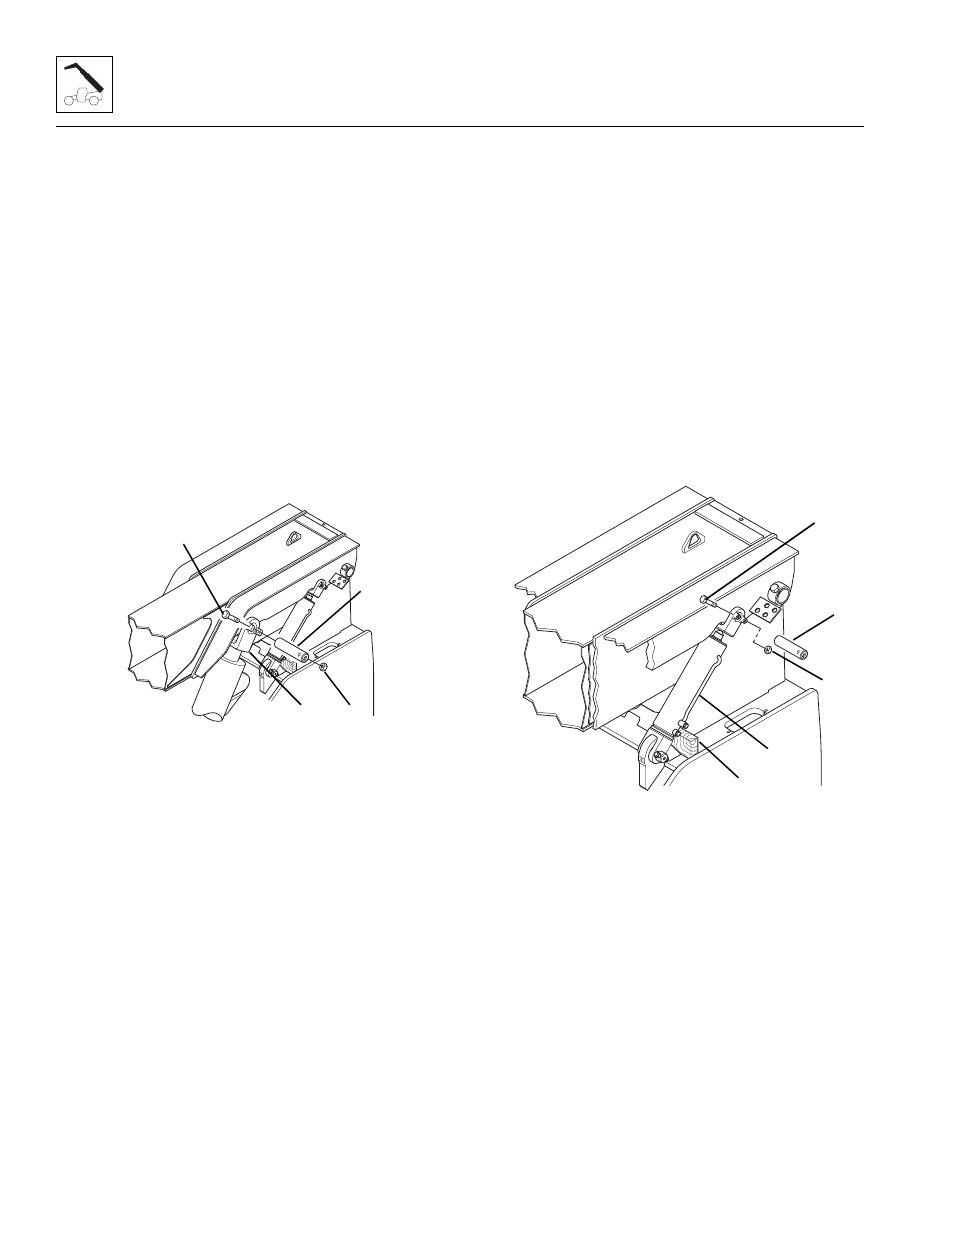
15. Align the rod end of one of the lift/lower cylinders
(Fig. 3-57, 1) with the self-aligning bearing on the
outer boom assembly.
16. Coat the entire lift/lower cylinder pivot pin (Fig. 3-57, 2)
with anti-seize compound. Insert the pin through the
rod end of the cylinder and the self-aligning bearing.
If necessary, use a rawhide hammer to install the
pin.
17. Use a tapered punch to align the capscrew mounting
hole in the pin with the mounting tabs on the rod end
of the cylinder. Secure the pin in place with the
capscrew (Fig. 3-57, 3), saved, and a new 1/2-13
elastic locknut (4). Tighten the elastic locknut securely.
18. Repeat Steps 15-17 to install the lift/lower cylinder
on the other side of the outer boom.
19. Remove the blocks that were used to hold the
lift/lower cylinder in place.
Figure 3-57 Lift/Lower Cylinder Reassembly
20. Use a hoist and sling to position the rod end of the
slave cylinder (Fig. 3-58, 1) in line with the self-
aligning bearing on the outer boom.
21. Coat the upper pivot pin (Fig. 3 -58, 2) with anti-seize
compound. Insert the pin through the rod end of the
slave cylinder. If necessary, use a rawhide hammer
to install the upper pivot pin. Use a tapered punch to
align the capscrew hole in the pin with the mounting
tabs on the cylinder. Secure the upper pivot pin in
place with the capscrew (3), saved, and a new 1/2-13
elastic locknut (4). Tighten the elastic locknut
securely.
22. Repeat Steps 20-21 to install the other slave cylinder
to the other side of the outer boom.
23. Remove the blocks (5) that were used to hold the
slave cylinder in place.
Figure 3-58 Slave Cylinder Reassembly
MA9750
3
4
2
1
MA9760
4
3
2
1
5