Applying an exposure vignette – Apple Aperture 2 User Manual
Page 464
464
Applying an Exposure Vignette
You use the Exposure vignette when you want to apply the effect of a traditional
lens-created vignette.
To apply an Exposure vignette to an image:
1
Select an image.
2
If the Vignette controls are not shown in the Adjustments inspector or the Adjustments
pane of the Inspector HUD, choose Vignette from the Add Adjustments pop-up menu.
3
Choose Exposure from the Type pop-up menu.
4
Adjust the amount of vignette to apply to the image by doing one of the following:
 Drag the Amount slider to the left to decrease amount of dark shading applied to
the edges of the image, or drag it to the right to increase the dark shading.
 Click the left or right arrow in the Amount value slider to change the amount of dark
shading applied to the edges of the image, or drag in the value field.
The left arrow decreases the amount of dark shading applied to the edges of the
image, and the right arrow increases the dark shading.
 Double-click the number in the Amount value slider, then enter a value from 0.00 to
1.00 and press Return.
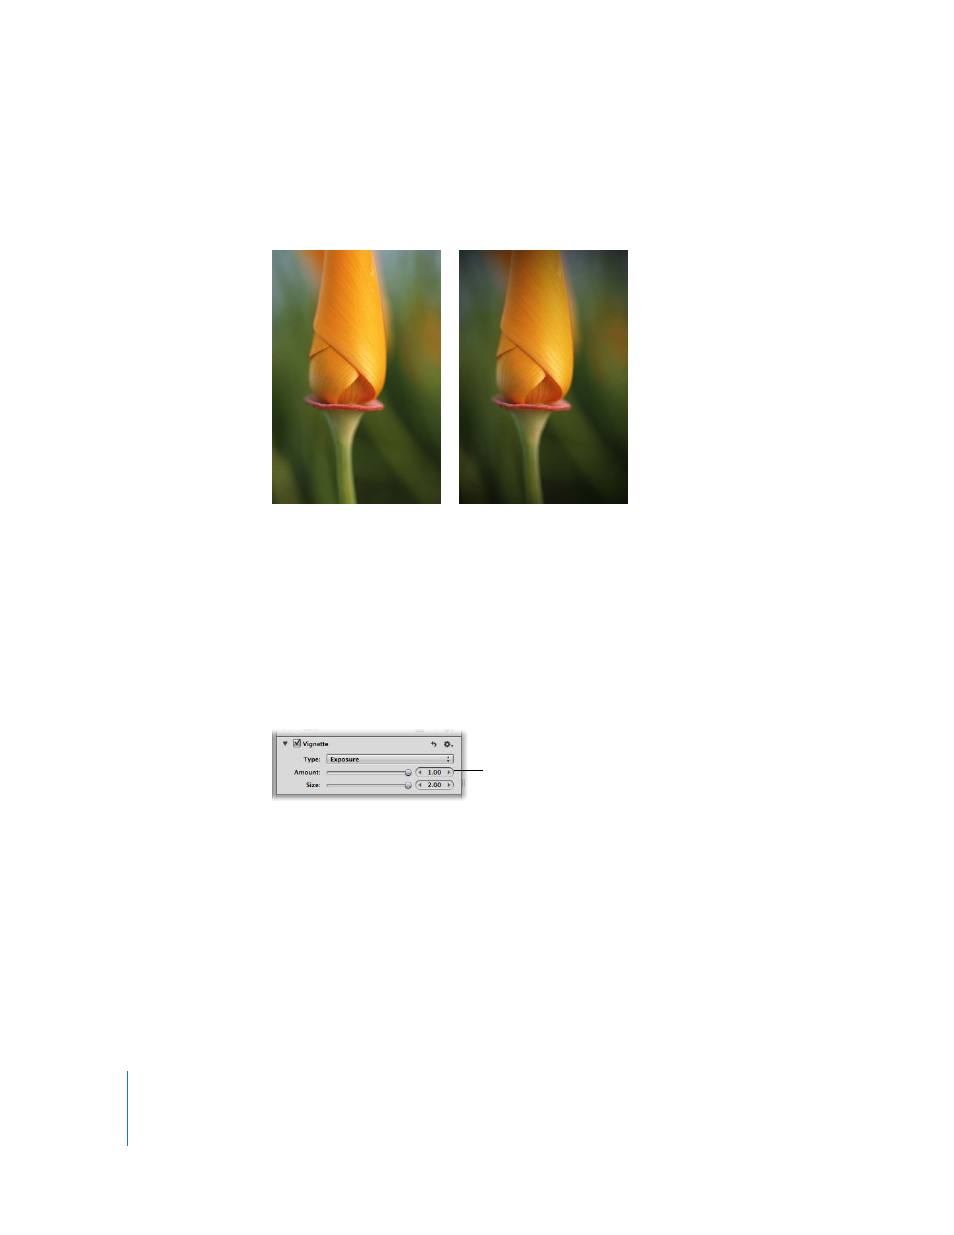
Before Exposure Vignette
adjustment
After Exposure Vignette
adjustment
Use the Amount slider and
value slider to adjust the
amount of brightness removed
from the edges of the image.