Apple Aperture 2 User Manual
Page 112
112
 Plan how you want to import your legacy digital images. Because you may have many
thousands of images previously stored on disk, you need to decide whether you’ll store
newly imported images in the Aperture library or store them as referenced images,
leaving them in their current hard disk locations. You can also copy or move images to
a different hard disk location when importing them. Also, plan the project organization
you’ll need to hold the images. For more information about importing files, see
“
Importing Image Files Stored on Your Computer
 Try out the different methods for importing individual files into your system. You can
import individual files, import files stored in folders, and drag files or folders from the
Finder into Aperture. For more information, see “
Dragging Files from the Finder to
Importing Folders of Images from the
Once you’re familiar with Aperture, you can begin to create and organize your
professional image management system.
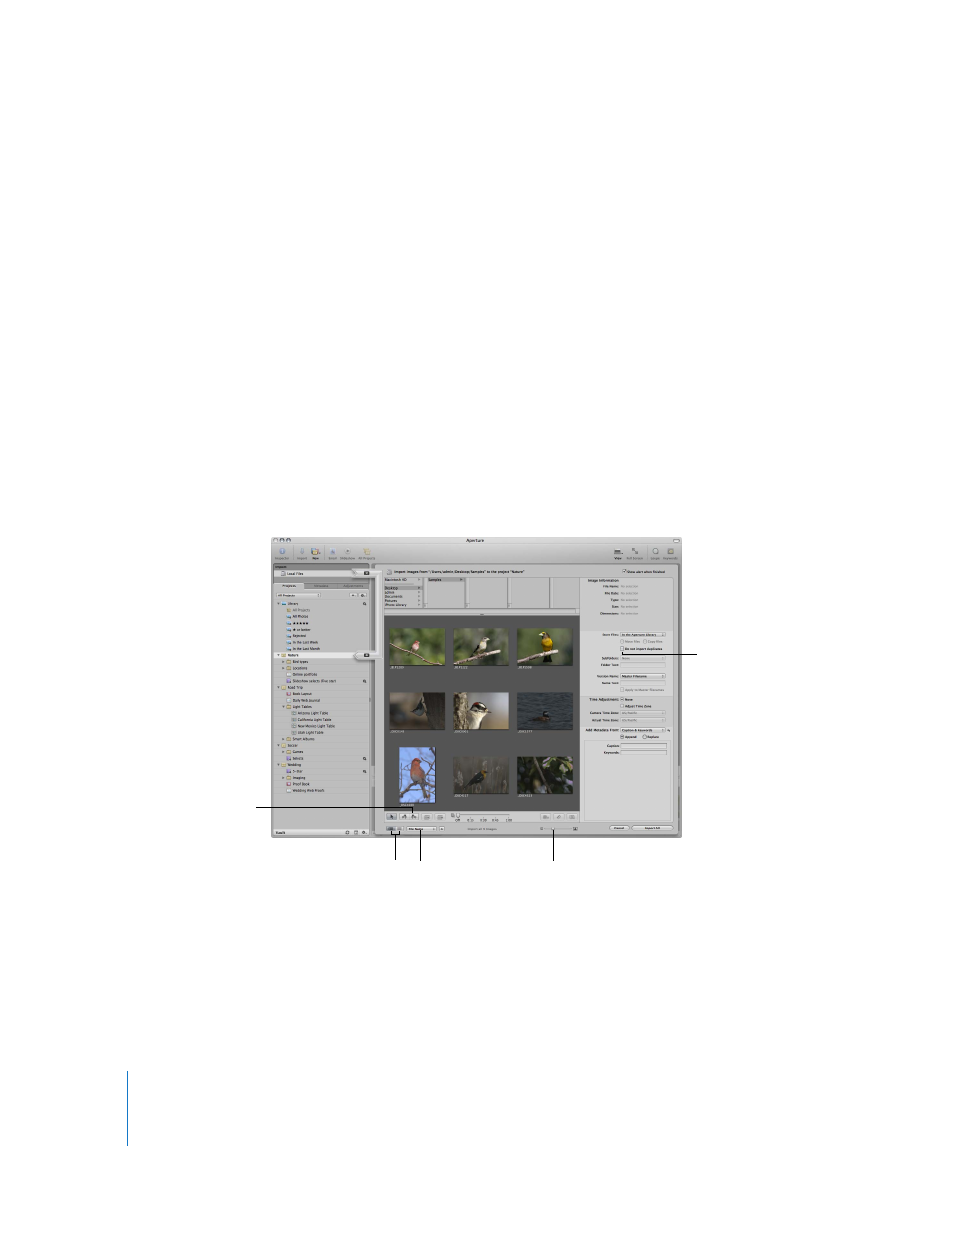
When you connect a camera or click an item in the Import pane, Aperture opens the
Import dialog.
You use the options in the Import dialog to set up how and where images are
imported. The Import dialog shows thumbnails of your images that you can enlarge or
reduce in size by using the Thumbnail Resize slider. You can select individual images to
import or select all the images to import at once. You can also change the dialog to
display images in a list by clicking the List View button. In list view, you can then sort
images by category by clicking a column heading.
Thumbnail Resize
slider
Sorting pop-up menu
Rotate buttons
“Do not import
duplicates” checkbox
Grid View and List
View buttons