Tween motion along a path – Adobe Flash Professional CS3 User Manual
Page 251
FLASH CS3
User Guide
245
Tween motion along a path
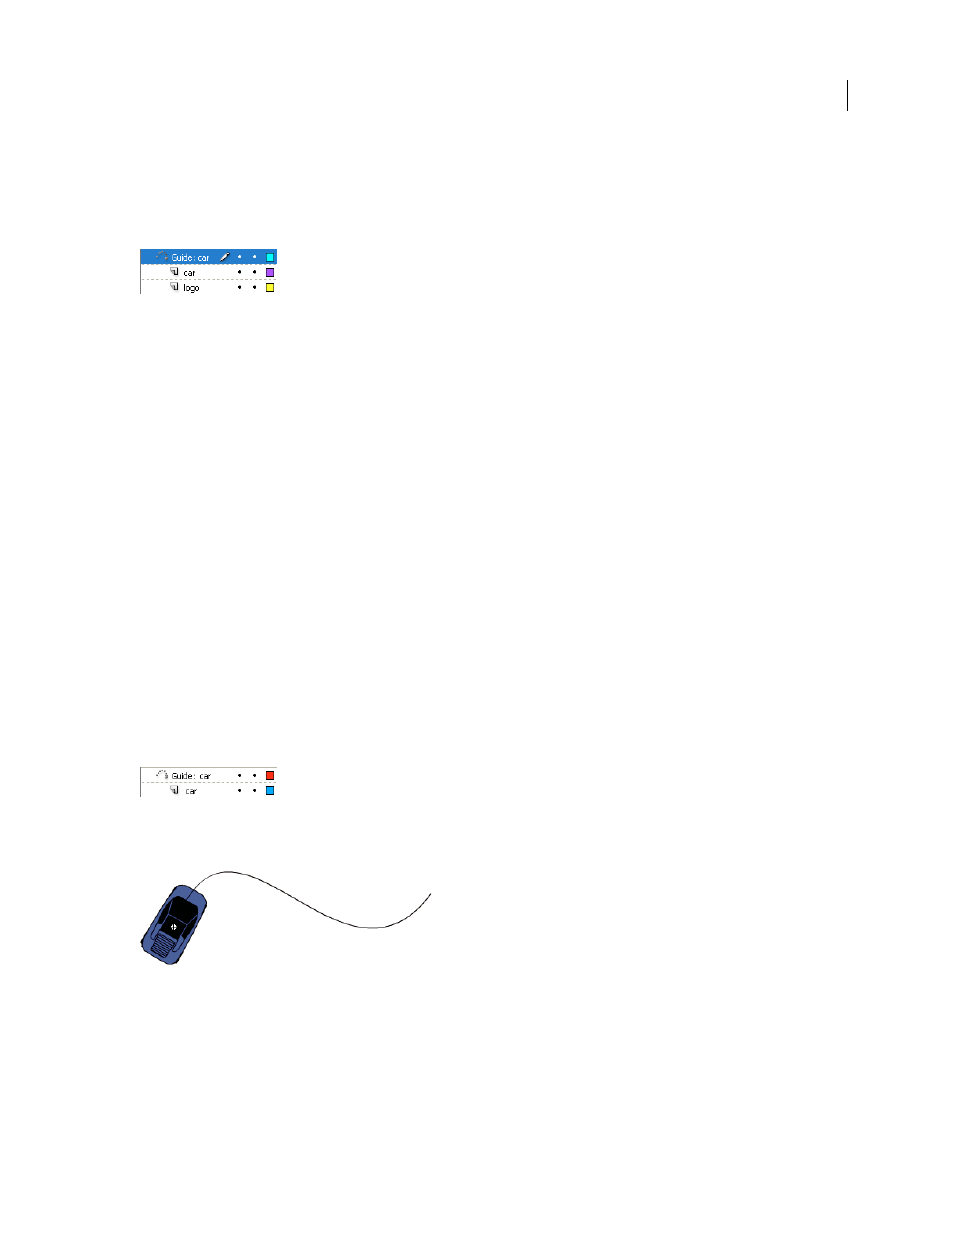
Motion guide layers let you draw paths along which tweened instances, groups, or text blocks can be animated. You
can link multiple layers to a motion guide layer to have multiple objects follow the same path. A normal layer that is
linked to a motion guide layer becomes a guided layer.
In this example, two objects on separate layers are attached to the same motion path.
For a video tutorial about motion tweens, see
For a tutorial about motion tweens, see Create a Timeline Animation on the Flash Tutorials web page at
.
For samples of animation, see the Flash Samples page at
e following
samples are available:
•
Animated Drop Shadow: Download and decompress the Samples zip file and navigate to the Graphics\Animat-
edDropShadow folder to access the sample.
•
Animation and Gradients: Download and decompress the Samples zip file and navigate to the Graphics\Anima-
tionAndGradients folder to access the sample.
Create a motion path for a tweened animation
1
Create a motion-tweened animation sequence. If you select Orient To Path, the baseline of the tweened element
orients to the motion path. If you select Snap, the registration point of the tweened element snaps to the motion path.
2
Do one of the following:
•
Select the layer containing the animation, and select Insert > Timeline > Motion Guide.
•
Right-click (Windows) or Control-click (Macintosh) the layer containing the animation and select Add Motion
Guide.
Flash creates a new layer above the selected layer with a motion guide icon to the left of the layer name.
Motion guide layer above selected layer
3
Use the Pen, Pencil, Line, Circle, Rectangle, or Brush tool to draw the desired path.
4
Snap the center to the beginning of the line in the first frame, and to the end of the line in the last frame.
Note: For best snapping results, drag the symbol by its registration point.
5
To hide the motion guide layer and the line so that only the object’s movement is visible while you work, click in
the Eye column on the motion guide layer.