Draw curves followed by straight lines, Draw two curved segments connected by a corner – Adobe InDesign CC 2015 User Manual
Page 455

450
Drawing and painting
Last updated 6/6/2015
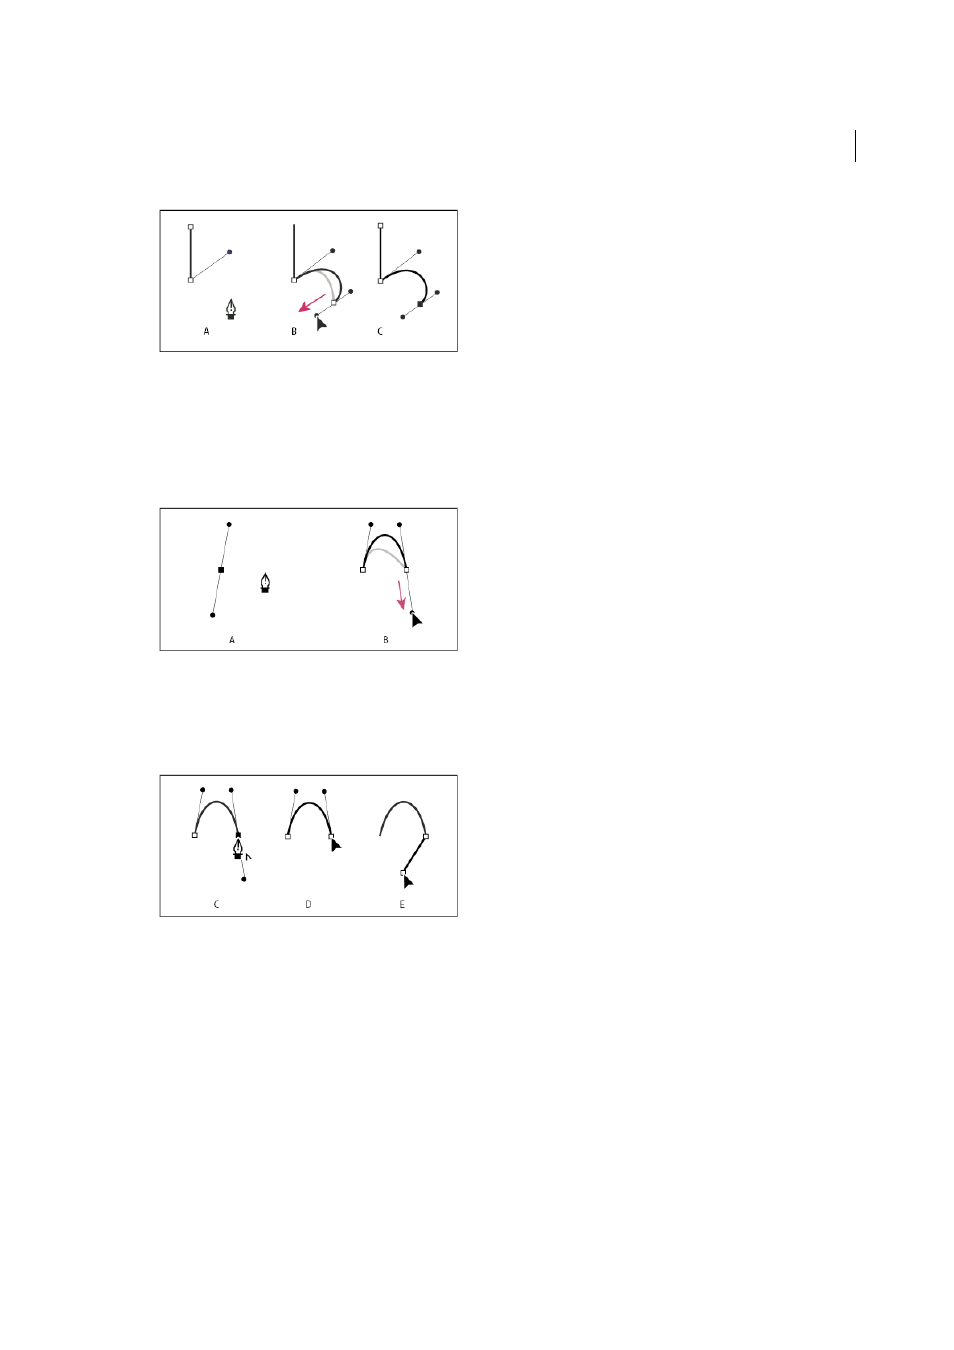
A Positioning Pen tool B Dragging direction line C New curve segment completed
Draw curves followed by straight lines
1
Using the Pen tool, drag to create the first smooth point of the curved segment, and release the mouse button.
2
Reposition the Pen tool where you want the curved segment to end, drag to complete the curve, and release the
mouse button.
A First smooth point of curved segment completed and Pen tool positioned over endpoint B Dragging to complete the curve
3
Position the Pen tool over the selected endpoint. A convert-point icon appears next to the Pen tool when it is
positioned correctly. Click the anchor point to convert the smooth point to a corner point.
4
Reposition the Pen tool where you want the straight segment to end, and click to complete the straight segment.
A Positioning Pen tool over existing endpoint B Clicking endpoint C Clicking next corner point
Draw two curved segments connected by a corner
1
Using the Pen tool, drag to create the first smooth point of a curved segment.
2
Reposition the Pen tool and drag to create a curve with a second smooth point; then press and hold Alt (Windows)
or Option (Mac OS) and drag the direction line toward its opposing end to set the slope of the next curve. Release
the key and the mouse button.
This process converts the smooth point to a corner point by splitting the direction lines.
3
Reposition the Pen tool where you want the second curved segment to end, and drag a new smooth point to
complete the second curved segment.
