Split a path, Split a path using the scissors tool, Open a path using the pathfinder panel – Adobe InDesign CC 2015 User Manual
Page 450: Smooth out paths
445
Drawing and painting
Last updated 6/6/2015
To convert points, you can also use the Direct Selection tool to select a point, and then choose a command from the
Object > Convert Point menu. For example, you can select the smooth point at the bottom of a “U” shape and choose
Object > Convert Point > Plain. Doing so removes the direction lines and makes a “V” shape. Choose Corner to create a
point with direction lines that can move independently of each other. Choose Smooth to create a point with handles that
can have unequal lengths. Choose Symmetrical to create a point with handles of equal lengths.
Split a path
You can split a path, graphics frame, or empty text frame at any anchor point or along any segment. When you split a
path, keep the following in mind:
• If you want to split a closed path into two open paths, you must slice in two places along the path. If you slice a closed
path only once, you get a single path with a gap in it.
• Any paths resulting from a split inherit the path settings of the original path, such as stroke weight and fill color. You
may need to reset stroke alignment from inside to outside.
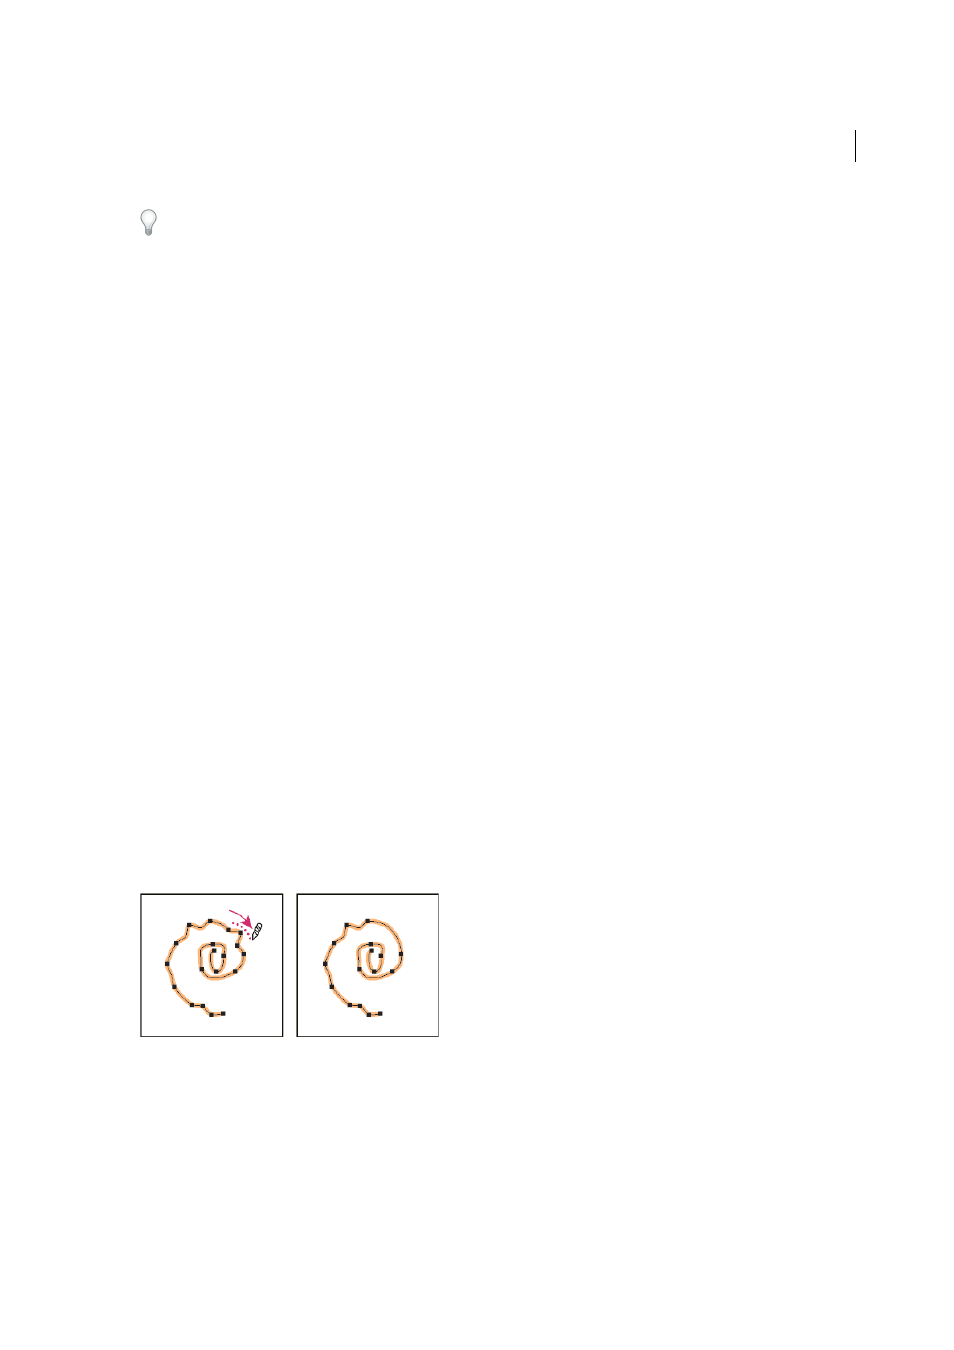
Split a path using the Scissors tool
1
(Optional) Select the path to see its current anchor points.
2
Select the Scissors tool and click the path where you want to split it. When you split the path in the middle of a
segment, the two new endpoints appear on top of the other, and one endpoint is selected.
3
Use the Direct Selection tool to adjust the new anchor point or path segment.
Open a path using the Pathfinder panel
1
Select the closed path.
2
To open the Pathfinder panel, choose Window > Object & Layout > Pathfinder.
3
Click Open Path in the Pathfinder panel.
Smooth out paths
Use the Smooth tool to remove excess angles from an existing path or a section of a path. The Smooth tool retains the
original shape of the path as nearly as possible. Smoothed paths generally have fewer points, which can make them
easier to edit, display, and print.
1
Select the path.
2
Select the Smooth tool.
Note: If the Pencil tool is selected, hold down Alt (Windows) or Option (Mac OS) to temporarily change the Pencil to
the Smooth tool.
3
Drag the tool along the length of the path segment you want to smooth out.
4
Continue smoothing until the stroke or path is of the desired smoothness.