Document window overview, Define document presets, Create custom page sizes – Adobe InDesign CC 2015 User Manual
Page 164

159
Layout and design
Last updated 6/6/2015
Note: You can also click the Save Document Preset icon to save document settings for future use.
Document window overview
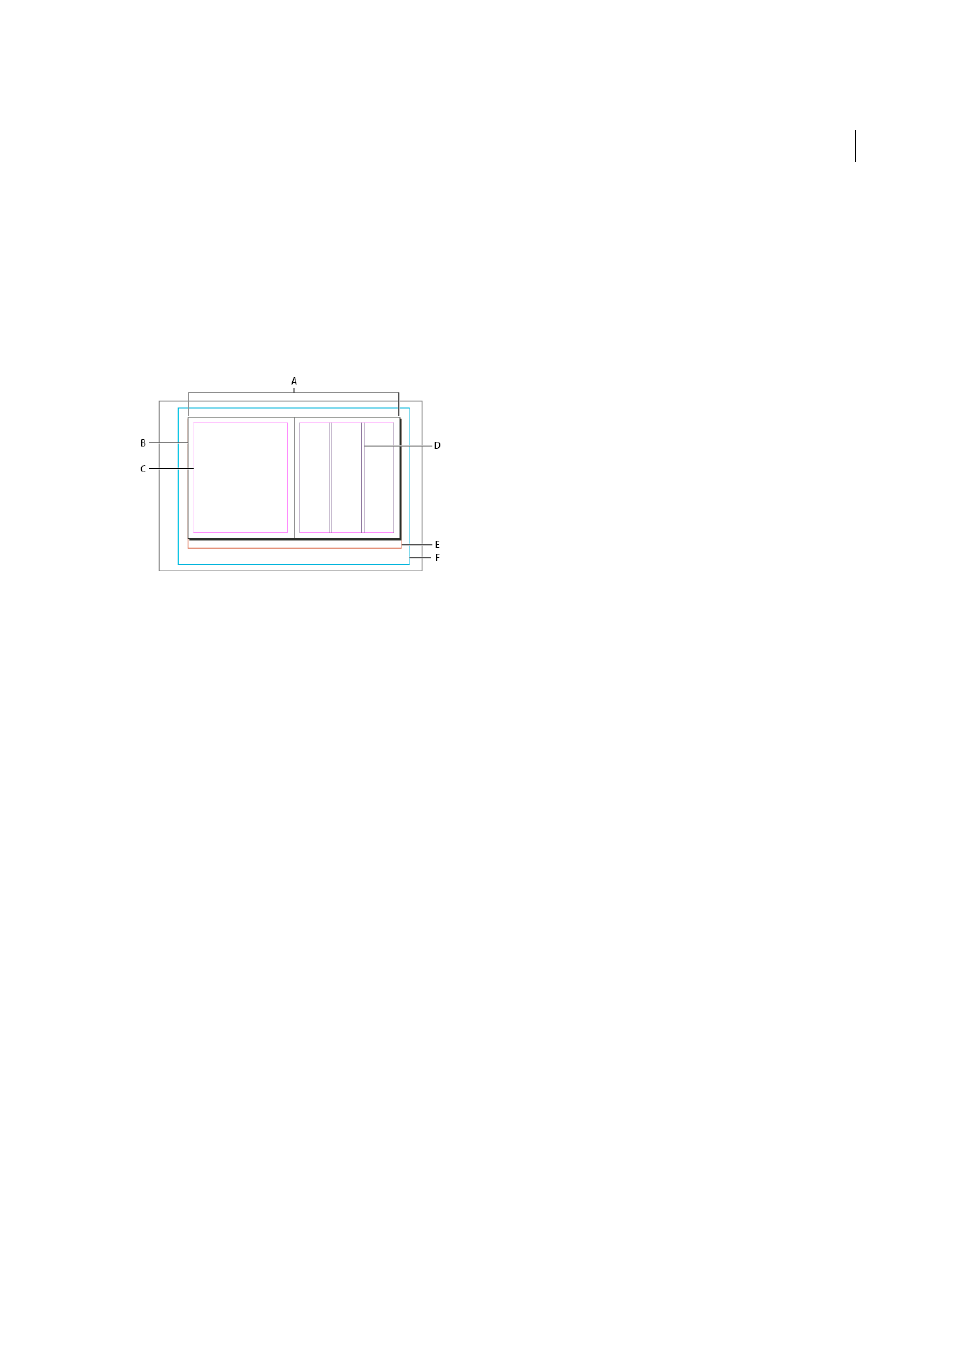
Each page or spread in your document has its own pasteboard and guides, which are visible in Normal View mode. (To
switch to Normal View, choose View > Screen Mode > Normal.) The pasteboard is replaced with a gray background
when the document is viewed using one of the Preview modes. (See
.) You can change the color of
this preview background and guides in Guides & Pasteboard preferences.
A Spread (black lines) B Page (black lines) C Margin guides (magenta lines) D Column guides (violet lines) E Bleed area (red lines) F Slug area
(blue lines)
Document window notes:
• Lines of other colors are ruler guides which, when present, appear in the layer color when selected. See
• Column guides appear in front of margin guides. When a column guide is exactly in front of a margin guide, it hides
the margin guide.
Create custom page sizes
You can create custom page sizes that appear in the Page Size menu in the New Document dialog box.
1
Choose File > New > Document.
2
Choose Custom Page Size from the Page Size menu.
3
Type a name for the page size, specify page size settings, and then click Add.
The New Doc Sizes.txt file that lets you create custom page sizes in previous version of InDesign is not available in
InDesign CS5 or later.
Define document presets
You can save document settings for page size, columns, margins, and bleed and slug areas in a preset to save time and
ensure consistency when creating similar documents.
1
Choose File > Document Presets > Define.
2
Click New in the dialog box that appears.
3
Specify a name for the preset and select basic layout options in the New Document Preset dialog box. (See
New
Document options
for a description of each option.)
4
Click OK twice.
