Create a shade (or color) behind a paragraph – Adobe InDesign CC 2015 User Manual
Page 348
343
Typography
Last updated 6/6/2015
1
Select a text frame, or click anywhere in the story.
2
Choose Type > Story.
3
Select Optical Margin Alignment.
4
Select a font size to set the appropriate amount of overhang for the size of type in your story. For optimal results, use
the same size as the text.
To turn off Optical Margin Alignment for an individual paragraph, choose Ignore Optical Margin from the Paragraph
panel menu or Control panel menu.
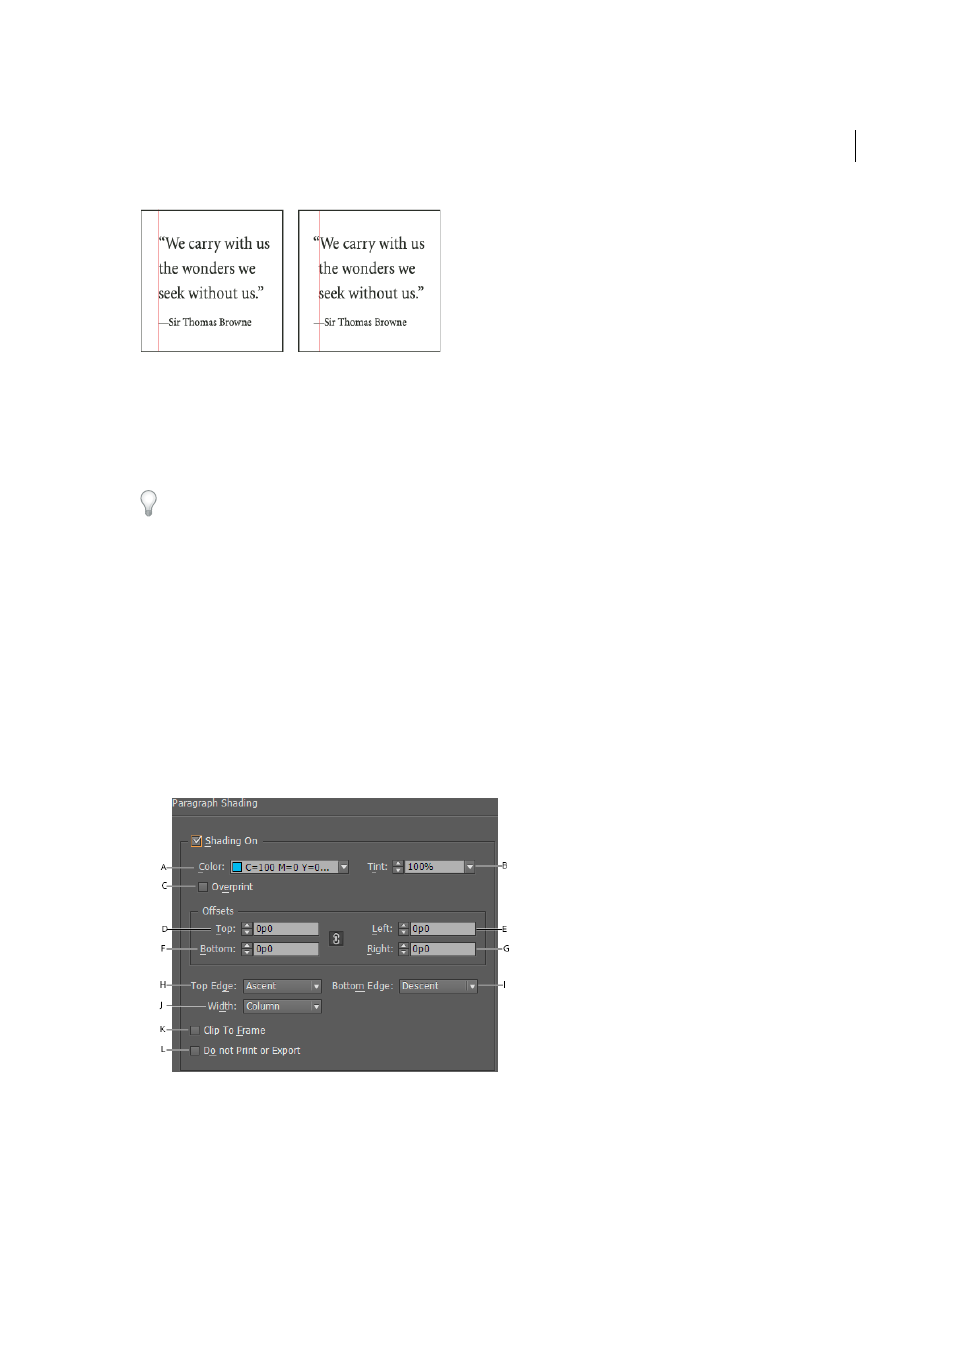
Create a shade (or color) behind a paragraph
1
To apply paragraph shading to the text in a text frame, select the text frame.
Or place the pointer on the text in the text frame.
2
Open the Paragraph Shading dialog.
From the Paragraph panel (Window > Type and Tables > Paragraph) flyout menu, choose Paragraph Shading.
Note: The following options are also available from the Paragraph Shading tab of the Paragraph Style Options dialog.
To open this dialog, from the Paragraph Style panel (Window > Styles > Paragraph Styles) flyout menu, choose Style
Options.
3
In the Paragraph Shading dialog, choose the following options:
A Shading color B Shading tint C Apply overprint D Extend shade beyond the top margin E Extend shade beyond the left margin F Extend
shade beyond the bottom margin
G Extend shade beyond the right margin H (Default Ascent) Top Edge of shading for a particular paragraph
I (Default Descent) Bottom Edge of shading for a particular paragraph J Column: Span shade across text frame. Text: Extend shade across
text.
K Shading will be clipped at the edges of the frame L Shading will be ignored if document is printed or exported it to formats (such PDF,
Epub, Jpeg, and PNG)