Brocade Mobility 7131N-FGR Access Point Product Reference Guide (Supporting software release 4.0.0.0-35GRN and later) User Manual
Page 44
32
Brocade Mobility 7131N-FGR Product Reference Guide
53-1001947-01
Mounting a Brocade Mobility 7131N-FGR Access Point
2
wire suitable for supporting the weight of the device. The safety wire should be a standard ceiling
suspension cable or equivalent steel wire between 1.59mm (.062in.) and 2.5mm (.10in.) in
diameter.
The mounting hardware required to install the access point above a ceiling consists of:
•
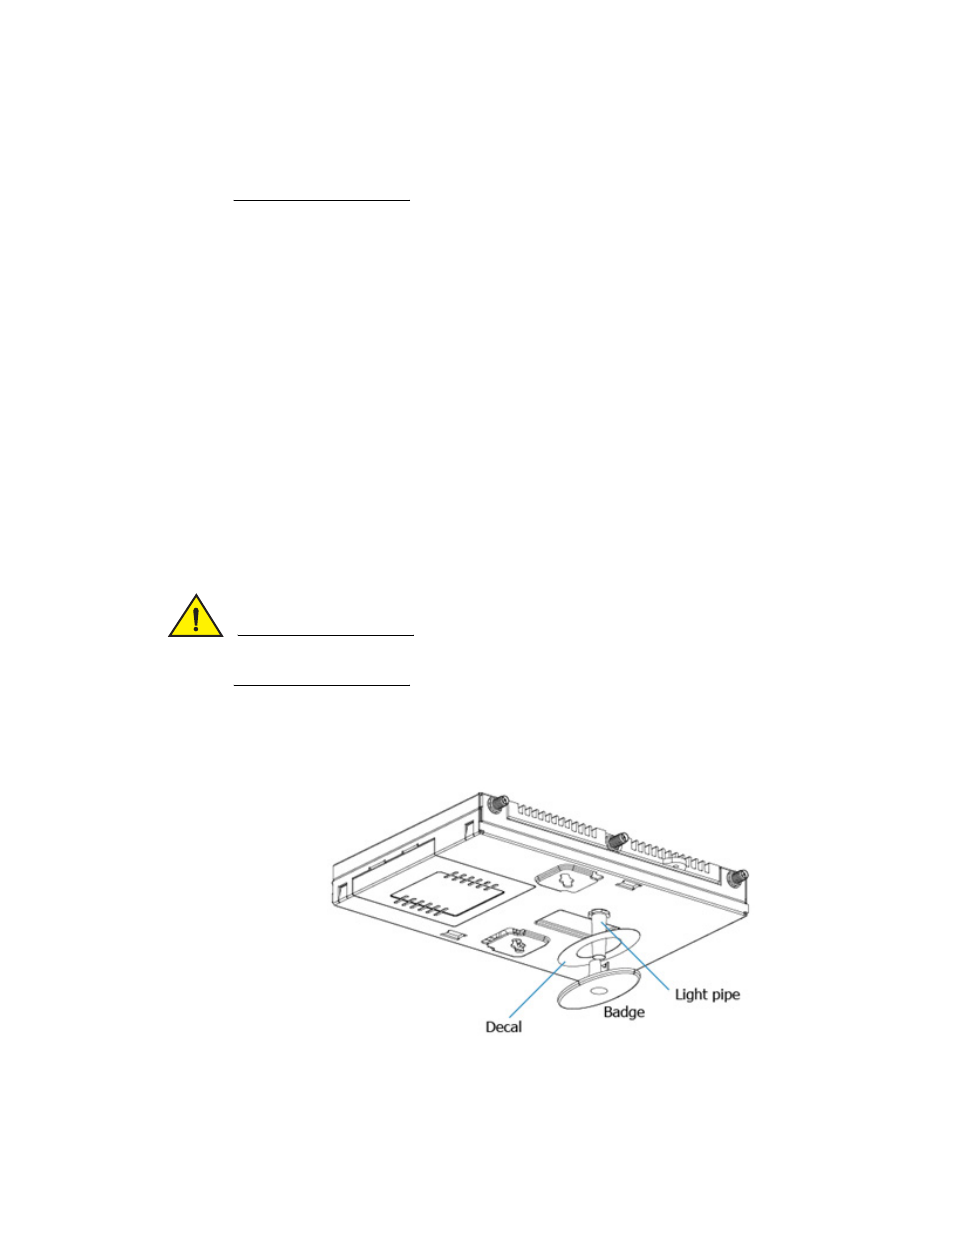
Light pipe
•
Badge for light pipe
•
Decal for badge
•
Safety wire (strongly recommended)
•
Security cable (optional)
To install the access point above a ceiling:
1. If possible, remove the adjacent ceiling tile from its frame and place it aside.
2. Install a safety wire, between 1.5mm (.06in.) and 2.5mm (.10in.) in diameter, in the ceiling
space.
3. If required, install and attach a security cable to the access point’s lock port.
4. Mark a point on the finished side of the tile where the light pipe is to be located.
5. Create a light pipe path hole in the target position on the ceiling tile.
6. Use a drill to make a hole in the tile the approximate size of the LED light pipe.
CAUTION
Brocade recommends care be taken not to damage the finished surface of the ceiling tile when
creating the light pipe hole and installing the light pipe.
7. Remove the light pipe’s rubber stopper before installing the light pipe.
8. Connect the light pipe to the bottom of the access point. Align the tabs and rotate
approximately 90 degrees. Do not over tighten
9. Fit the light pipe into hole in the tile from its unfinished side.
10. Place the decal on the back of the badge and slide the badge onto the light pipe from the
finished side of the tile.