Creating a vpn tunnel between two access points, Creating a vpn tunnel, Between two access points – Brocade Mobility 7131N-FGR Access Point Product Reference Guide (Supporting software release 4.0.0.0-35GRN and later) User Manual
Page 193
Brocade Mobility 7131N-FGR Product Reference Guide
181
53-1001947-01
Configuring VPN tunnels
6
4. Click Apply to save any changes to the VPN screen as well as changes made to the Auto Key
Settings, IKE Settings and Manual Key Settings screens. Navigating away from the screen
without clicking the Apply button results in all changes to the screens being lost.
5. Click Undo Changes (if necessary) to undo any changes made. Undo Changes reverts the
settings displayed on the VPN, Auto Key Settings, IKE Settings and Manual Key Settings
screens to the last saved configuration.
6. Click Logout to securely exit the Access Point applet. A prompt displays confirming the logout
before the applet is closed.
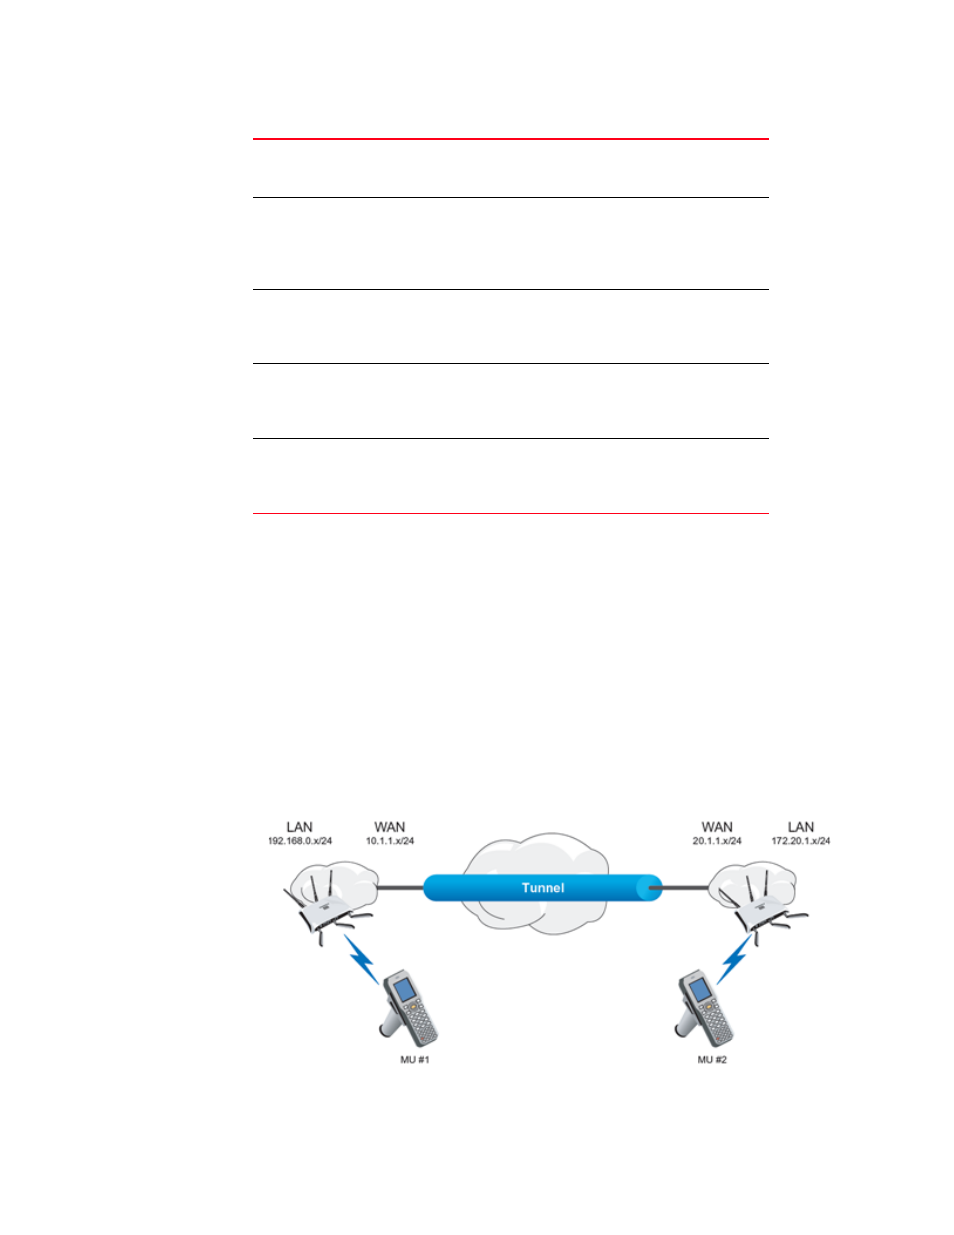
Creating a VPN tunnel between two access points
This section describes how to define a simple configuration using two access points to create an
IPSec tunnel.
To create a IPSec VPN tunnel between two access points:
Manual Key Exchange
Selecting Manual Key Exchange requires you to manually enter
keys for AH and/or ESP encryption and authentication. Click the
Manual Key Settings button to configure the settings.
Manual Key Settings
Select Manual Key Exchange and click the Manual Key Settings
button to open a screen where AH authentication and ESP
encryption/authentication can be configured and keys entered.
For more information, see
“Configuring manual key settings”
Auto (IKE) Key
Exchange
Select the Auto (IKE) Key Exchange checkbox to configure AH
and/or ESP without having to manually enter keys. The keys
automatically generate and rotate for the authentication and
encryption type selected.
Auto Key Settings
Select the Auto (IKE) Key Exchange checkbox, and click the Auto
Key Settings button to open a screen where AH authentication and
ESP encryption/authentication can be configured. For more
information, see
“Configuring auto key settings”
IKE Settings
After selecting Auto (IKE) Key Exchange, click the IKE Settings
button to open a screen where IKE specific settings can be
configured. For more information, see