RISCO Group LightSYS 2 User Manual
Page 24
Mounting and Wiring
Page 24
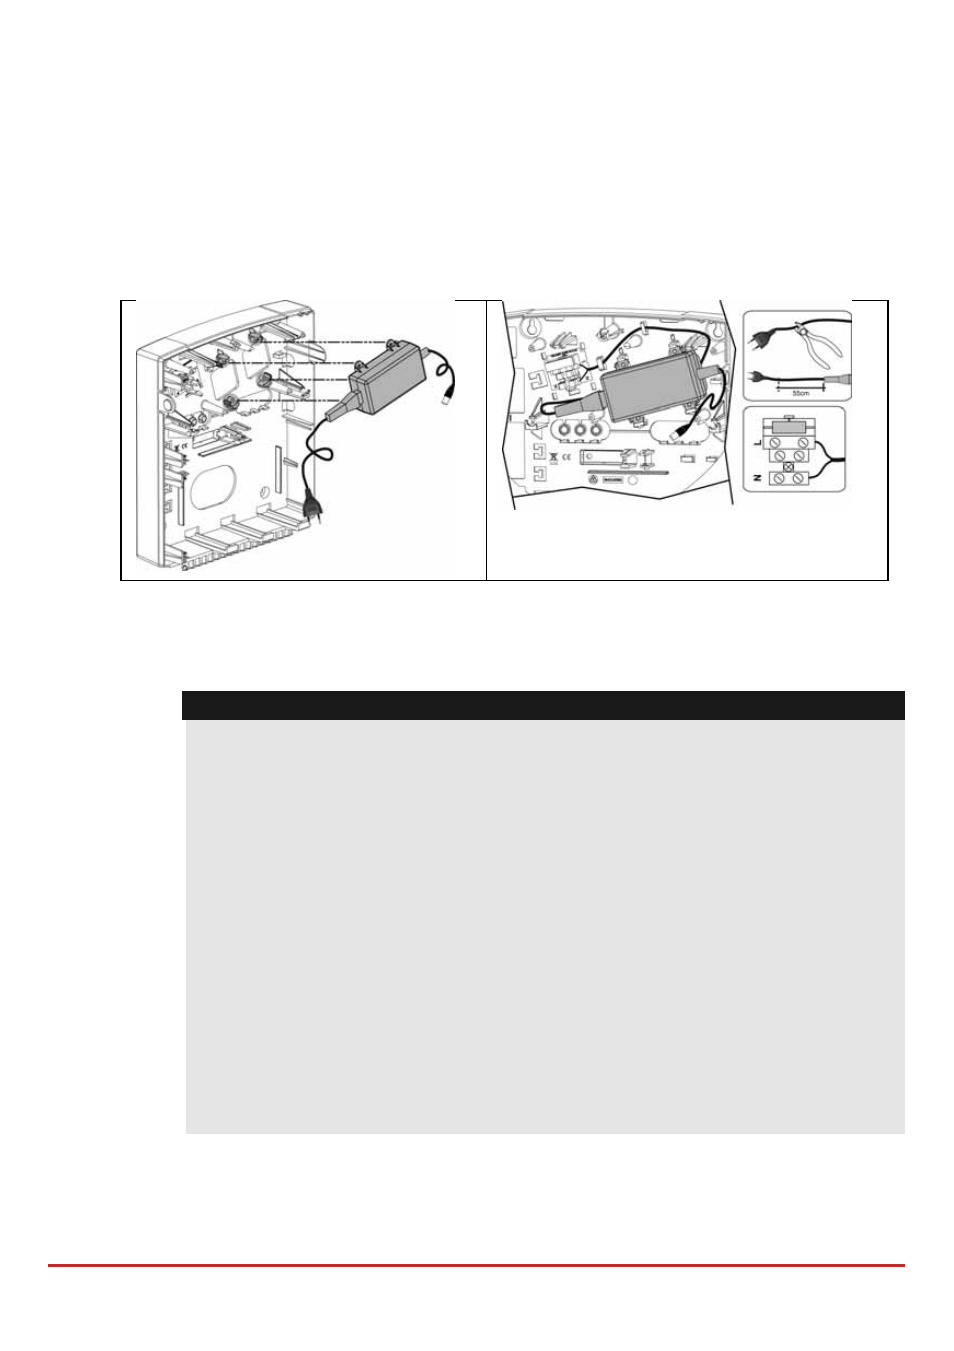
1. Connection to AC must be permanent and connect through the mains‐
fuse terminal block (see Figure 2‐3 below):
A. Affix AC adapter as per placement struts.
B. According to the location of the electrical and communication
outlets, remove the knockouts to allow cable and wire passage for
routing through the right or left‐side (default) knockout exit.
C. Do not connect AC power at this point of the installation.
Figure 2-3 Placing the AC adapter with mains fuse
Note: 1.5A PS can be mounted inside either the plastic enclosure RP432B or the metal
box RP432BM. 4A PS can be mounted only in the metal enclosure RP432BM1.
Caution:
When the main panel is powered on, mains voltage is present on the main
PCB.
To prevent risk of electric shock, disconnect all power (AC transformer
and battery) and phone cords before servicing.
Under no circumstances should mains power be connected to the PCB
other than to the main terminal block.
A readily accessible disconnection device shall be incorporated in the
building installation wiring.
For continued protection against risk of fire, replace fuses only with fuses
of the same type and rating.
Install the socket‐outlet near the equipment in an easily accessible
location.
Risk of explosion if battery is replaced by an incorrect type. Replace only
with the same type and manufacturer. Dispose of used batteries in
accordance with the manufacturer instructions
2. Place the main panel on its four mounting brackets and secure it, as per
Figure 2‐4