Setting the upper and lower limits display, Setting the area – KEYENCE LT-9001 Series User Manual
Page 36
2-18
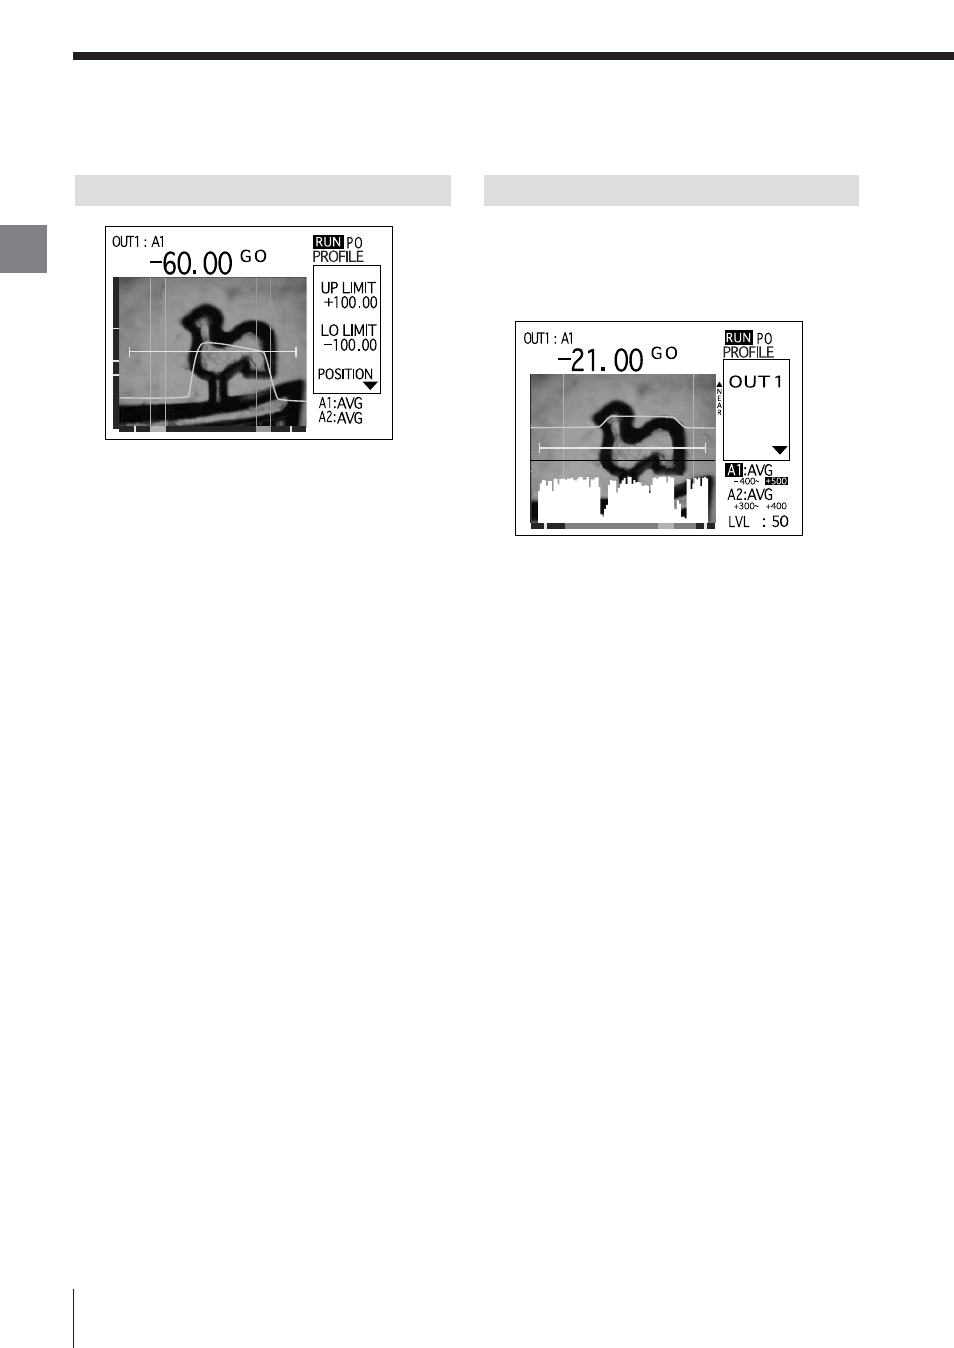
Using the Profile Mode
1
Press the [ENTER] button twice on the
measurement screen and place the cursor on
the value of [UP LIMIT].
2
Specify the value by using the [
t
], [
s
], [
▲]
and [
▼ ] buttons and press the [ENTER]
button.
The value +100.00 is specified in this example.
3
Place the cursor on [LO LIMIT] by using the
[
▲] and [▼] buttons.
4
Place the cursor on the value by pressing the
[ENTER] button.
5
Specify the value by using the [
t
], [
s
], [
▲]
and [
▼ ] buttons and press the [ENTER]
button.
The value –100.00 is specified in this example.
6
Press the [ESCAPE] button to return to the
measurement screen.
Setting the upper and lower limits display is
completed.
Setting the area is described next.
Setting the Upper and Lower Limits Display
1
Press the [SCREEN] button on the
measurement screen to display the light
intensity screen.
Set the area range on the light intensity screen.
2
Place the cursor on [A1] by pressing the
[ENTER] button.
3
Place the cursor on the value by pressing the
[ENTER] button.
4
Press the [SCREEN] button to select the
cursor on the left or the right.
5
Change the position of the cursor by using
the [
▲] and [▼] buttons.
Set [A1] (Area1) for the range including the
protruded part in this example.
6
Fix the setting value by pressing the [ENTER]
button.
7
Exit the setting by pressing the [ESCAPE]
button.
8
Press the [SCREEN] button to return to the
measurement screen.
Setting the area is completed.
How to measure the level differences is described
next.
Setting the Area
E LT-9001-IM
Basic
Operations
2
Chapter