Lull 6K Service Manual User Manual
Page 588
Brakes
9-14
Service Manual — Models 644B, 6K, 844C, 8K, 1044C, 10K
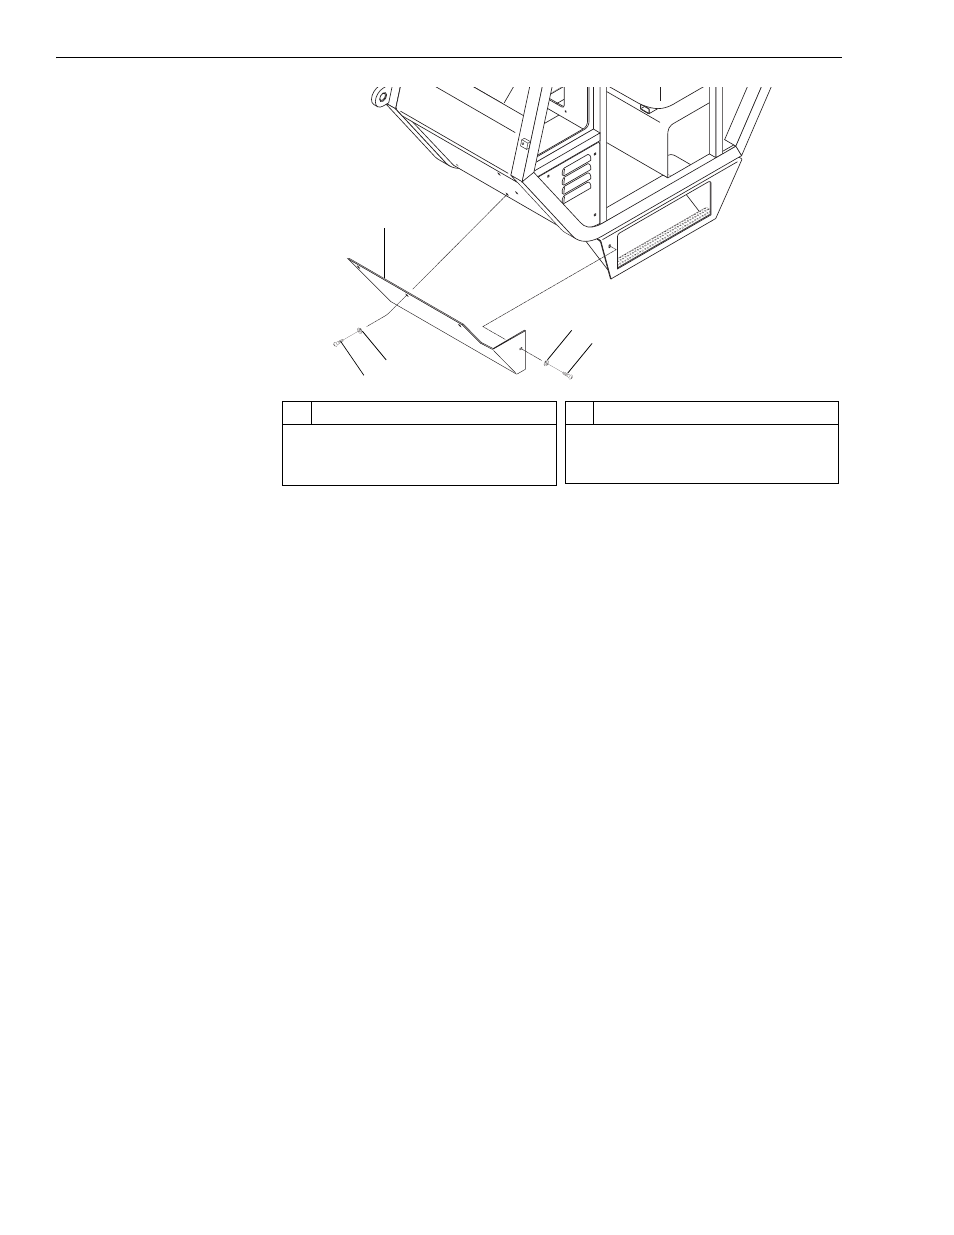
Fig. 9-9: Cab Front Cover Installation – Early Production
3. (Ref. Fig. 9-9) Remove the cab front panel as follows:
a. Remove the Phillips truss head screw (Item 3) and flatwasher
(Item 2) securing the cab front cover (Item 1) to the cab step.
b. Remove the three (3) Phillips truss head screws (Item 5) and
flatwashers (Item 4) and the cab front cover.
4. Remove the pedal assembly by loosening the four (4) ¼" nuts (Item 2)
on the U-clamps (Item 4) and pushing the pedal mounting pin (Item 6)
out.
5. Remove the rubber boot (Item 8), being careful not to damage it.
6. Use a spanner wrench to loosen and remove the piston guide (Item 9)
from the body (Item 18).
7. Remove the flange head capscrew (Item 7) from the piston (Item 12).
Record the number of turns it took to back out the capscrew.
Note: The flange head capscrew (Item 7) has thread sealant applied to its
threads. Grasp the piston around the large diameter end, so as to not
damage the sealing area on the piston.
8. Remove all thread sealant from the flange head capscrew and the
piston.
9. Install the flange head capscrew into the piston, turning it in the same
number of turns that was used to back it out.
10. Install and secure the piston guide (Item 9) into the body.
Note: Do not install rubber boot at this time.
#
Description
1
Cab Front Cover
2
Flatwasher
3
Phillips Truss Head Screw
#
Description
4
Flatwasher
5
Phillips Truss Head Screw
H1049
1
2
5
3
4