Lull 6K Service Manual User Manual
Page 372
Boom and Transfer
6-122
Service Manual — Models 644B, 6K, 844C, 8K, 1044C, 10K
14. (Ref. Fig. 6-128) Install rear slide pads and shims on the inner boom
section according to drawing specifications. See “Shimming
Procedures” on page 6-91 for details.
a. Install the upper shims (Item 2) and slide pads (Item 1). Install
each pad retainer (Item 3) with a flatwasher (Item 4), lockwasher
(Item 5), and capscrew (Item 6). Torque the capscrew to 200 ft-lbs.
b. Install each side shim (Item 7) and slide pad (Item 8) with two (2)
lockwashers (Item 9) and button head capscrews (Item 10). Torque
the capscrews to 65 ft-lbs.
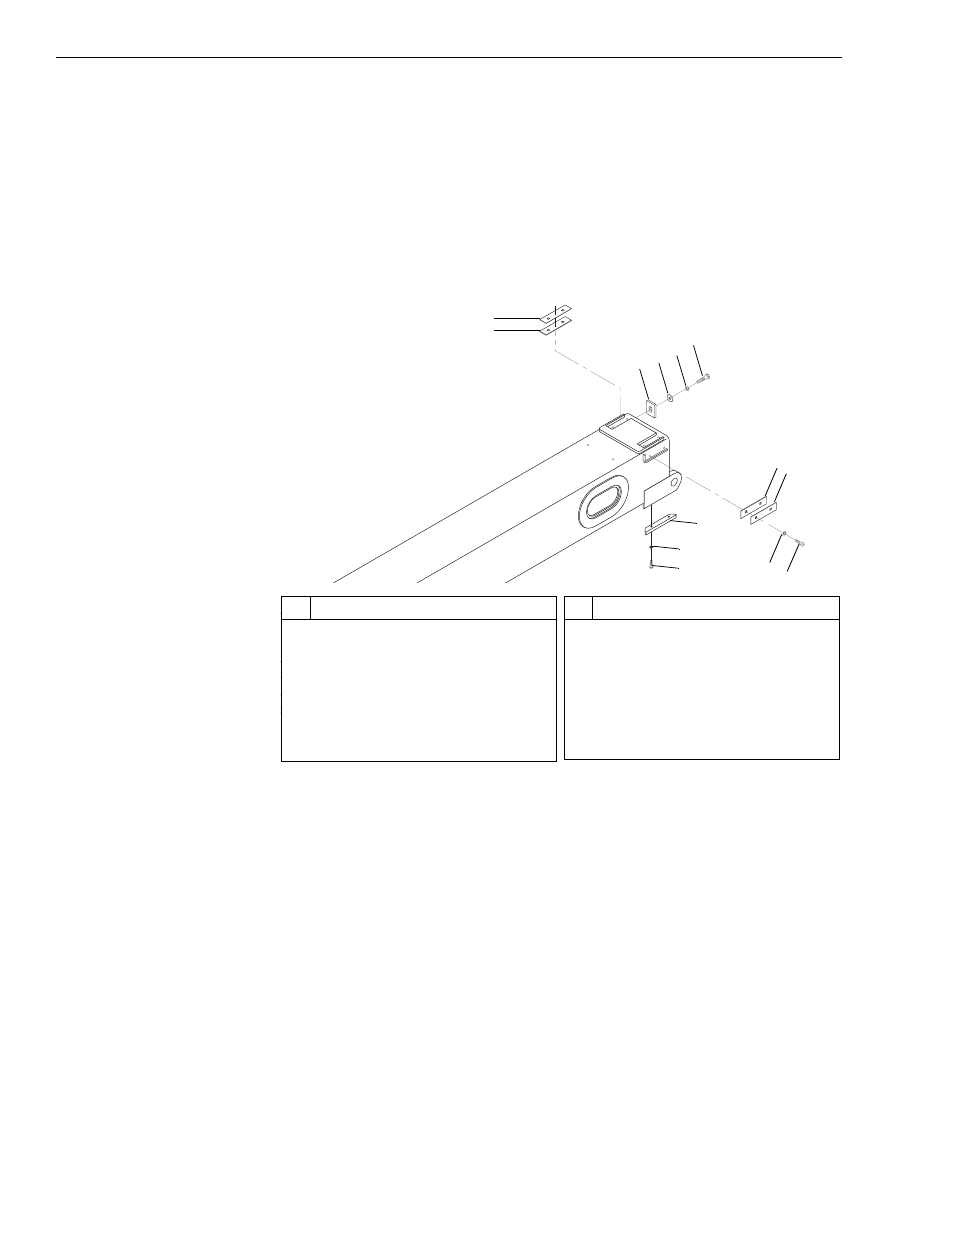
Fig. 6-129: Rear Slide Pads, Middle Boom
15. (Ref. Fig. 6-129) Install the rear slide pads and shims on the middle
boom section according to drawing specifications. See “Shimming
Procedures” on page 6-91 for details.
a. Install the upper shims (Item 2) and slide pads (Item 1). Install
each pad retainer (Item 3) with a flatwasher (Item 4), lockwasher
(Item 5), and capscrew (Item 6). Torque the capscrew to 200 ft-lbs.
b. Install each side shim(s) (Item 7) and slide pad (Item 8) with two (2)
lockwashers (Item 9) and button head capscrews (Item 10). Torque
the capscrews to 65 ft-lbs.
c. Install the lower slide pads (Item 11) with two (2) lockwashers
(Item 12) and button head capscrews (Item 13). Torque the
capscrews to 276 in-lbs.
J
1
288
#
Description
1
Upper Slide Pad
2
Shim
3
Pad Retainer
4
Flatwasher
5
Lockwasher
6
Capscrew
7
Shim
#
Description
8
Side Slide Pad
9
Lockwasher
10 Button Head Socket Capscrew
11 Lower Slide Pad
12 Lockwasher
13 Button Head Socket Capscrew
1
2
3 4
5
6
7 8
9 10
11
12
13