Lull 6K Service Manual User Manual
Page 479
Boom and Transfer
Service Manual — Models 644B, 6K, 844C, 8K, 1044C, 10K
6-229
Rear Mount Rollers, Bushings, and Spacer Washers
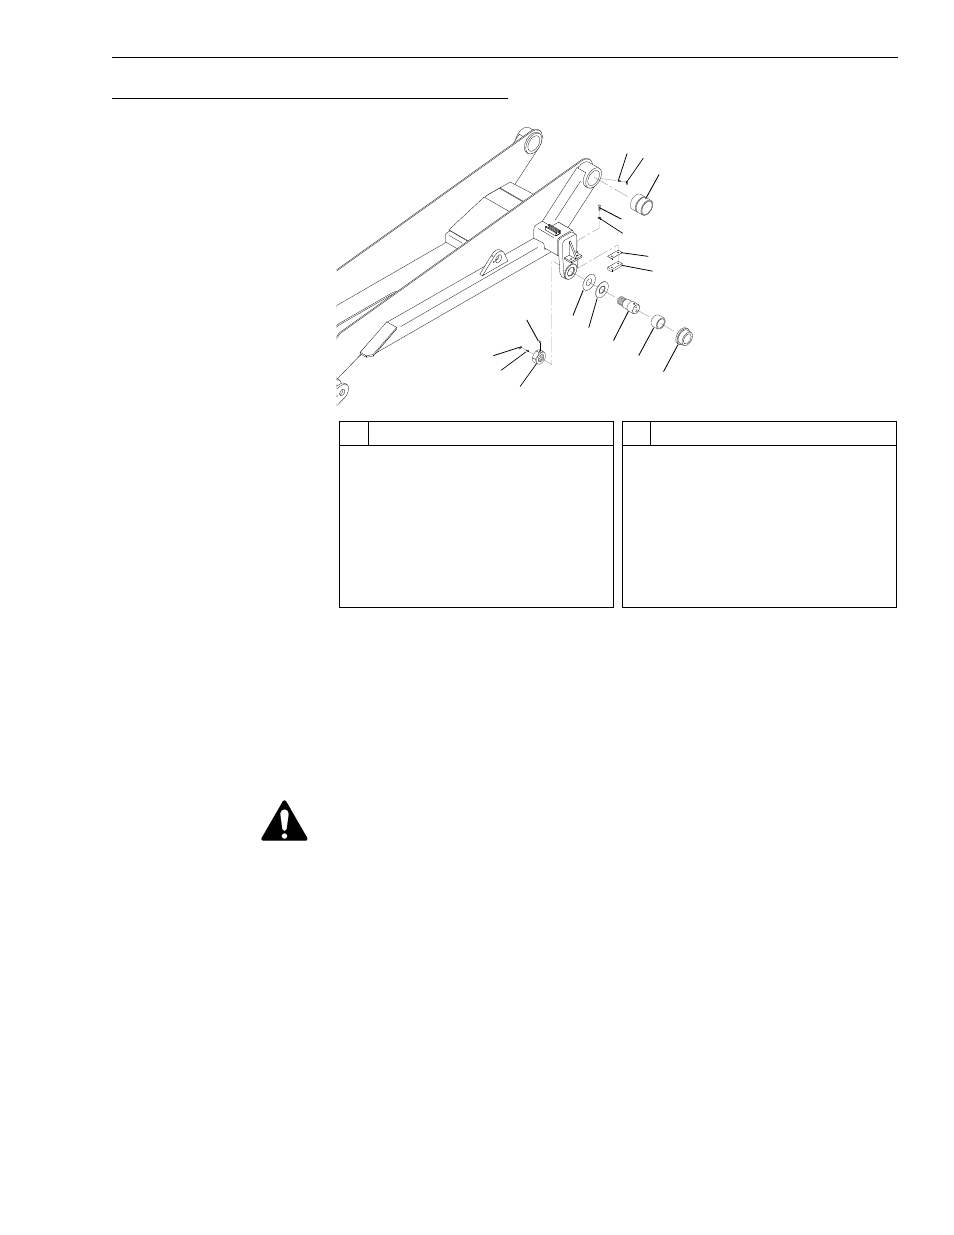
Fig. 6-242: Transfer Carriage – Rear Rollers, Bushings, and Shims
(Ref. Fig. 6-242) The following steps are required to replace rear transfer
rollers and bushings.
1. Follow preparation procedures as outlined in Section 3 of this manual.
2. Lower the boom to the ground, apply the park brake, retract the
transfer cylinder, and stop the engine.
CAUTION: To avoid personal and/or equipment damage, support the
boom and transfer carriage before removing the transfer roller
assembly. Use suitable blocking and lifting devices to prevent
the transfer carriage from shifting.
3. Loosen two (2) setscrews (Item 4) in each spindle nut (Item 3).
Remove two (2) spindle nuts.
4. Remove spacer washer(s) (Item 5), thrust washer (Item 6), spindle
(Item 7), roller bushing (Item 8), and transfer roller (Item 9) from each
side of transfer carriage.
5. Discard transfer rollers and bushings. Clean remaining parts with
solvent and dry with compressed air. Replace any damaged parts.
6. Install new bushings so that each is centered in transfer roller.
7. Install transfer roller, spindle, thrust washer, and spacer washer(s) on
each side of transfer carriage.
J
1144
3
2
1
4
5
6
7
8
9
10
11
12
13
16 15
14
#
Description
1
Grease Fitting Cover
2
Grease Fitting
3
Spindle Nut
4
Setscrew
5
Spacer Washer
6
Thrust Washer
7
Spindle
8
Rear Roller Bushing
#
Description
9
Rear Transfer Roller
10 Rear Slide Block
11 Slide Block Shim
12 Lockwasher
13 Capscrew
14 Boom Pivot Bushing
15 Grease Fitting Cover
16 Grease Fitting