Lull 6K Service Manual User Manual
Page 276
Boom and Transfer
6-26
Service Manual — Models 644B, 6K, 844C, 8K, 1044C, 10K
5. Clean hydraulic hose ends with solvent. Attach two (2) hoses (Item 7)
to elbows on each cylinder. Torque hose swivel nuts to 44–48 ft-lbs.
6. If necessary, remove grease fitting cover(s) (Item 8) and grease
fitting(s) (Item 9). Clean and inspect for damage; replace if necessary.
Install grease fitting(s) and covers; torque fitting(s) 1.5 to 3 turns past
finger tight.
7. Lubricate grease fittings with EP lithium based grease.
Overhaul
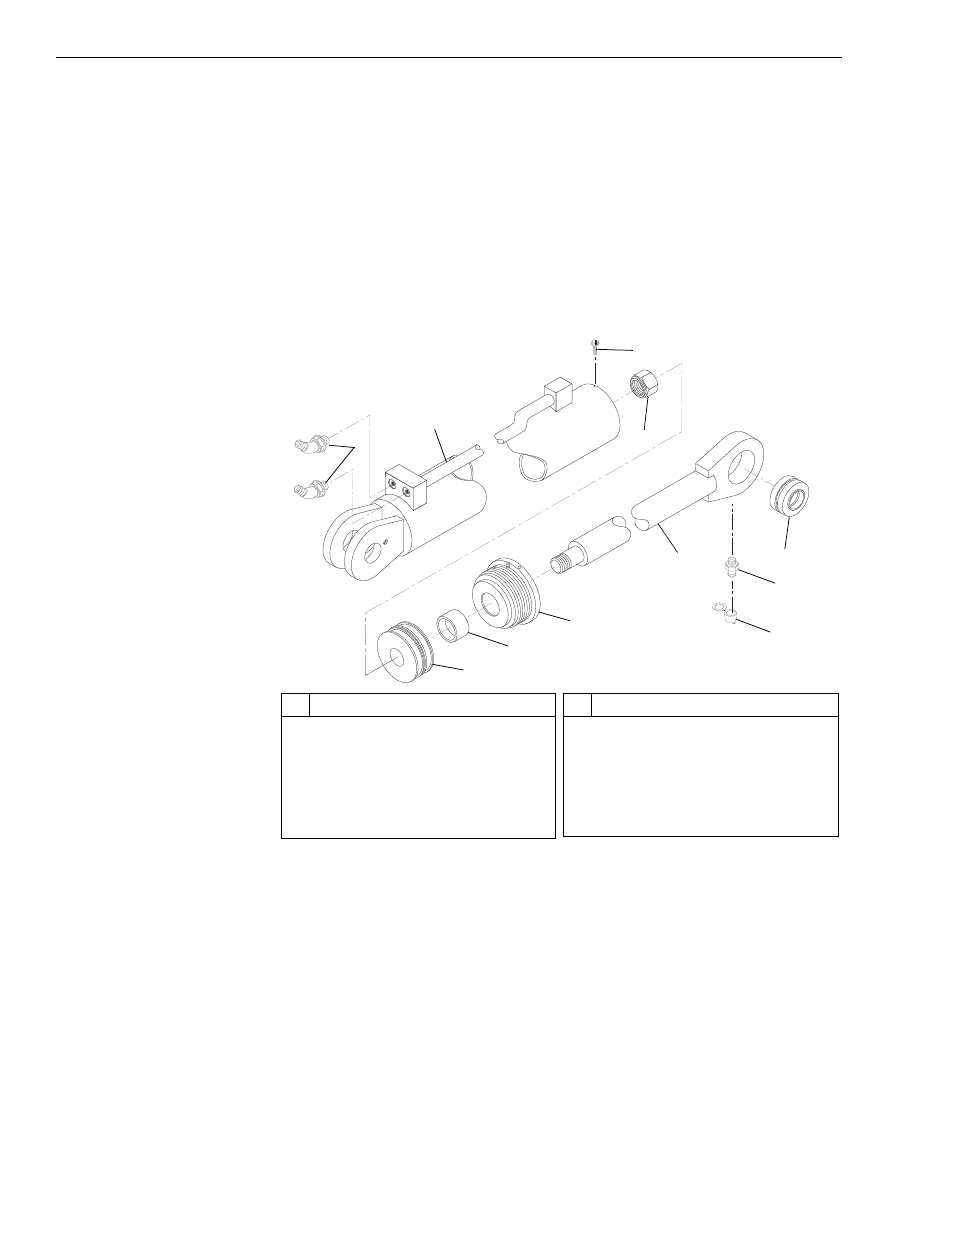
Rear Carriage Tilt Cylinder
Fig. 6-16: Rear Carriage Tilt Cylinder Assembly
(Ref. Fig. 6-16) The following steps are required to overhaul the rear
carriage tilt cylinder.
1. Lay cylinder horizontally in a vice or hold it down with a strap wrench.
Hydraulic oil in cylinder will drain out during disassembly. Place a
suitable pan or tray under the cylinder.
2. Remove the two (2) elbows (Item 1) from the manifold block on the
cylinder barrel (Item 2).
3. For 10K and 1044C models, remove the setscrew (Item 3).
4. Install a spanner wrench in the two (2) holes in the end of the rod
bearing head (Item 7). Unscrew the rod bearing head.
1
J
113
0
#
Description
1
45° O-ring Elbow
2
Cylinder Barrel
3
Setscrew
4
Rod Nut
5
Piston
6
Stroke Limiter
#
Description
7
Rod Bearing Head
8
Rod
9
Self-Aligned Bushing
10 Grease Fitting
11 Grease Fitting Cover
2
4
11
10
9
8
7
5
3
6