Lull 6K Service Manual User Manual
Page 518
Frame Tilt and Oscillation
7-16
Service Manual — Models 644B, 6K, 844C, 8K, 1044C, 10K
Note: Swivel fittings are not used with the latest production models (e.g.
644B-37 (S/N 591, 667~) and 644B-42 (S/N 208~)).
11. Install counterbalance valve cartridges. See below.
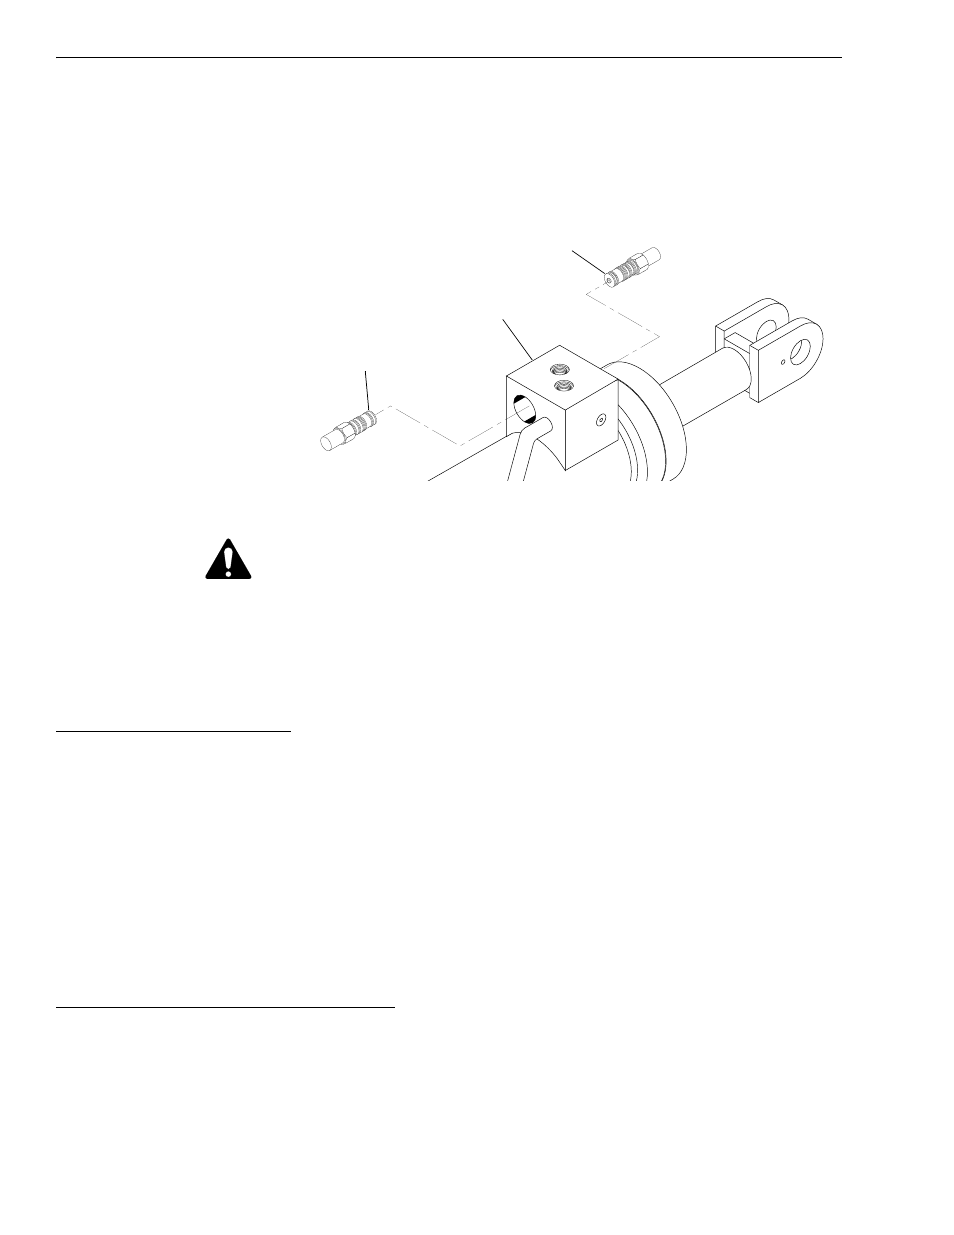
Counterbalance Valve Cartridge
Fig. 7-9: Counterbalance Valve Cartridges, Frame Tilt Cylinder
WARNING: The counterbalance valve cartridges trap hydraulic pressure
in the frame tilt cylinder. Wear proper eye and hand protection
when removing counterbalance valve cartridges. Hydraulic
fluid under pressure can be injected under skin or into eyes,
resulting in serious personal injury or death.
The following procedures refer to Fig. 7-9.
Releasing Pressure in Cylinder
1. Place socket wrench over a counterbalance valve cartridge. Wrap a
clean shop rag around the socket to cover the area of the
counterbalance valve cartridge.
2. Carefully and slowly, turn cartridge out of manifold block to release
pressure in cylinder. Repeat for other cartridge to release pressure
from other end of cylinder.
3. After pressure has been released, tighten cartridges. If cartridges will
not be removed, then torque counterbalance valve cartridges to
30–35 ft-lbs.
Removal and Service, Counterbalance Valve
1. Remove both cartridges and cap ports in manifold block. Inspect
cartridge O-rings for condition and replace as necessary.
2. Do not disassemble the cartridge. Service to a counterbalance valve
cartridge is limited to installing a new O-ring and replacing the entire
cartridge.
K
1025
Counterbalance Valve
Cartridge
Counterbalance Valve
Cartridge
Manifold Block