Lull 6K Service Manual User Manual
Page 481
Boom and Transfer
Service Manual — Models 644B, 6K, 844C, 8K, 1044C, 10K
6-231
4. Reinstall boom and shims as described earlier in this section.
5. Remove two (2) grease fitting cover caps (Item 15) and lubricate
grease fittings (Item 16) with EP lithium based grease.
Rear Slide Block and Shims
(Ref. Fig. 6-242) The following steps are required to replace worn rear
slide blocks.
1. Follow preparation procedures as outlined in Section 3 of this manual.
2. Lower the boom to the ground, apply the park brake, retract the
transfer cylinder, and stop the engine.
3. Remove two (2) each capscrews (Item 13) and lockwashers (Item 12)
securing each of the two rear slide blocks (Item 10) and shims
(Item 11) to the transfer carriage. Remove slide blocks and shims.
4. Discard worn slide block. Clean and inspect remaining parts; replace
as necessary.
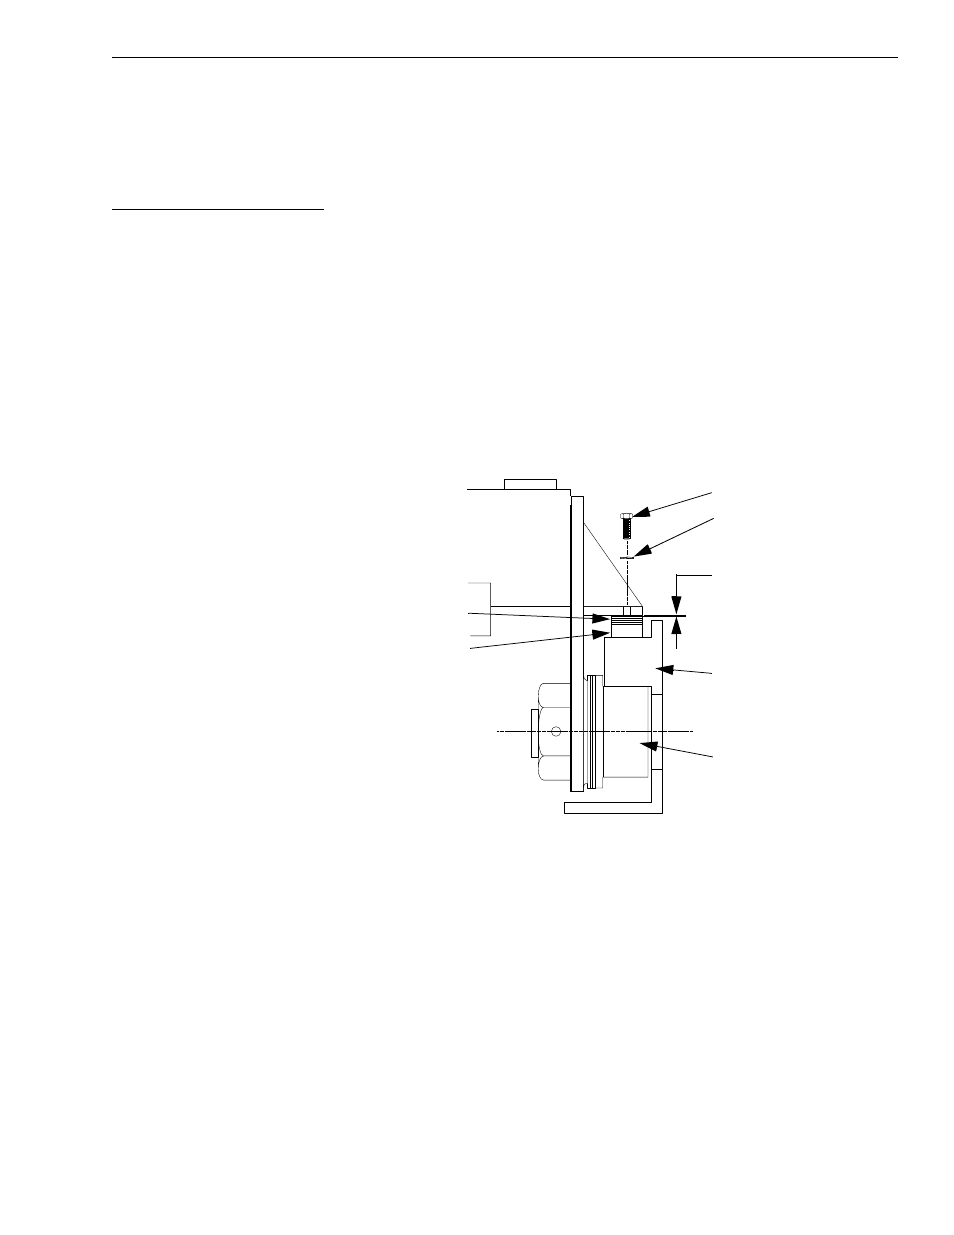
Fig. 6-244: Rear Slide Block Installation
5. (Ref. Fig. 6-244) Make sure that the correct number of shims will be
installed.
a. Check to see that the rear transfer roller is up against the bottom of
the rail. It may be necessary to start the engine and relocate the
weight of the boom until the transfer roller is snug against the rail.
b. Place slide block and shims on the rail beneath the transfer
carriage.
c. Measure the space between the stack to the transfer carriage. Add
or subtract shims until the remaining gap is less than 1/16".
6. Install new slide block and shims on each side of the transfer carriage
with two (2) each lockwashers and capscrews. Torque capscrews to 55
ft-lbs.
J
1
172
Less than 1/16"
Lockwasher
Capscrew
Rail and Main Frame
Transfer Roller Assembly
Shims
Rear Slide Block