Lull 6K Service Manual User Manual
Page 476
Boom and Transfer
6-226
Service Manual — Models 644B, 6K, 844C, 8K, 1044C, 10K
d. Secure the wiring harness and switch connection wire to the boom
with six (6) each (five on top of the boom and one inside of the
back left side of the boom) nuts (Item 4), lockwashers, (Item 3),
flatwashers (Item 2), and J-clamps (Item 1). Tighten nuts until
snug.
e. Secure the wire harness to the hydraulic tubes and hoses with wire
tires.
10. (Ref. Fig. 6-234) Install the boom cover on models with 3-section (see
Step a) or 4-section booms (see Step b).
a. Install boom cover (Item 4) on boom and secure it with four (4)
each flatwashers (Item 2), lockwashers (Item 1), and nuts (Item 3).
Torque nuts to 180 in-lbs.
b. Install boom cover (Item 4) on boom and secure it with six (6) each
flatwashers (Item 2), lockwashers (Item 1), and nuts (Item 3).
Torque nuts to 180 in-lbs.
Rollers, Bushings, and Shims
Transfer Carriage
The following procedures describe replacement of transfer rollers and
bushings for the transfer carriage along with shimming procedures and
replacement of scraper plates.
Front Mount Rollers, Bushings, and Shims
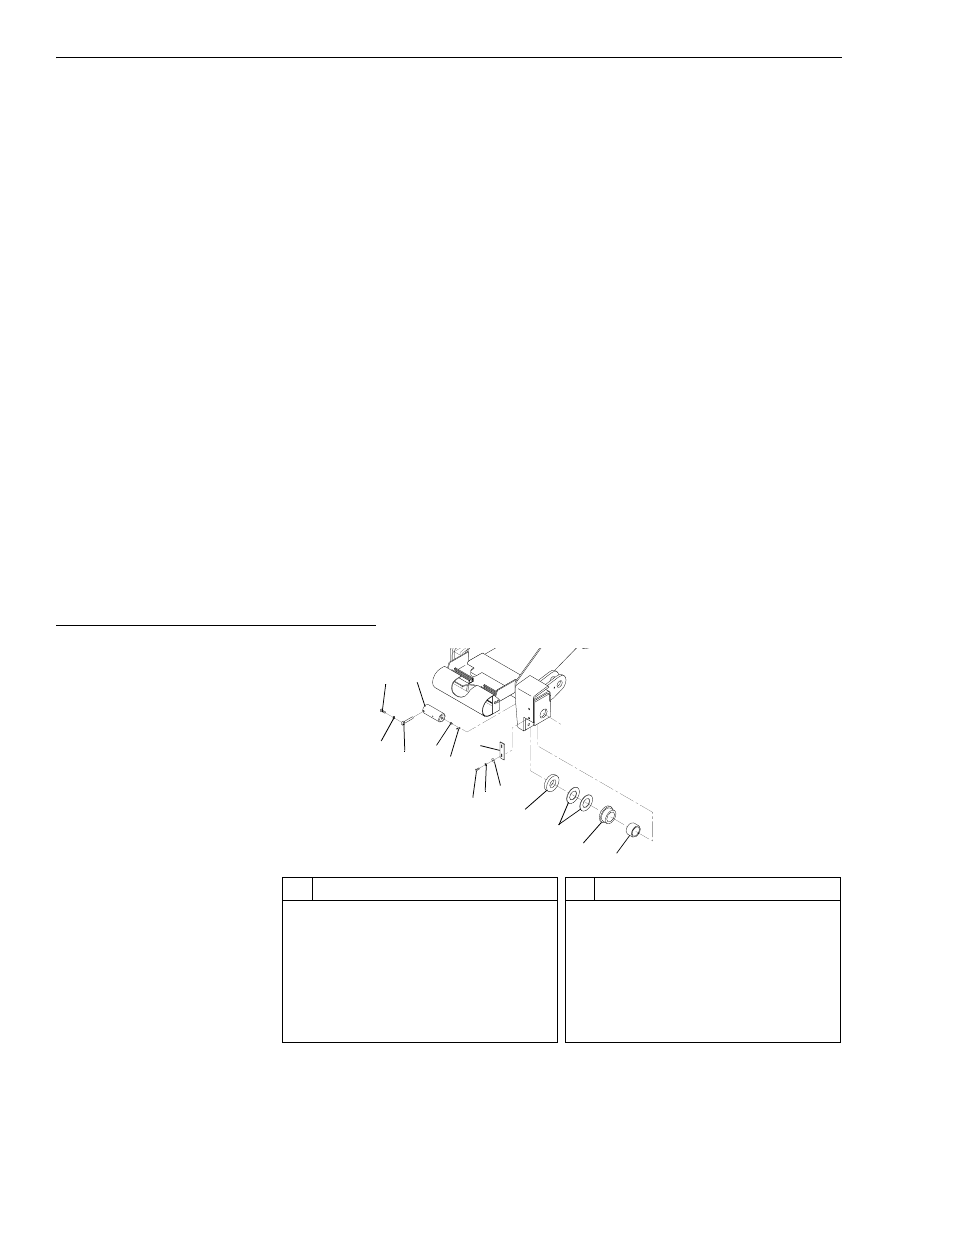
Fig. 6-239: Transfer Carriage – Front Rollers, Bushings, and Shims
(Ref. Fig. 6-239) The following steps are required to replace the front
transfer rollers and bushings.
J1
1
4
4
7
#
Description
1
Capscrew
2
Front Roller Pin
3
Lockwasher
4
Lock Pin
5
Grease Fitting
6
Grease Fitting Cover
7
Scraper Plate
#
Description
8
Capscrew
9
Lockwasher
10 Flatwasher
11 Roller Spacer
12 Roller Shims
13 Front Transfer Roller
14 Front Roller Bushing
8
9 10
11
12
13
14
1
3
4
2
5
6