141 removal, boom extension cylinder – Lull 6K Service Manual User Manual
Page 391
Boom and Transfer
Service Manual — Models 644B, 6K, 844C, 8K, 1044C, 10K
6-141
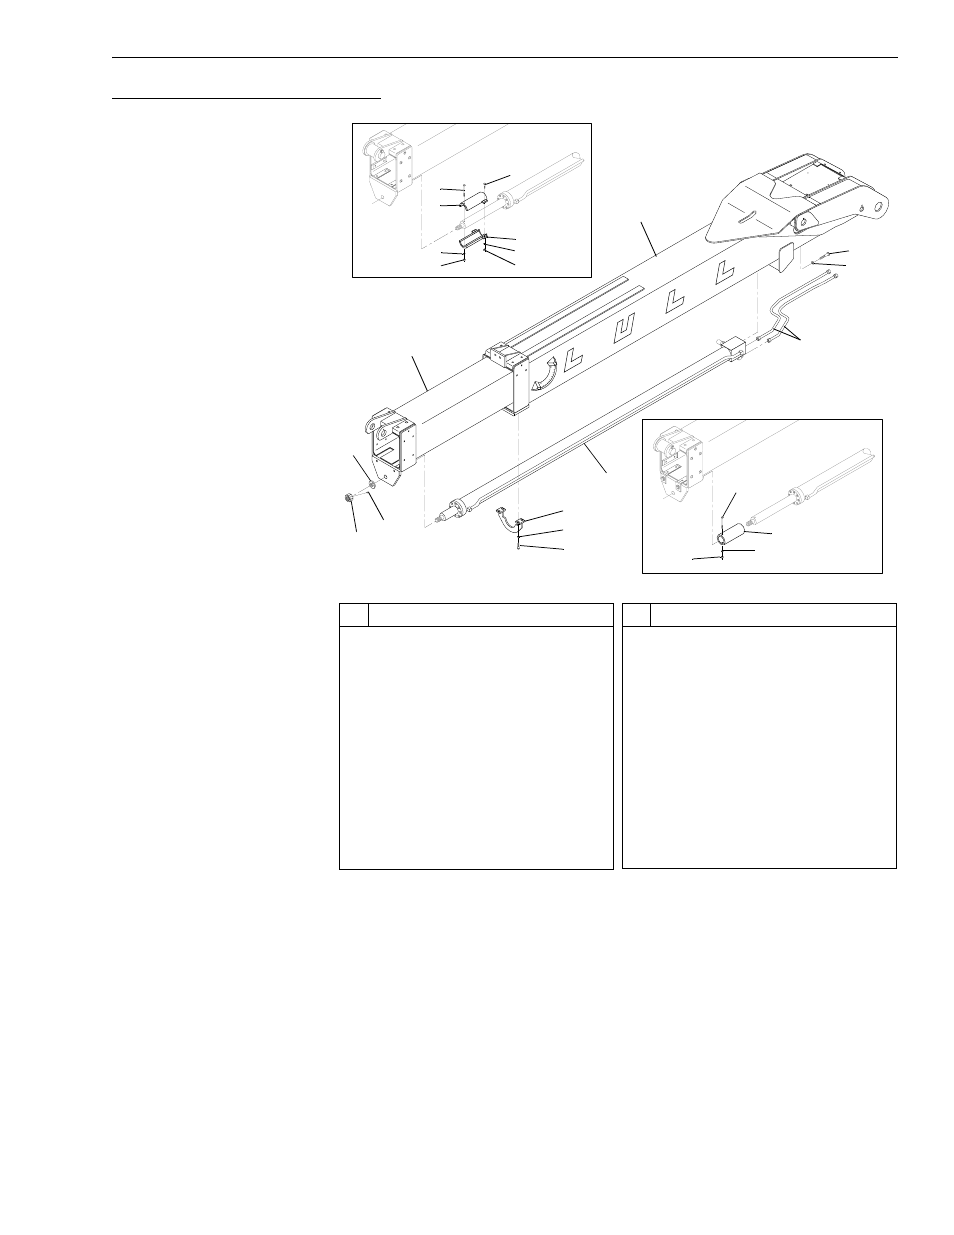
Removal, Boom Extension Cylinder
Fig. 6-151: Boom Extension Cylinder Removal – 3-Section Boom
(Ref. Fig. 6-151) The following steps are required to remove the boom
extension cylinder.
1. Follow preparation procedures as outlined in Section 3 of this manual.
2. For models with transfer carriages, extend the carriage out. Extend the
middle boom section out one foot.
3. Level the boom, apply the park brake, and shut the engine off.
4. Loosen two (2) socket setscrews (Item 3) in rod nut (Item 2).
5. Loosen and remove the rod nut and washer (Item 1) securing boom
extension cylinder to front of middle boom section (Item 4).
0
80
60
40
20
-20
J
113
1
1
2
3
6
7
8
9
10
11
12
#
Description
1
Washer
2
Extension Cylinder Rod Nut
3
Socket Setscrew
4
Middle Boom Section
5
Outer Boom Section
6
Capscrew
7
Lockwasher
8
Cylinder Support Bracket
9
Boom Extension Cylinder
10 Hydraulic Tube
11 Lockwasher
12 Capscrew
#
Description
13 Capscrew
14 Cylinder Stop
15 Lockwasher
16 Nut
17 Capscrew
18 Lockwasher
19 Nut
20 Capscrew
21 Nut
22 Lockwasher
23 Cylinder Stop
4
5
15
16
14
13
17
14
19
18
View A – Models with Outriggers
(Early Production Models)
View B – Models with Outriggers
20
22
21
23