14 print-mark register, Print-mark register -85, Cross cutter – Lenze EVS93xx CrossCutter User Manual
Page 99
Cross Cutter
Features of the "Cross Cutter" prepared solution
Prepared Solution Servo PLC / ECSxA 1.1 EN
2-85
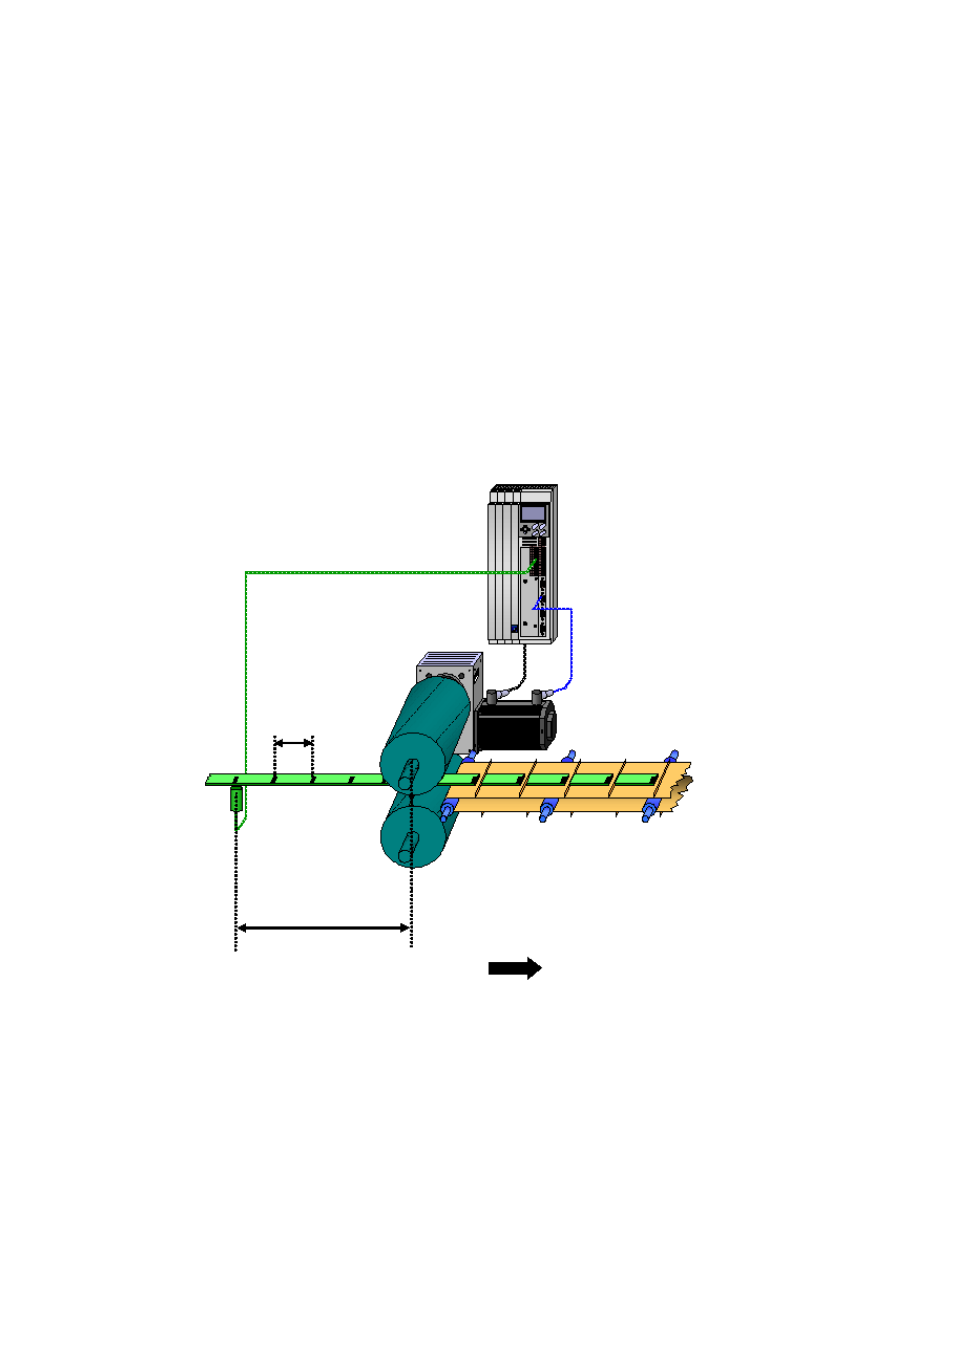
2.5.14 Print-mark
register
A print-mark register enables the user to mount the print-mark sensor further away from the
knife. As soon as the distance between the location of the print-mark sensor and the end of the
cut (X
max
value of profile) exceeds the cutting length, the print-mark register will need to be used
to make sure that the cut is always corrected to the right print-mark signal. However, the aim
should be to mount the print-mark sensor as close as possible to the knife. The greater the
distance between the print-mark sensor and the knife, the more changes in the material flow will
go unnoticed, leading to cutting inaccuracies. Up to 16 print-mark signals can be managed in
the print-mark register; these are then made available to the system at the relevant time as
necessary (i.e. they are delayed by a corresponding value). The print-mark register is activated
automatically by the prepared solution and receives all necessary information via internal
signals. The user does not need to enter any values.
Figure 35: Using the print-mark register
Figure 35 shows that a print-mark register is always used whenever the distance from the print-
mark sensor to the cross-cutter knife is greater than the set cutting length.
Cutting length Δs
The distance from the TP sensor to the 6 o'clock position on the knife Δl
is greater than the cutting length Δs.
You need to use a TP register!