Task 1: define a master target, Task 2: define clone targets – HP Integrity NonStop H-Series User Manual
Page 174
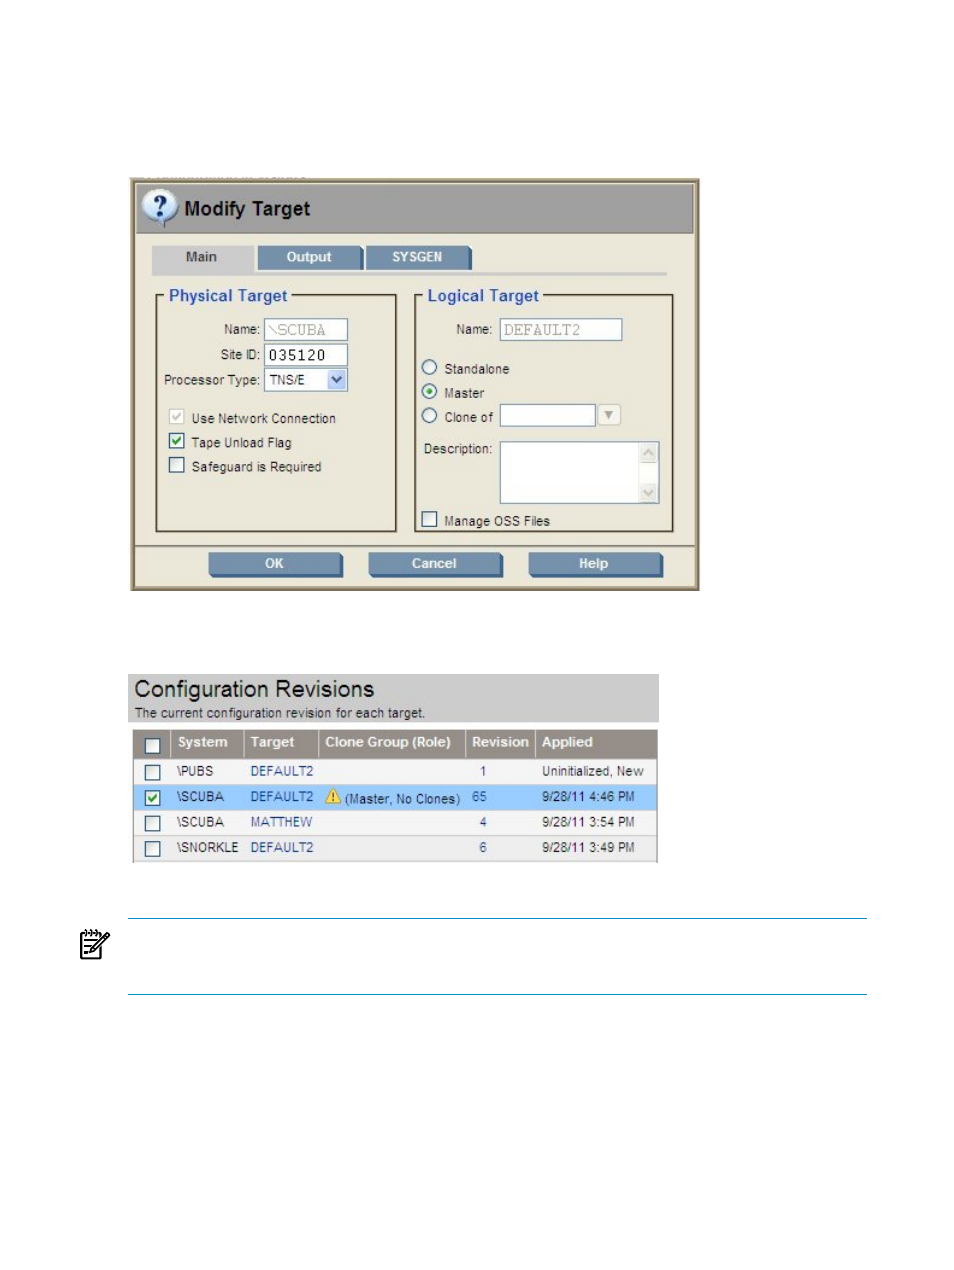
Task 1: Define a Master Target
To choose the target that will serve as master target for a new clone group, select a logical target
on the Configuration Revisions page and click the Modify button.
In the Logical Target section of the Modify Target dialog box, select “Master” and click OK.
On the Configuration Revisions page, that target (\SCUBA in the example below) is now identified
as a master with no clones.
You can now “Define a Clone Target” for that clone group.
NOTE:
All members of a clone group must share the same Logical Target names for their respective
systems. Since the Logical Target name of the master in the preceding example was “Default2, all
clones configured for that clone group must also have a Logical Target name of “Default2.”
Task 2: Define Clone Targets
To add a clone target to a clone group, select the desired target on the Configuration Revisions
page and click the Modify button.
In the Logical Target section of the Modify Target dialog box, select “Clone of” and from the
drop-down menu, select the name of the target that is the master target for the clone group. Click
OK.
174
Simplified Installation and Management of Multiple Identical NonStop Servers (Cloning)