Step 5: adding cover art, Step 5: adding cover art -13 – ClearOne NetStreams DigiLinX Dealer User Manual
Page 311
DigiLinX Streaming Music Manager
15-13
All specifications subject to change without notification. All rights reserved. Copyright © 2008 NetStreams
Main +1 512.977-9393 / fax +1 512.977.9398 / Toll Free Technical Support +1 866-353-3496
3600 W. Parmer Lane, Suite 100; Austin, TX 7872
2.
Click on the matched Streaming Music Manager.
3.
In the right pane, click on the Security tab.
4.
In the Username field enter the username required by the PC sharing the media.
5.
In the Password field enter the password (remember the passwords are case
sensitive).
6.
Enter the password again in the Verify Password field.
Finally, click on the Send button. The Streaming Music Manager will now use this ID
and password to access shared folders.
NOTE:
If you do not set up security, make sure that the guest account is enabled on the
PC, with open authentication.
Step 5: Adding Cover Art
MP3 files can include cover art, but not all ripping software makes use of this feature.
WAV files do not include cover art at all. The SMM100 will allow you to manually
include cover art with music. The PC must be part of the NetStreams workgroup to
share music.
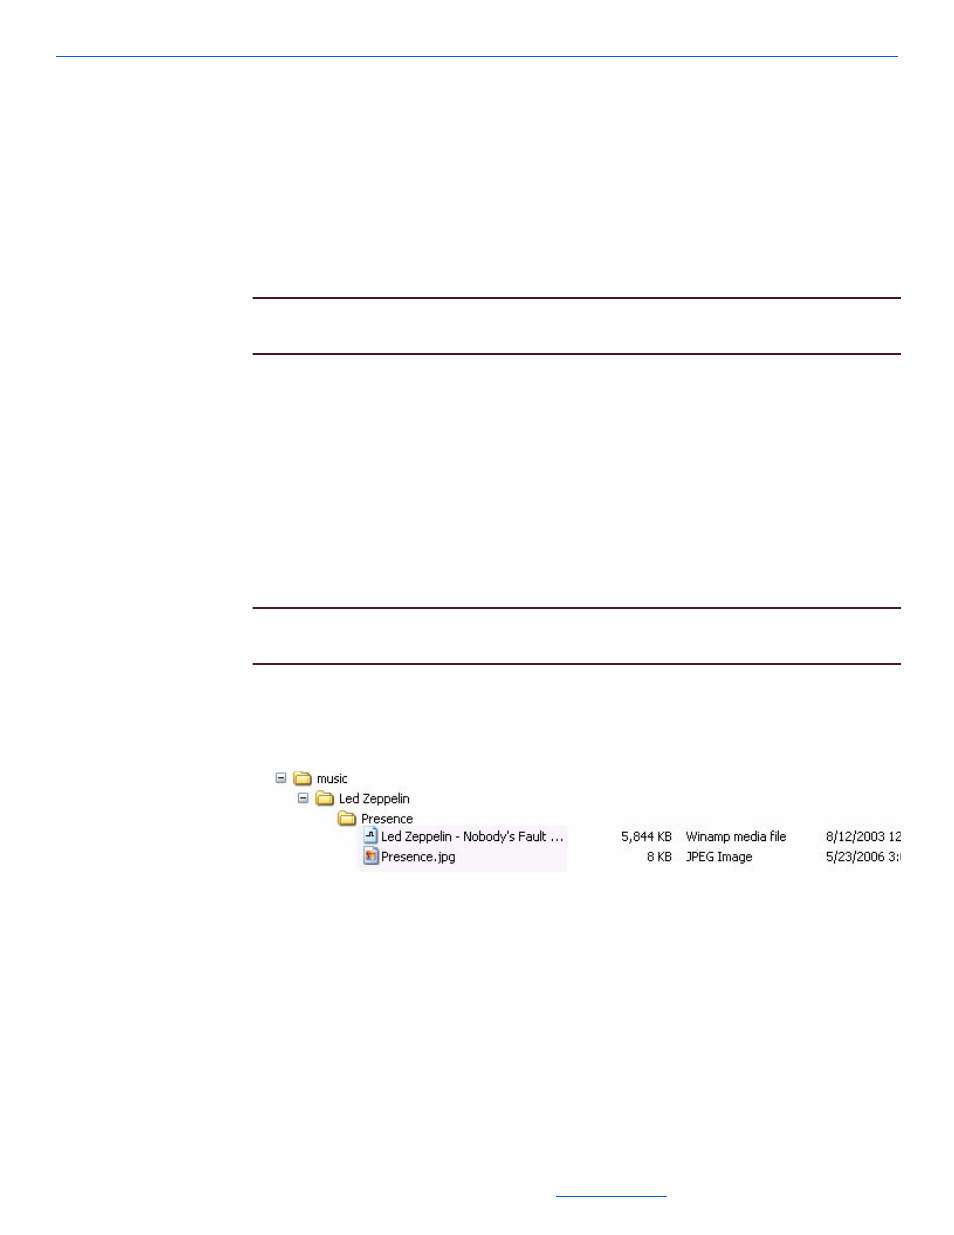
To enable the SMM to find cover art, organize the music collection into artist/album
directories. In each album directory, place a .jpg of the cover art.
1.
Locate a .jpg image of the cover art for the album.
NOTE:
Some music ripping software will include the album cover art in the directory
with the music files.
Follow these steps to display album cover art:
2.
Copy the file into the album folder associated with the art (see Figure 15-13 for an
example).
Figure 15-13
Copying art to the album
3.
Rename the file to “folder.jpg” (or to any cover art name you set in Cover Art in
the Settings tab) (refer to Figure 15-12 and Figure 15-13). Your cover art should
display on the TouchLinX. Repeat steps 1 through 3 for each album.
4.
Select the Settings tab on the Streaming Music Manager.
Settings information displays (see Figure 15-13).