Controlinx and netstreams panorama, Controlinx and – ClearOne NetStreams DigiLinX Dealer User Manual
Page 121
Editing Devices
5-51
All specifications subject to change without notification. All rights reserved. Copyright © 2008 NetStreams
Main +1 512.977-9393 / fax +1 512.977.9398 / Toll Free Technical Support +1 866-353-3496
3600 W. Parmer Lane, Suite 100; Austin, TX 7872
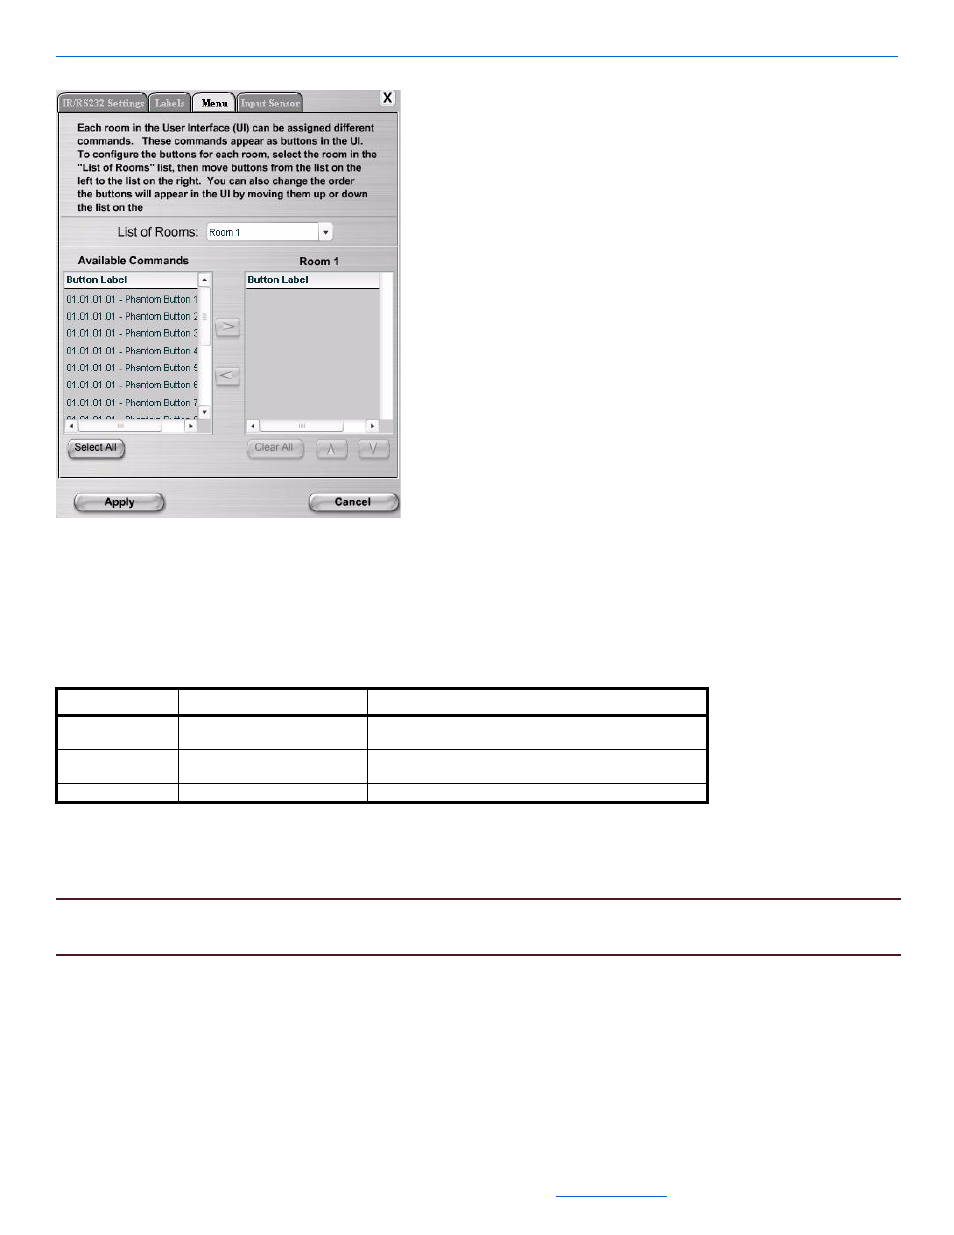
Figure 5-42
Menu tab for the ControLinX hosting HomeWorks
The Menu tab allows you to determine what order the scenes (phantom buttons) are presented on the lighting
menu in the user interface.
Table 5-32 provides information on the fields available for editing the Menu tab.
5.
Once all scenes have been added, use the up and down arrows located under the menu listing to adjust the
order the scenes are presented in.
6.
After adjusting information, select Apply.
NOTE:
For information on the Input Sensor tab, see Input Sensor Tab for a ControLinX Contained in a MLA4000
on page 5-32.
ControLinX and NetStreams Panorama
To edit ControLinX settings for control of the NetStreams Panorama Video Distribution System, complete the
following steps:
1.
Connect the NetStreams RS232 cable (included with the MLA4000) to a null modem cable and connect it to
the Panorama through the RS232 (IO2) on the Panorama unit.
Table 5-32
Menu Tab
Tab
Selection Description
Menu
List of Rooms
Select the room from the list of rooms for the phantom
buttons.
Available Commands
Select the scene and select the right arrow to move the
scene to the room.
The name of the room for which you are enabling scenes.