Eppendorf epBlue with MultiCon User Manual
Page 78
epBlue Application Editor - Creating and editing applications
epBlue™ with MultiCon
English (EN)
78
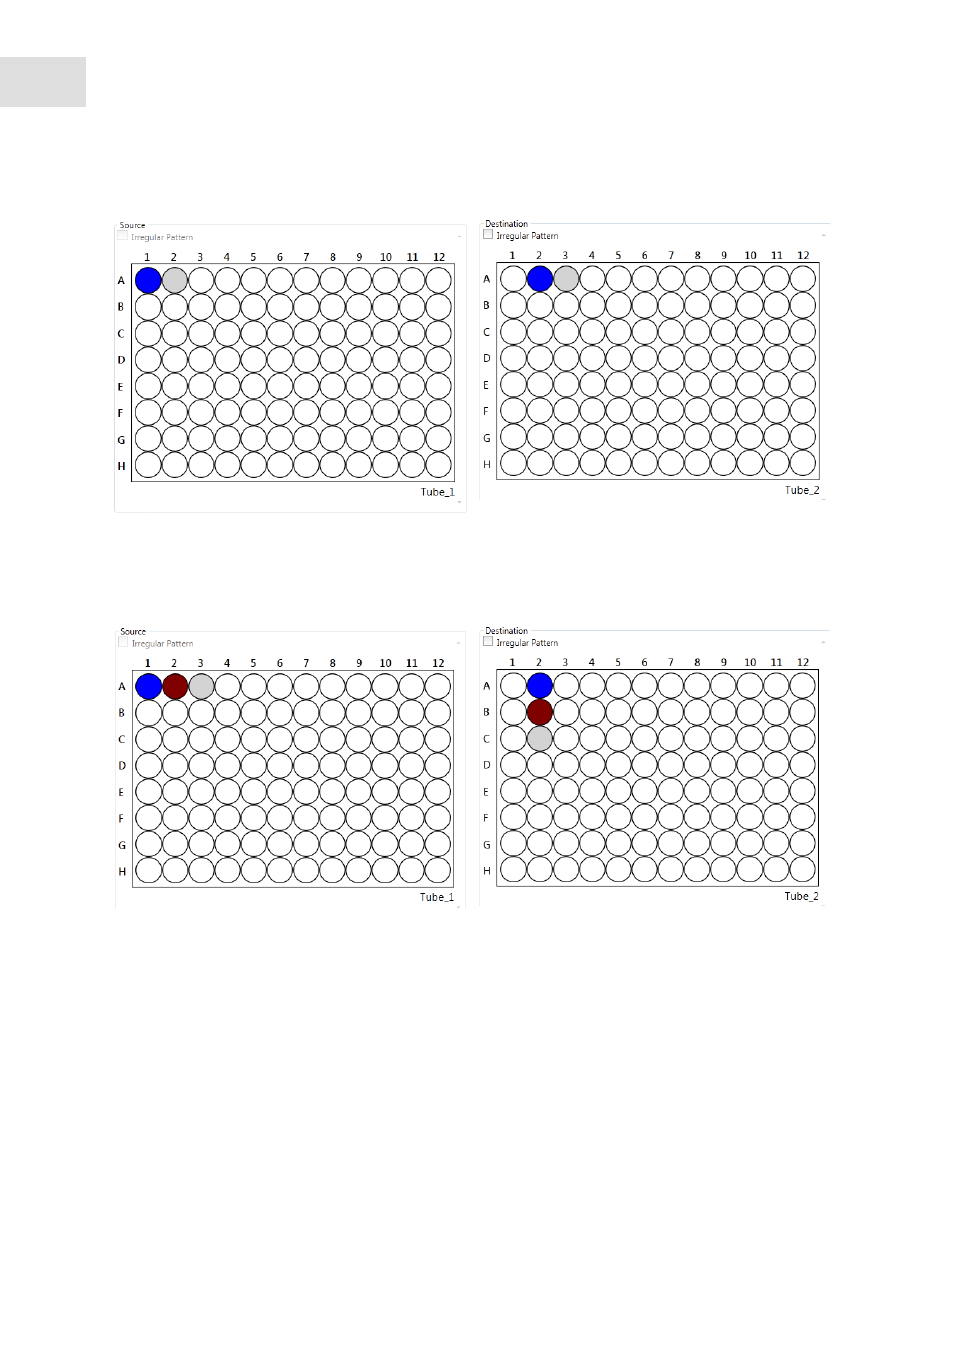
7. Select the next source position in the source labware.
8. Select the next destination position in the destination labware.
epBlue attempts to detect the pattern and marks the next position gray.
If you created replicates during the first step, and select the destination position for the second liquid
transfer, the positions will be defined for the replicates in the same order as in the first step.
9. If the pattern matches your requirements, press the
Complete
button. The pattern will be completed
automatically up to the defined number of samples.
If you would like to discard the pattern, press the
Reset
button. Start from the beginning.
10. To check a pattern, press the
Show
button.
The order of the pattern will be displayed. The source position and destination position of a liquid
transfer are the same color.
Abb. 6-29: Selecting the first source position
Fig. 6-29: Selecting the first source position
Abb. 6-30: Selecting the first destination position
Fig. 6-30: Selecting the first destination position
Abb. 6-31: Selecting the next source position
Fig. 6-31: Selecting the next source position
Abb. 6-32: Selecting the next destination position
Fig. 6-32: Selecting the next destination position