Controller status screen – Seed Hawk Raven 2012 User Manual
Page 70
Chapter 4
58
Seed Hawk® Viper Pro™ Installation & Operation Manual
Menu
Various configuration and feature settings for the Viper Pro control system are accessible via the ‘Menu’ button
in the lower, right corner of the Viper Pro display. Access the menu to:
Note:
Refer to Menu section on page 142 for details on the settings, features and options accessible
through the main screen menu button.
•
Exit or Restart the Viper Pro application or shutdown the field computer
•
View field computer software and hardware version information
•
Access the internet (if a wireless access device is connected and properly configured)
•
Setup the following control and feature items:
•
Registration or authorization keys for optional Viper Pro features
•
Map settings such as prescription (Rx) map colors, loading street maps (if available) and
adjusting coverage and scout map displays
•
Display Language and Units, time zone settings and machine profiles
•
Communication port settings
•
Product control settings
•
Lightbar settings
•
Boom configuration and settings
•
File maintenance processes
•
Begin or resume jobs or machine guidance
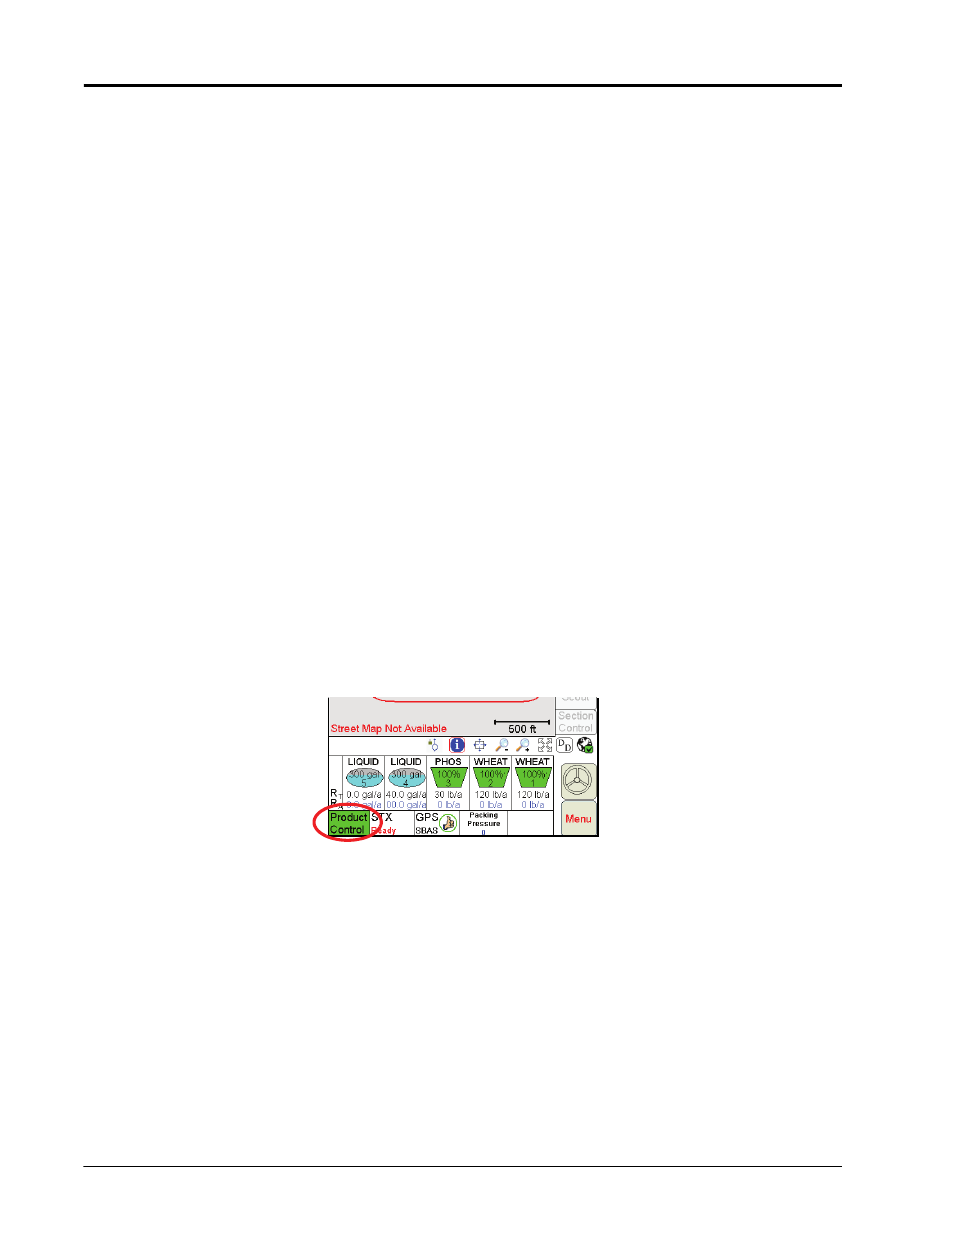
Controller Status Screen
Touch the Product Control Status indicator at the bottom of the main screen to view the Controller Status
screen.
The Controller Status screen displays information from the product rate controller or a CANbus control system.
Controller Status
When connected to a separate product rate control console, the Viper Pro Controller Status screen displays
boom section and product rate information provided by the rate controller. Refer to the Raven Viper Pro
Installation and Operation Manual for more information about using the Viper Pro field computer with an
external rate control console.