Testing the speed sensor cable – Seed Hawk Raven 2012 User Manual
Page 260
Appendix D
248
Seed Hawk® Viper Pro™ Installation & Operation Manual
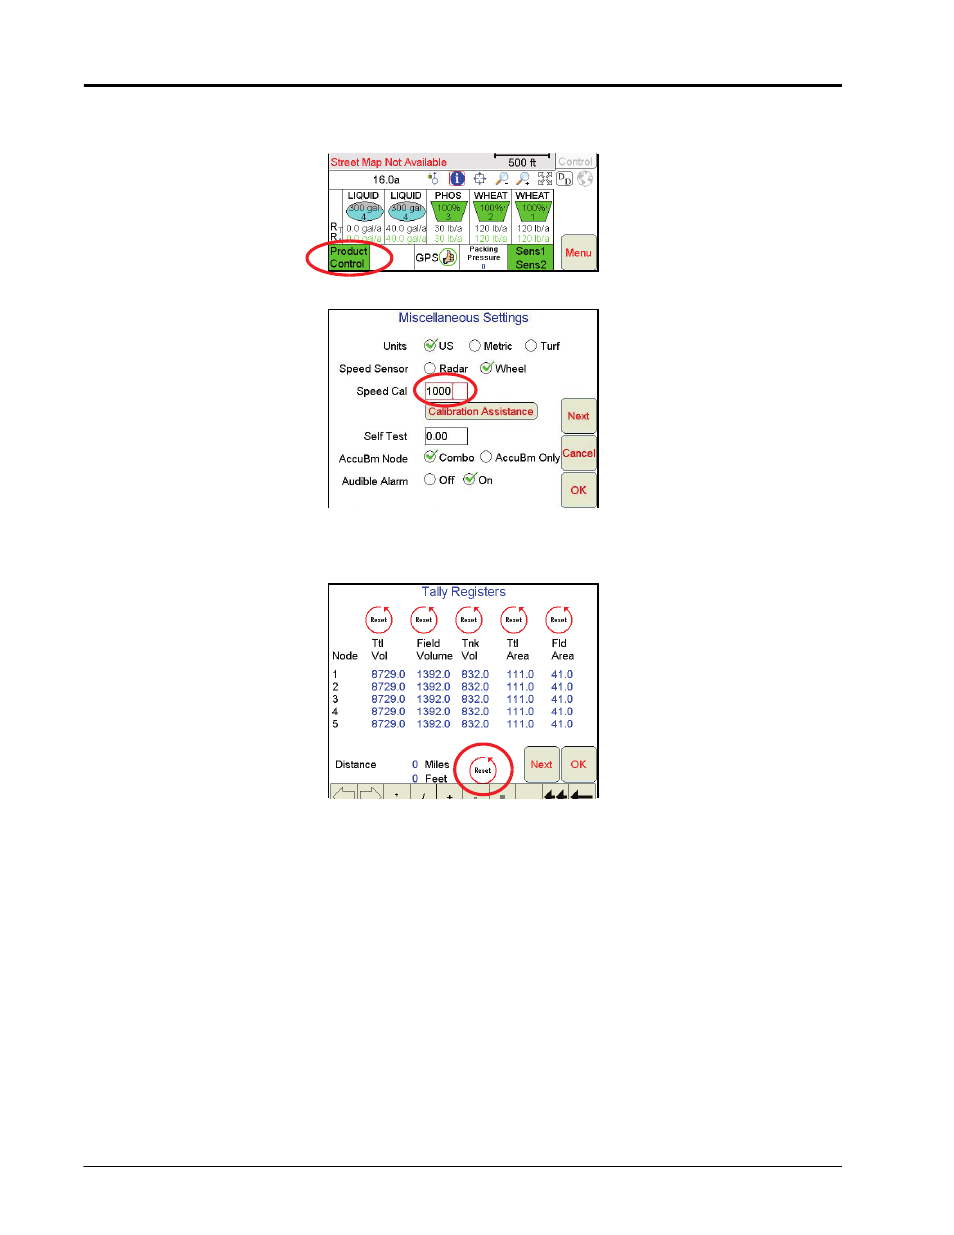
Testing the Speed Sensor Cable
1.
Press Product Control.
2.
Press the Miscellaneous box. Enter 1000 as the Speed Cal and press OK.
3.
Press OK to return to the CAN Controller Status screen.
4.
Press Tally Registers.
5.
Press the Reset button next to the Distance box.
6.
With a small jumper wire (or paper clip), short between pin C and pin B sockets with a ‘short-no-short’
motion. Each time contact is made, the Distance total should increase by increments of 1 or more.
7.
If the Distance total does not increase, remove the section of cable and repeat the test at the connector that
is the next closest to the node. If the distance total now increments during the short-no-short test, replace
the defective cable as required.
8.
If no pulses are registered, perform the above voltage checks.
9.
If all of the cables test ‘good’, replace the Speed Sensor.
Note:
After testing is complete, re-enter the correct Speed Cal and Speed Sensor type before starting
application.