Seed Hawk Raven 2012 User Manual
Page 249
Manual No. 016-3001-003
237
3.
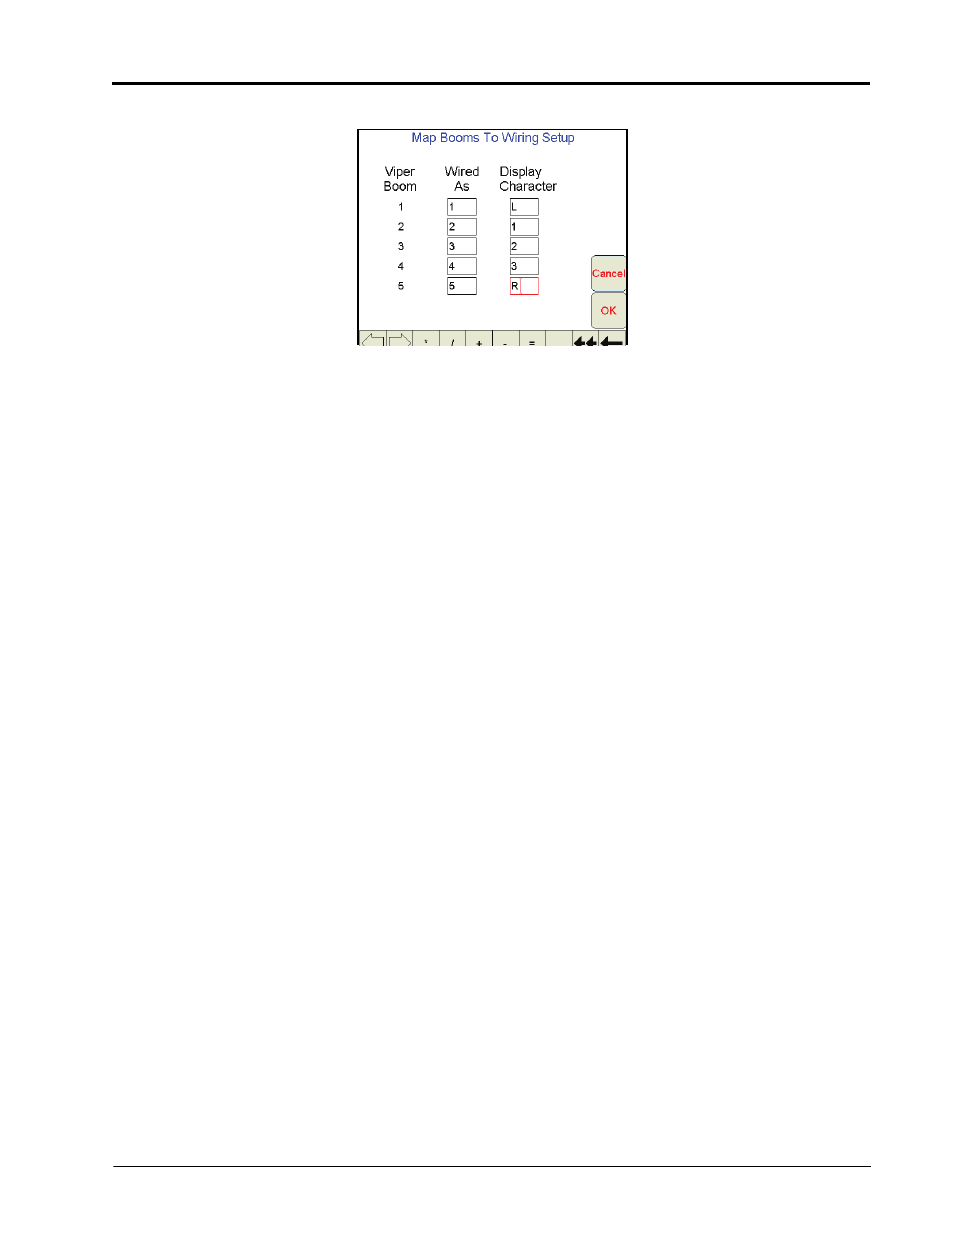
Select the Map Booms button. The Map Booms to Wiring Setup screen will display.
The ‘Viper Boom’ column displays the number of the boom sense sections configured for the current
configuration. These numbers correspond to the section values displayed from left-to-right on the Viper Pro
main screen.
Note:
Touch the Next button if necessary to display ‘Wired As’ and ‘Display Character’ settings for
sections 6 through 10.
4.
Use the ‘Wired As’ column to set the actual boom sense wired connection for each configured section.
Note:
Raven boom sense wires are color coded as follows:
Boom 1 - Black
Boom 2 - Brown
Boom 3 - Blue
Boom 4 - Black/White
Boom 5 - Brown/White
Boom 6 - Blue/White
Boom 7 - White/Black
Boom 8 - White/Brown
Boom 9 - White/Blue
Boom 10 - Pink
Viper will not allow ‘Wired As’ sections to be skipped. For example, if the value entered as the
Number of Boom Sections setting is set to 3, ‘Wired As’ must be 1, 2, and 3 in any order. These
three sections cannot be ‘Wired As’ 1, 2, and 4. To skip a boom section, a boom must be
configured with ‘0’ width.
5.
Use the ‘Display Character’ column to customize the “Booms” display on the Viper Pro main screen. For
example, the display character for section 1 may be set to L to signify that section 1 is the left fence row.
Note:
Use only the characters 0, 1, 2, 3, 4, 5,6, 7, 8, 9, D, E, L, R, and * to label the booms. It is
recommended to use * for skipped booms.
6.
The following table is an example of a possible boom mapping configuration.