Inputs, Calibration offset, Calibration – Watlow EZ-ZONE RMC User Manual
Page 158
Watlow EZ-ZONE
®
RMC Module
•
155
•
Chapter 7 Features
ç
WARNING! During autotuning, the controller sets the out-
put to 100 percent and attempts to drive the Process Value
toward the set point . Enter a set point and heat and cool
power limits that are within the safe operating limits of your
system .
Inputs
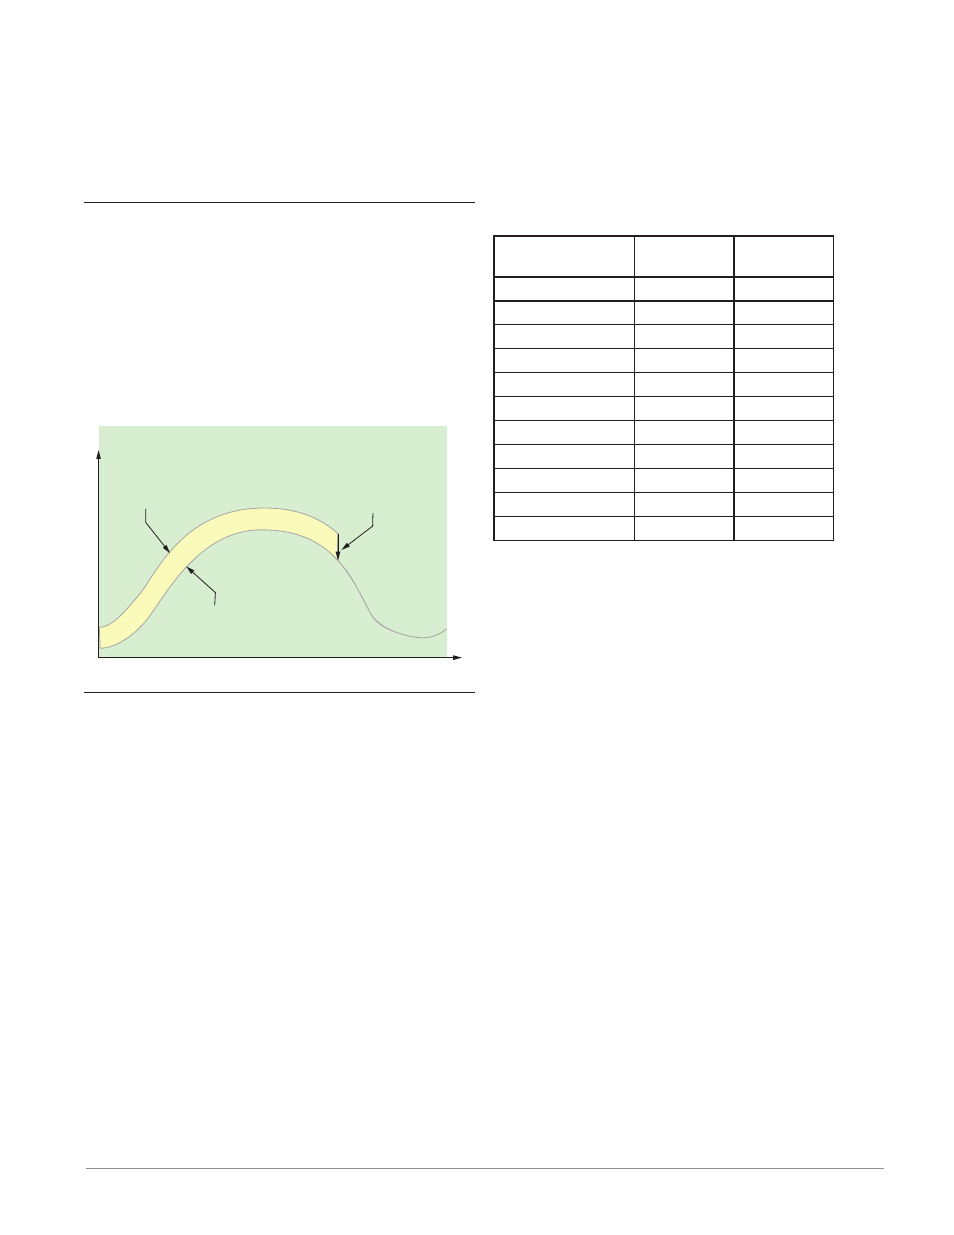
Calibration Offset
Calibration offset allows a user to compensate for an
inaccurate sensor, lead resistance or other factors
that affect the input value. A positive offset increases
the input value, and a negative offset decreases the
input value.
The input offset value can be viewed or changed
with Calibration Offset [`i;CA] (Operations Page,
Analog Input Menu).
Time
Temperature
Temperature Reading
from Sensor
Actual Process Temperature
Negative Calibration Offset will
compensate for the difference
between the Sensor Reading and
the Actual Temperature
Calibration
Before performing any calibration procedure, verify
that the displayed readings are not within published
specifications by inputting a known value from a pre-
cision source to the analog input. Next, subtract the
displayed value with the known value and compare
this difference to the published accuracy range speci-
fication for that type of input.
Use of the Calibration Offset [`i;CA] parameter
found in the Operations Page [oPEr] , Analog Input
Menu [``Ai] shifts the readings across the entire
displayed range by the offset value. Use this param-
eter to compensate for sensor error or sensor place-
ment error. Typically this value is set to zero.
Equipment required while performing calibra-
tion: Obtain a precision source for millivolts, volts,
milliamperes or resistance depending on the sensor
type to be calibrated. Use copper wire only to connect
the precision source to the controller’s input. Keep
leads between the precision source and controller as
short as possible to minimize error. In addition, a
precision volt/ohm meter capable of reading values to
4 decimal places or better is recommended. Prior to
calibration, connect this volt/ohm meter to the preci-
sion source to verify accuracy.
Actual input values do NOT have to be exactly the
recommended values, but it IS critical that the actual
value of the signal connected to the controller be ac-
curately known to at least four digits.
Calibration of Analog Inputs:
To calibrate an analog input, you will need to provide
a source of two electrical signals or resistance values
near the extremes of the range that the application is
likely to utilize. See recommended values below:
Sensor Type
Precision
Source Low
Precision
Source High
thermocouple
0.000 mV
50.000 mV
millivolts
0.000 mV
50.000 mV
volts
0.000V
10.000V
milliamps
0.000 mA
20.000 mA
100 Ω RTD
50.00 Ω
350.0 Ω
1,000 Ω RTD
500.0 Ω
3,500 Ω
thermistor 5 kΩ
50.00
5,000
thermistor 10 kΩ 150.0
10,000
thermistor 20 kΩ 1,800
20,000
thermistor 40 kΩ 1,700
40,000
potentiometer
0.000
1,200
Note:
The user may only calibrate one sensor type. If the
calibrator interferences with open thermocouple detec-
tion, set Sensor Type [`SEn] in Setup Page [`SEt],
Analog Input Menu [``Ai] to millivolt [`Mu] in-
stead of Thermocouple [``tC] to avoid interference
between the calibrator and open thermocouple detect
circuit for the duration of the calibration process. Be
sure to set sensor type back to the thermocouple type
utilized.
1. Disconnect the sensor from the controller.
2. Record the Calibration Offset [`i;CA] parameter
value in the Operations Page [oPEr] , Analog In-
put Menu [``Ai] then set value to zero.
3. Wire the precision source to the appropriate con-
troller input terminals to be calibrated. Do not
have any other wires connected to the input ter-
minals. Please refer to the Install and Wiring sec-
tion of this manual for the appropriate connec-
tions.
4. Ensure the controller sensor type is programmed
to the appropriate Sensor Type [`SEn] to be uti-
lized in the Setup Page [`SEt] , Analog Input
Menu
[``Ai]
.
5. Enter Factory Page [FCty] , Calibration Menu
[`CAL] via RUI or EZ-ZONE Configurator Soft-
ware.
6. Select the Calibration [CAL] input instance to be
calibrated. This corresponds to the analog input to
be calibrated.
7. Set Electrical Input Slope [ELi;S] to 1.000 and
Electrical Input Offset [ELi;o] to 0.000 (this will
cancel any prior user calibration values)