Disk saturation – Xerox 180 User Manual
Page 144
ONLINE PRINTING TASKS
6-8
XEROX DOCUPRINT 180 LPS OPERATOR GUIDE
Disk saturation
If a report is larger than the size of the print file, the system may not
be able to receive the entire report onto the system disk at one time.
If it cannot, a disk saturation message appears on the PC UI or
system controller screen alerting you of the situation and asking you
for instructions.
Disk Saturation task through windows
Perform the following steps:
Step 1.
When 16 cylinders of disk space are available, the following
message appears in the Messages window:
APPROACHING DISK SATURATION
Step 2.
If disk saturation occurs, input processing stops while printing
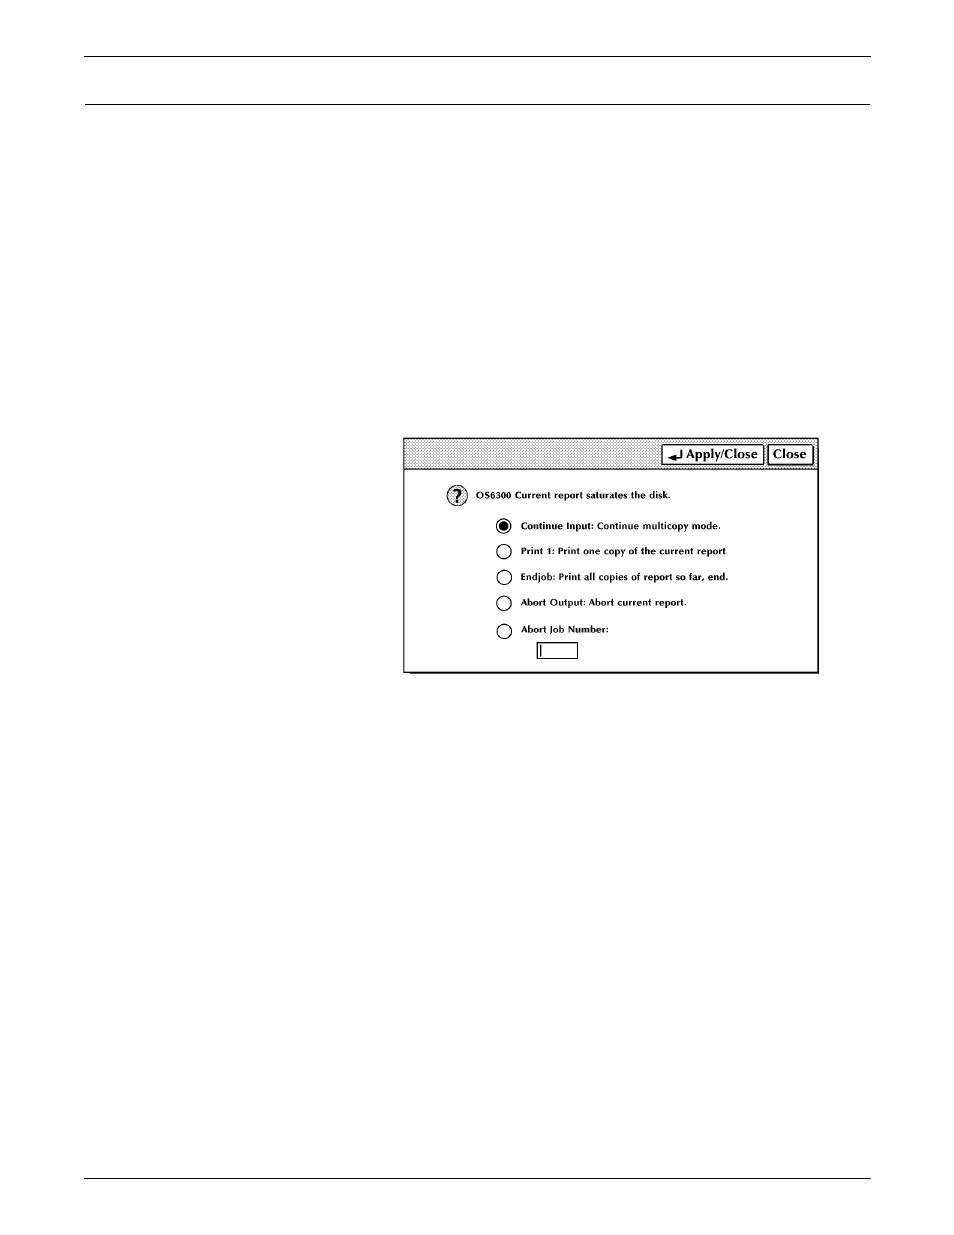
continues. The confirmation window shown in figure 6-4 appears.
Figure 6-4.
Confirmation window (disk saturation)
This window contains options for dealing with the disk saturation.
Step 3.
Select the appropriate option:
•
Continue Input. Continues multi-copy printing in sections. You
will need to merge the prints of the different sections to get
complete prints of the whole report.
•
Print 1. One copy of the current report is printed. The report
must be retransmitted from the host for each copy required.
•
Endjob. Prints already formatted pages and ends the current
job file.
•
Abort Output. The current report is aborted and the next report
begins printing.
•
Abort Job Number. The job whose number appears in the field
is aborted.
Step 4.
Select the Apply/Close header button to apply your selection and
close the window.