Navigate the software navigating the software, Main window, Action tabs – UVP Life Science User Manual
Page 38
24
Navigate the Software
Navigating the Software
•
Main Window
•
Action Tabs
•
Menu Buttons
Main Window
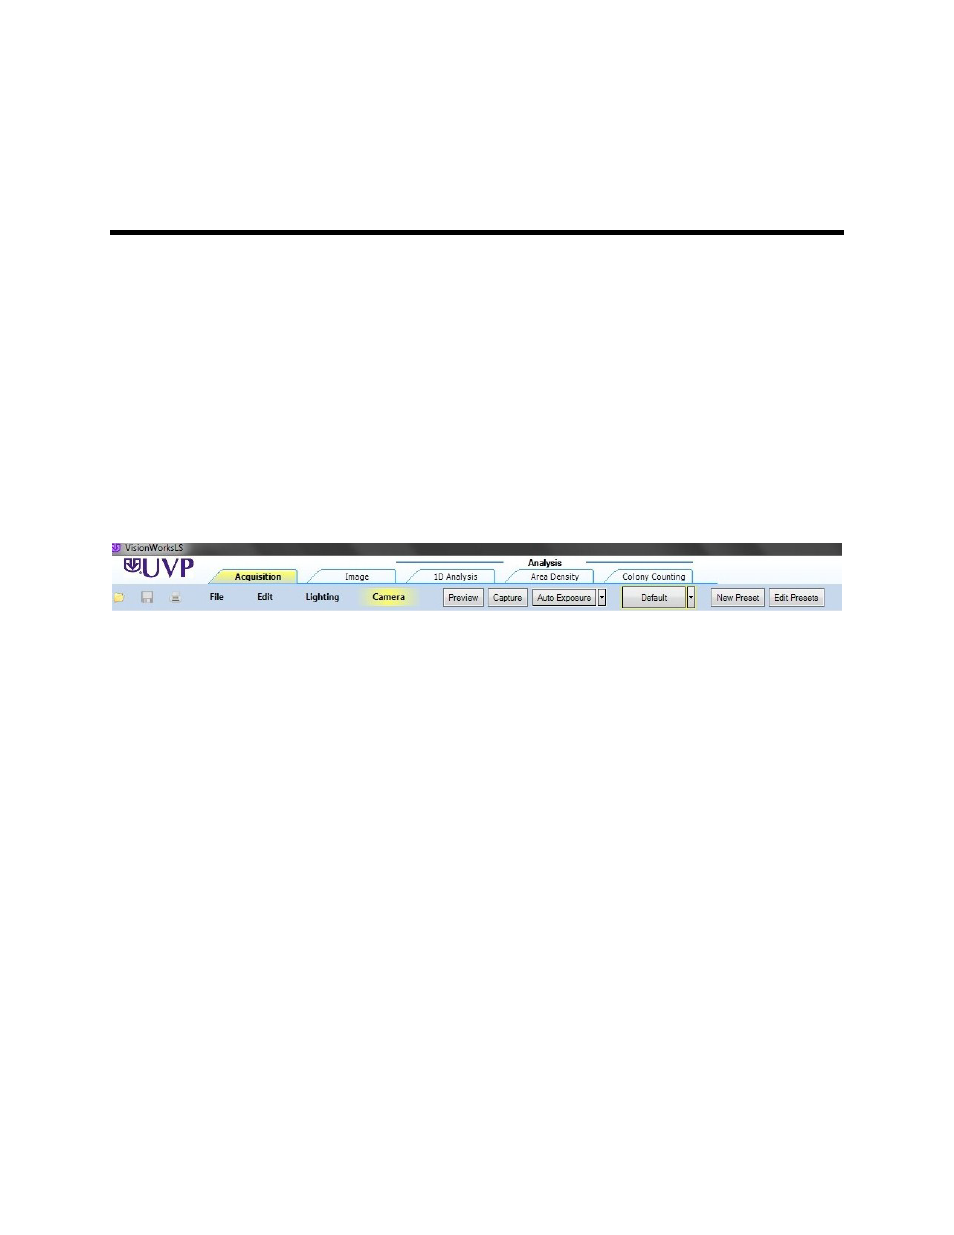
After the software is opened, the menu bar will look similar to the one shown below. The main window
contains the Action Tabs, Menu Buttons and modules (not shown) down the left side. Action tabs are
shown across the top row and are for functions used the most. Below each Action Tab is a set of
corresponding menu buttons. When a specific menu button is clicked, a module will display in the left
column (not shown) with additional function options. The example below shows
Acquisitions Action Tab
> Camera module.
The File and Edit menus always display on the screen. To the far right, Advanced menu and Help menus
(not pictured here) are available.
Action Tabs
The purpose of the Action Tabs is to enable quick selection of major tasks.
•
Acquisition: Functions to capture images and change camera, darkroom, lens etc. settings
•
Image: Functions to apply image filters, brightness & contrast, pseudocolors, annotations, and
other tools to apply to an image
•
1D Analysis: Functions to perform 1D Analysis on a captured image
•
Area Density: Functions to perform Area Density on a captured image
•
Colony Counting: Functions to perform Colony Counting on a captured image
Action tabs are shown in the top row. Each Action tab has a unique set of menu buttons with the
corresponding menu buttons displayed in the row below. The example below shows the Acquisition
Action Tab highlighted with yellow and its corresponding menu buttons. When selected menu buttons are
clicked, modules will open to provide function options.