Adding a picture of the item, Adding a picture of the item 123 – IntelliTrack Check In/Out User Manual
Page 151
Chapter 6
Initializing the System
123
•
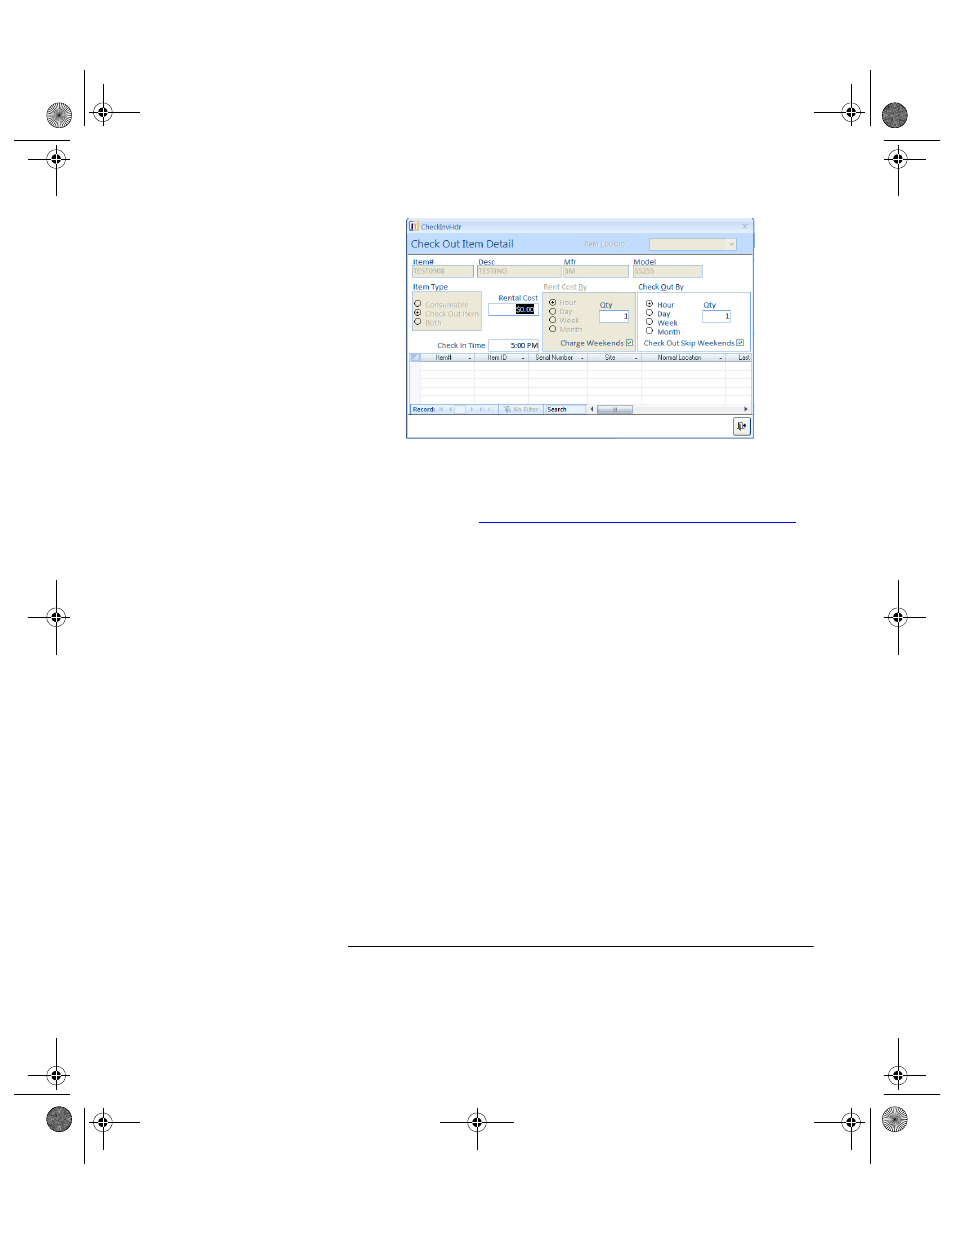
Enter the Rental and Check Out period in the top half of the Check
Out Items screen. Press TAB until you reach the ITEM# column.
•
For more detailed information about entering check out item details,
please refer to
“Adding Check Out Item# Detail Data” on page 131
Both: Use this option for items that are part of your consumable
inventory and may also be rented or borrowed from the system on an
individual basis. This item record contains both consumable inven-
tory data and check-out item data. When you add an item that is cat-
egorized as Both consumable and check-out, you must add site,
location and quantity information for the item at the Item at Location
form and Check Out Detail information for this item at the Check
Out Detail form. When you mark an item as Both consumable and
check out, the item is displayed by item number/quantity and item
number/item ID in the Item#/Location form.
The Qty field is automatically updated by the system to reflect the
on hand inventory amount for this item.
Adding a
Picture of the
Item
If you enabled the Pictures option in the Setup/Options form, you are able
to link an image file of the item to the item number in the Item Data form.
The image file must be a supported image file type (.wmf, .emf, .dib, .bmp,
.ico, .BMP, .EPS, .GIF, .JPG, .PCT, .PNG, .WMF) in order to import it into
the application. The Check In-Out application directory (Check In Out)
contains a Pictures folder to store your image files; however, you may
import image files from any directory on the network.
Note: The Check In-Out application references the image file; this means
that the image file does not need to be placed on each individual PC that
uses the application. When placed in a single network directory that is
2283.book Page 123 Thursday, July 9, 2009 11:26 AM