Grass Valley Trinix NXT v.3.3.1 User Manual
Page 427
Trinix NXT — Installation and Service Manual
427
Trinix Fiber Boards Installation
5.
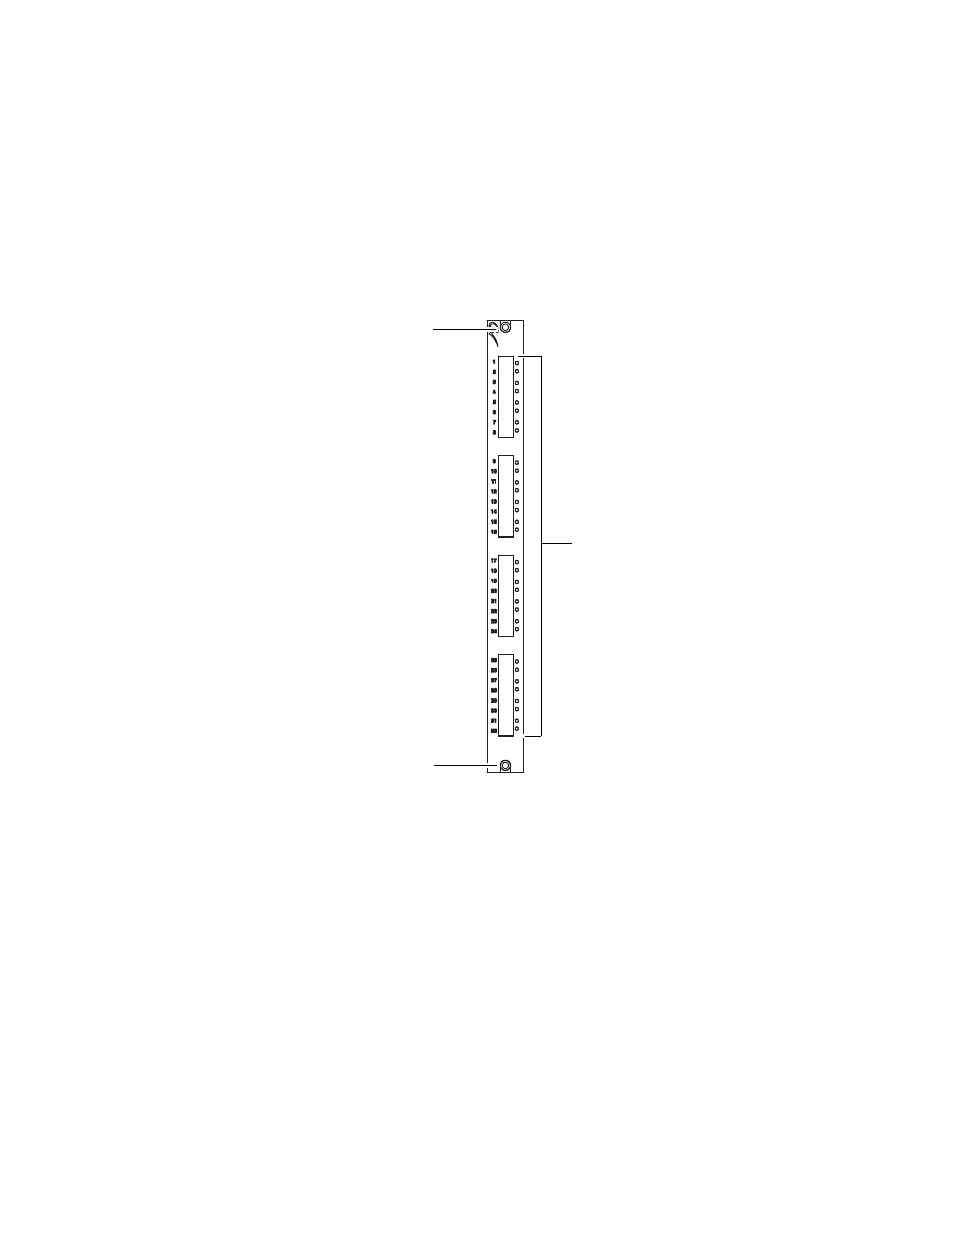
Align the panel in the proper direction. The rear panel circuit board
near the end of the panel marked with "32," must fit into the card guide
inside the frame.
If the panel does not fit properly into the hole, or is at an angle relative
to the rear panel surface of the frame, the panel is probably not in the
card guide.
6.
Fasten the rear panel to the frame using the provided screws.
Figure 287. Install the Screws for the Trinix -Fiber Rear Panel
7.
Insert the Fiber-Optic Input or Output cables into the SFP modules.
Move to the front of the Trinix frame.
8.
Locate the front slot corresponding to the correct rear panel. For
example, Input slot for Input rear panel.
9.
Insert the Fiber Input and Output boards into their corresponding
locations from the front of the Trinix frame and then lock them into
place.
a.
To insert the boards, carefully slide the Fiber board along the board
guides while keeping the ejector levers spread apart; slide the board
in until the levers make contact.
b.
Fold the levers toward each other until the front ejector levers snap
into place, which will lock the board into the frame.
071827611_Fiber_rear-pnl
Install the top screw
Install the bottom
screw
SFP Module connections