Slave configuration – Measurement Computing TempScan/1100 User Manual
Page 46
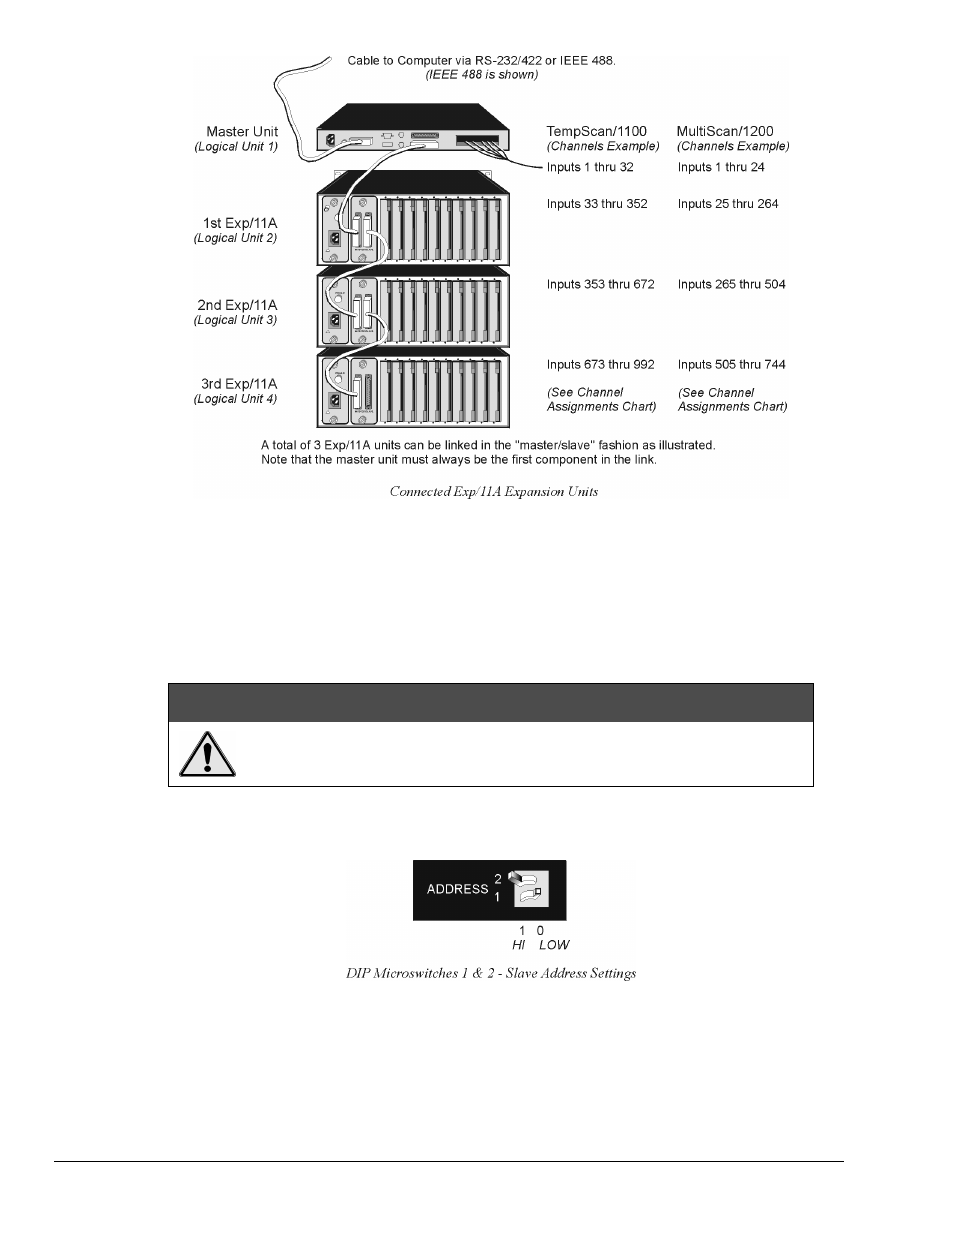
2-10 Expansion Units
889897
TempScan / MultiScan User's Manual
4. Plug in all system devices.
5. Set the slave address on the rear panel DIP switch. See next section Slave Configuration.
6. Turn power on to the master unit.
7. Turn power on to the remaining system devices.
Slave Configuration
CAUTION
CAUTION
CAUTION
CAUTION
Avoid linking two or more expansion chassis with the same slave address.
Otherwise, the unspecified addresses may result in operating errors.
For the master/slave configuration to operate correctly, the master unit must either be a TempScan/1100 or
MultiScan/1200; it cannot be an Exp/10A or Exp/11A expansion unit.
Furthermore, each Exp/11A unit must be assigned a unique slave address. Following simple binary
weighting, this slave address is set by using microswitches 1 and 2 of the rear panel DIP switch. In the
previous figure, DIP microswitch 1 is in the LOW position while DIP microswitch 2 is in the HI position,
indicating the slave address 1. A maximum of 3 Exp/11A slave addresses can be set – 0, 1, and 2 – while
the address of 3 is not allowed. The Exp/11A factory default is address 0.
Note: The address of 3 is invalid. If this address is set, the LED indicator ERROR will light up.