Channel tabs, Controller settings – Ag Leader EDGE Ver.4.5 Users Manual User Manual
Page 97
85
P
LANTING
5. Select Controller
Select an existing controller from the drop-down menu, or press the New button and use the Controller
Setup Wizard to create a controller.
6. Select Device and Seed Command Type
After pressing the New button, the Controller Setup Wizard appears. Use the drop-down menus to select
SeedCommand as your device. Use the bottom drop-down menu to select Hydraulic Seed Control as the
SeedCommand Type. Press the blue right-arrow button to continue.
7. Enter number of drives
Use the up and down arrows to enter in the number of hydraulic drives on your planter. Press the blue right-
arrow button to continue.
8. Enter suggested controller name
A suggested controller name appears. If necessary, use the on-screen keyboard to edit the name of the
controller.
9. Select Ground Speed Source
Select a Primary and Backup Ground Speed Source, (such as GPS, Wheels, Track or Radar). Press the
blue right-arrow button to continue.
10. Enter Suggested Name for Configuration
Use the keyboard button to enter a name for the configuration. Press the checkmark box when complete.
C
ONTROLLER
S
ETTINGS FOR
H
YDRAULIC
S
EED
R
ATE
M
OTOR
D
RIVES
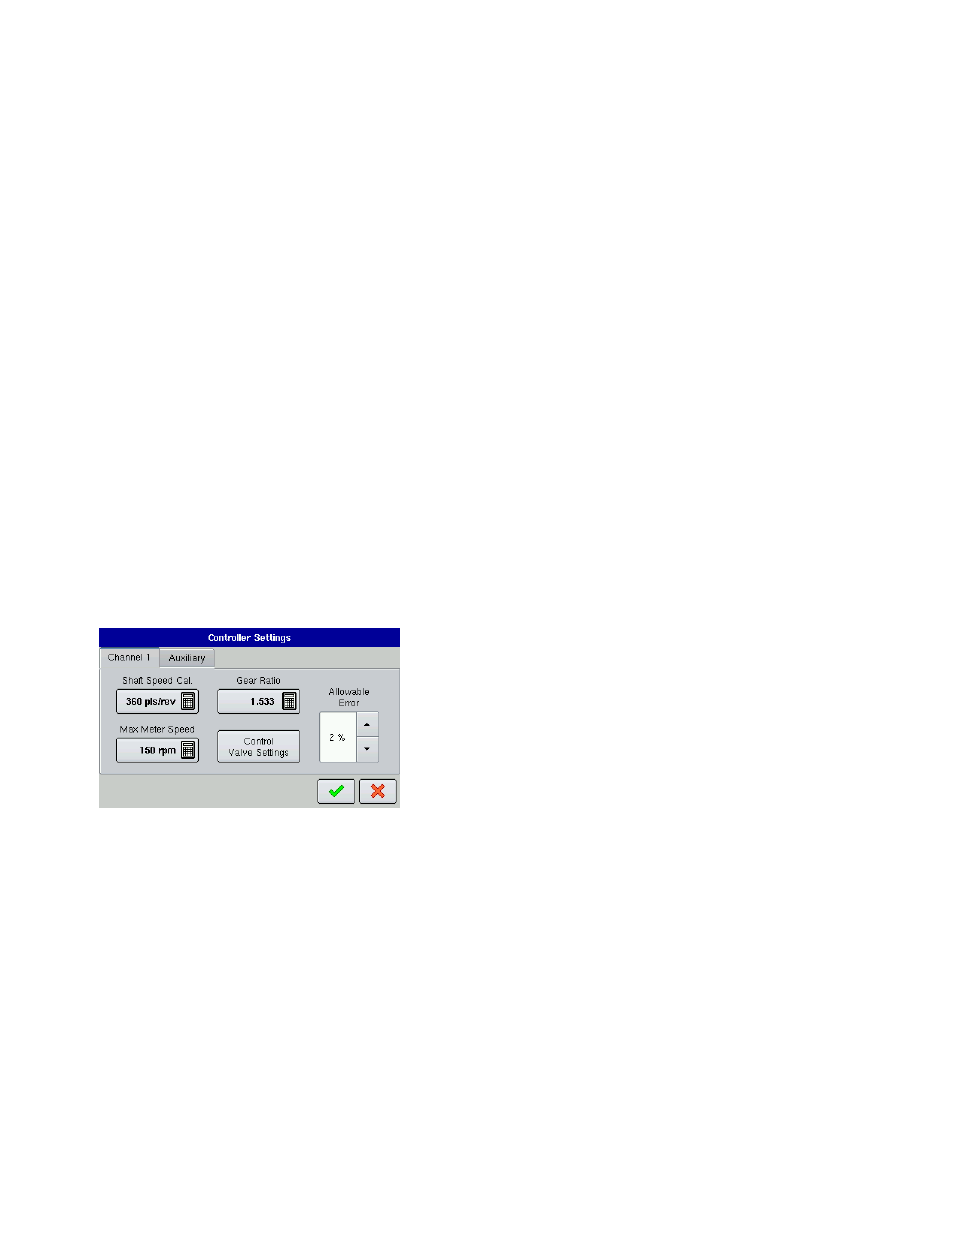
Channel Tabs
• Shaft Speed Cal
Calibration number representing the pulses that equal one
revolution of the hydraulic motor.
• Max Meter Speed
Setting determines the maximum RPM of the seed meter, and is
specified by the manufacturer. A warning informs you if this
threshold is exceeded.
• Gear Ratio
Ratio of the revolutions of the hydraulic drive as compared to the revolutions of the seed meter.
• Allowable Error
Determines the percent of error that is allowed prior to the product control system making any flow rate
changes.
• Control Valve Settings
This button summons the Control Valve Settings screen. If your planting configuration uses a PWM valve,
see
“Control Valve Settings - PWM” on page
. If your planting configuration uses a Servo valve, see