Header offset, Crops tab, Crops – Ag Leader EDGE Ver.4.5 Users Manual User Manual
Page 188: Rops
176
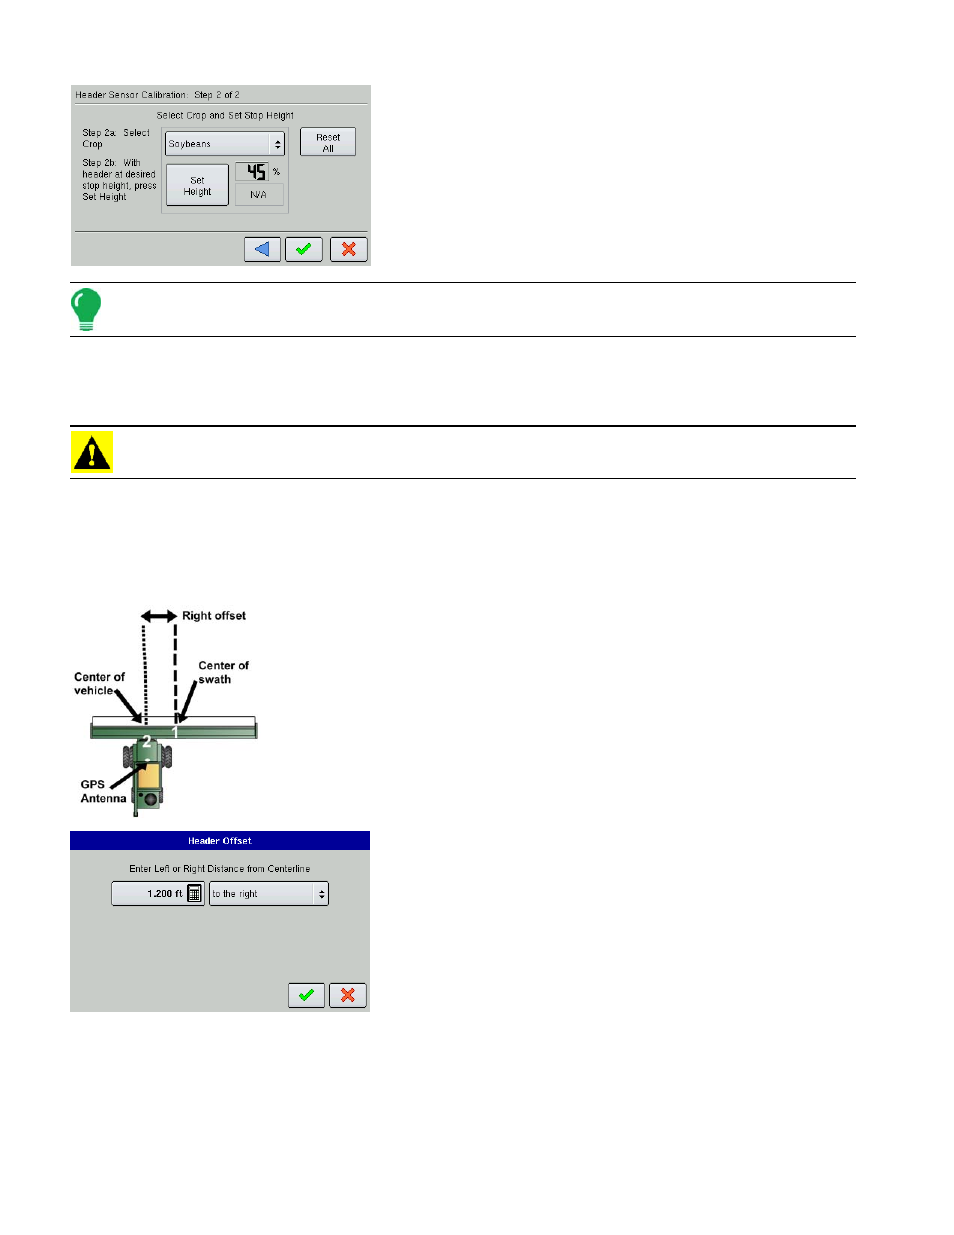
3. Set Stop Height
Select the correct crop type from the list box. Raise or lower the
header to the height where you would like to have the area logging
turn on and off. Press Set Height.
Note: The position relating to the Stop Height will be represented as a percentage.
- Move the header above and below the Stop Height. When below the Stop Height the dialog will indicate
Down, when above the Stop Height the dialog will indicate Up.
- To clear Min, Max, and Stop Height for all headers, press Reset All.
CAUTION: If Reset All is pressed the sensor will have to be calibrated for all headers.
H
EADER
O
FFSET
If the header of your vehicle is mounted asymmetrically to the vehicle's center, this can affect the
accuracy of the GPS data you are receiving. With the Header Offset feature, you can compensate for the
distance between the center of the vehicle and the center of the header's swath.
1. Measure Distance.
First, measure the distance between the GPS antenna and the center of the
header's swath.
2. Pull up the Header Offset screen.
Under the Header Tab, highlight the header name, press the
Wrench button and go to the Header Settings screen. Press the
Header Offset button and the Header Offset screen appears, as
shown.
3. Enter the Distance Amount.
Enter the distance amount by using the Calculator button, and the
distance from the centerline with the drop-down menu on the right.
When finished, press the checkmark button.
C
ROPS
T
AB
Crops are added and edited on the Crops Tab. The crops list shows all the crops that have been created
and are available for use.