Auxiliary input settings (switch mapping), Add auxiliary input settings – Ag Leader EDGE Ver.4.5 Users Manual User Manual
Page 82
70
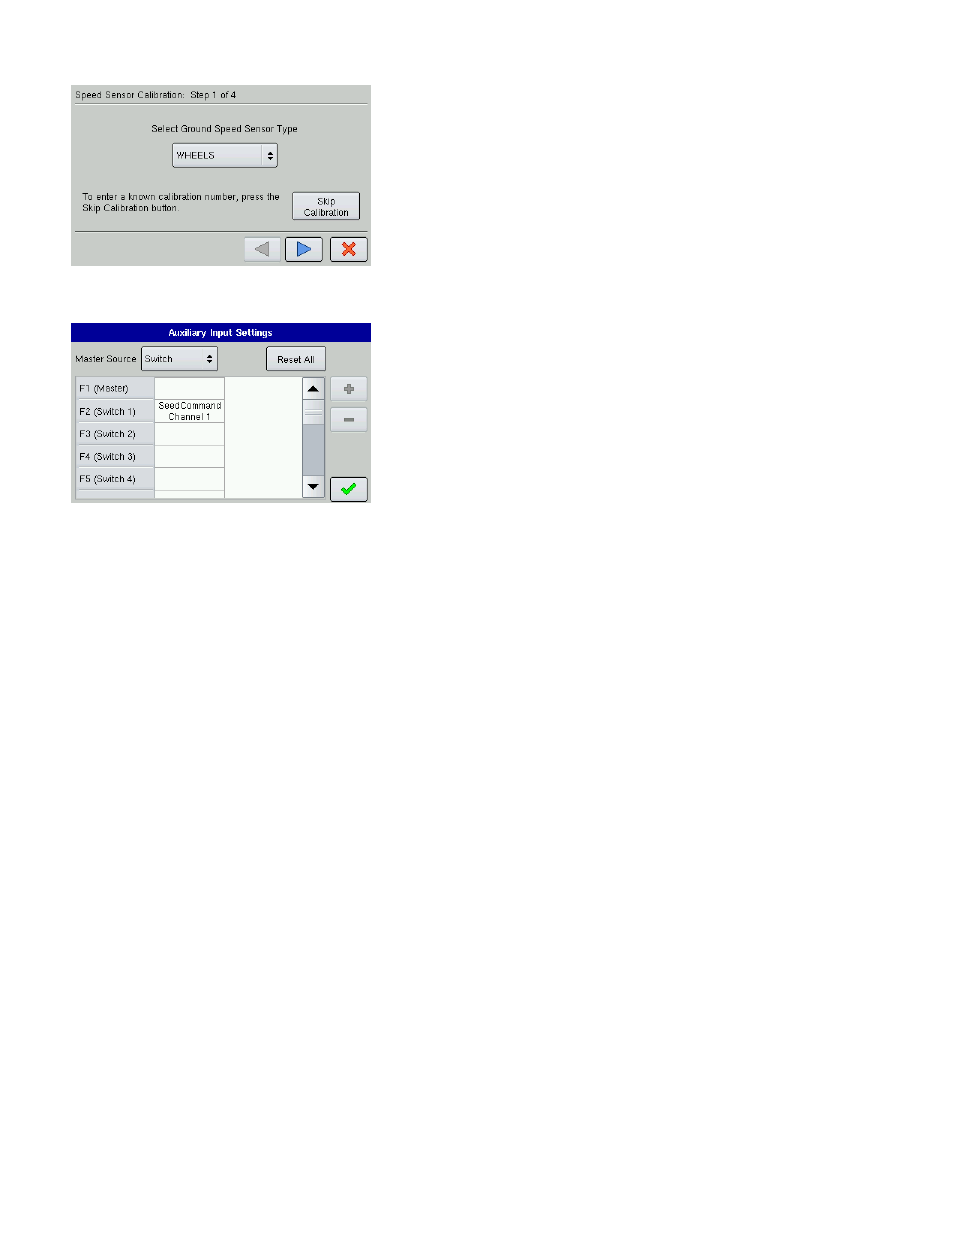
4. From here, follow the on-screen wizard’s instructions to
complete the distance calibration procedure.
A
UXILIARY
I
NPUT
S
ETTINGS
(S
WITCH
M
APPING
)
To view Auxiliary Input Settings, go to the Planting
Configuration Tab, highlight the desired configuration and
press the Wrench button. At the Configuration Settings screen,
press the Aux Input button, and the Auxiliary Input Settings
screen appears, as shown.
This Switch Mapping function is active only for users with
DirectCommand or SeedCommand features. The Auxiliary
Input Settings screen displays settings for the Master Switch
and other switches on a SeedCommand Switch Box.
The Master Source drop down menu controls the master switch for your entire configuration. You may
see the following options underneath this menu:
• Switch
Controls the master switch.
• External 2
This setting can control an optional, floor-mounted master switch.
• External 1, 3 & 4
Not used at this time.
The F1-F11 cells can be assigned to any implement sections. You can use these to choose the switches
that control a particular section or controller planting clutch. From here, you can also make the following
changes to the switch settings.
• Add a switch setting. For more information, see
“Add Auxiliary Input Settings” on page
• Remove a switch setting.
• Reset All. This resets the settings to defaults.
Add Auxiliary Input Settings
If you wish to add a switch setting, press the Add button on the Auxiliary Input Settings Screen, and a
second Auxiliary Input Settings screen appears, as shown. This screen shows the following drop down
menus: