Ag Leader EDGE Ver.4.5 Users Manual User Manual
Page 157
145
A
PPLICATION
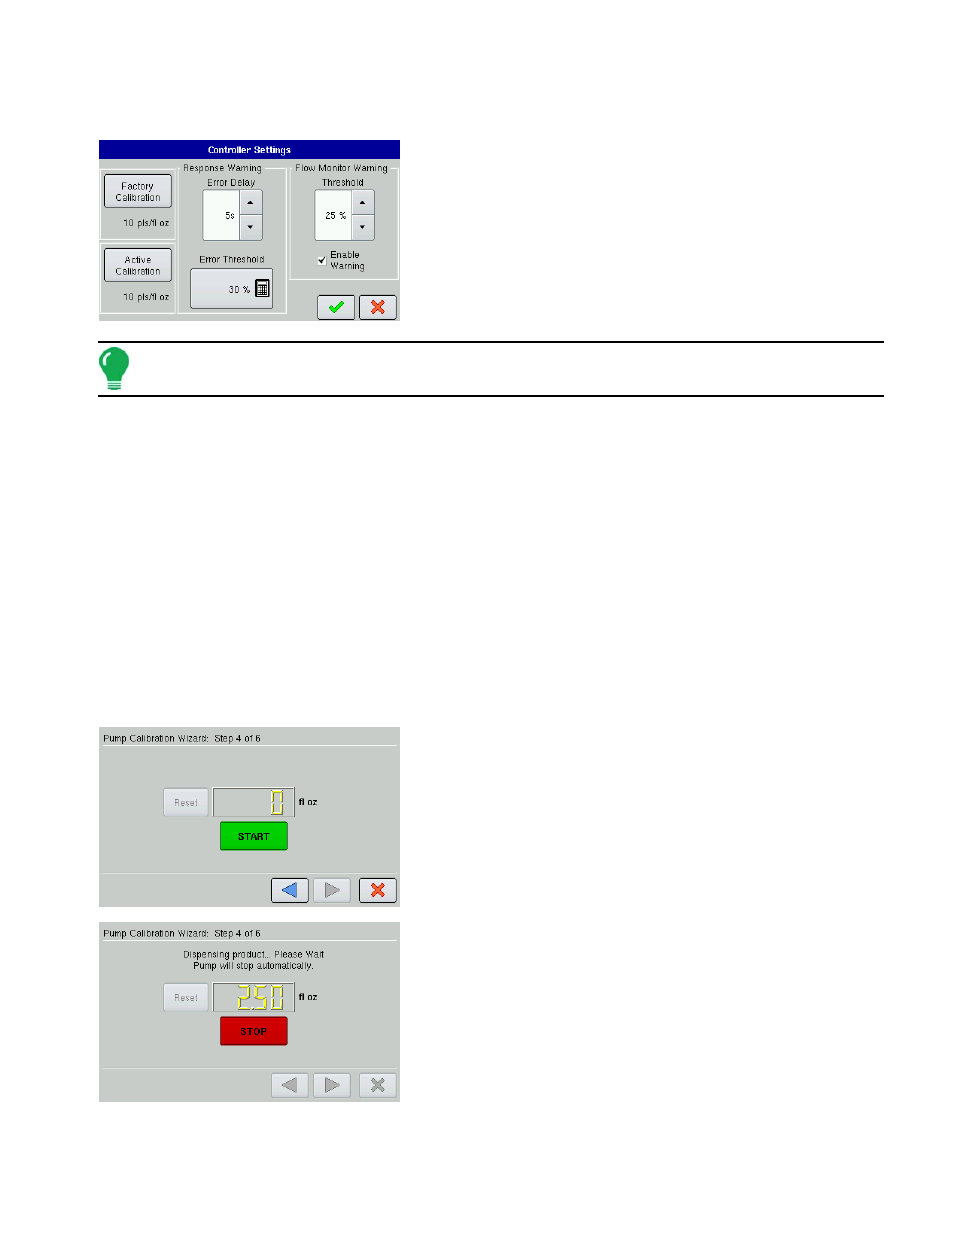
At the following screen, press the Controller Settings button. The Controller Settings screen appears,
as shown.
1. Enter Factory Calibration
Before entering a Direct Injection Calibration, a Factory Calibration
must be entered. If you have not already done so, enter the Factory
Calibration Number by pressing the Factory Calibration button.
This number is found on the tag of the Digital Pump Speed Sensor.
This tag number represents pulses per 10 fluid ounces. Divide the
tag number by 10 and enter this number. Once entered, this
number should not be changed.
Note: Active Calibration button becomes active once the factory calibration is entered.
2. Press Perform Calibration
Underneath Pump Calibration, press the Perform Calibration button.
3. Prime the Direct Injection Pump
The Pump Calibration Wizard appears. Before beginning this calibration procedure, it is recommended that
you first prime the Direct Injection pump. Press the Prime button and continue along with the priming
procedure as described in
. After the priming
procedure is finished, you will return to this Pump Calibration Wizard window. Press the blue right-arrow
button to continue.
4. Enter the Dispense Amount
Enter the amount that you want dispensed. Press Next to continue.
5. Acknowledge the Warning
Prepare to catch any product dispensed in an appropriate container. Press the green check mark button to
continue.
6. Start Calibration
Press the green-colored START button to begin the calibration
procedure. The Pump Calibration Wizard automatically counts up
to the amount that you specified in Step 4.
The button will turn red and displays STOP while the product is
being dispensed (an example is shown). When the procedure
is finished, the button will again turn green. Press the blue
right-arrow button to continue.