Calibrating ontrac2 – Ag Leader EDGE Ver.4.5 Users Manual User Manual
Page 64
52
Calibrating OnTrac2
Calibration of the OnTrac2 should be performed after you install it on your vehicle. This calibration
procedure consists of four main tasks: Selecting the Electronic Control Unit (ECU) orientation,
Calibrating the Tilt Sensor, Adjusting the minimum output for the Motor Drive Unit, and Adjusting the
Disengage Sensitivity.
1. Open Calibration Screen
At the GPS Guidance Tab, press the Setup (wrench) tool. Go to the OnTrac2 Tools Tab. Press the
Calibrate button, and the Calibration screen opens.
2. Read Calibration Instructions
Read the calibration instructions and press the blue right-arrow button to continue.
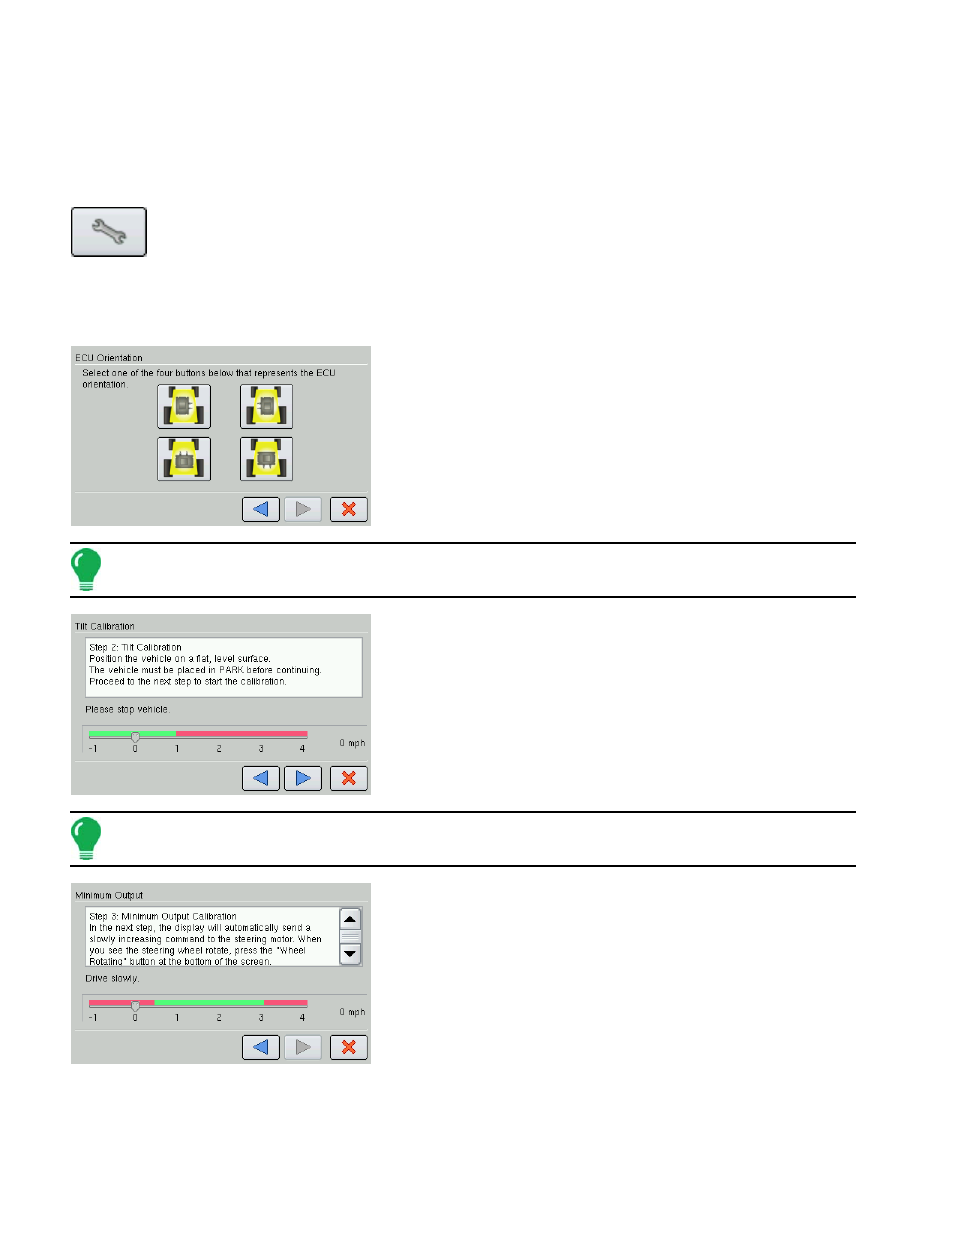
3. Select ECU Orientation
Select one of the four buttons (pictures) that accurately represents
the direction that the cable connectors on the ECU are facing.
Press the blue right-arrow button to continue.
Note: Mount the ECU so that is lies flat. Do not install it on its side or at an angle that is diagonal to the vehicle
direction.
4. Calibrate Tilt Sensor
Place the vehicle in Park on a flat, level surface. Press the blue
right-arrow button to continue. The Calibration in Progress
messages display and a countdown simultaneously takes place.
Note: The vehicle must be sitting on a flat, level location and must not move while the ECU Orientation takes
place.
5. Begin Minimum Output Calibration
The Minimum Output Calibration screen appears. Calculating the
minimum output tells the ECU how much electrical current is
needed to make steering adjustments. Drive your vehicle forward
in a straight line between 0.05—3.0 mph (0.8—4.8 km/h).