Header settings, Calibrate header sensor, Header settings calibrate header sensor – Ag Leader EDGE Ver.4.5 Users Manual User Manual
Page 187
175
H
ARVEST
Note: When a header is removed, all data in the regions and configurations using that header are deleted.
H
EADER
S
ETTINGS
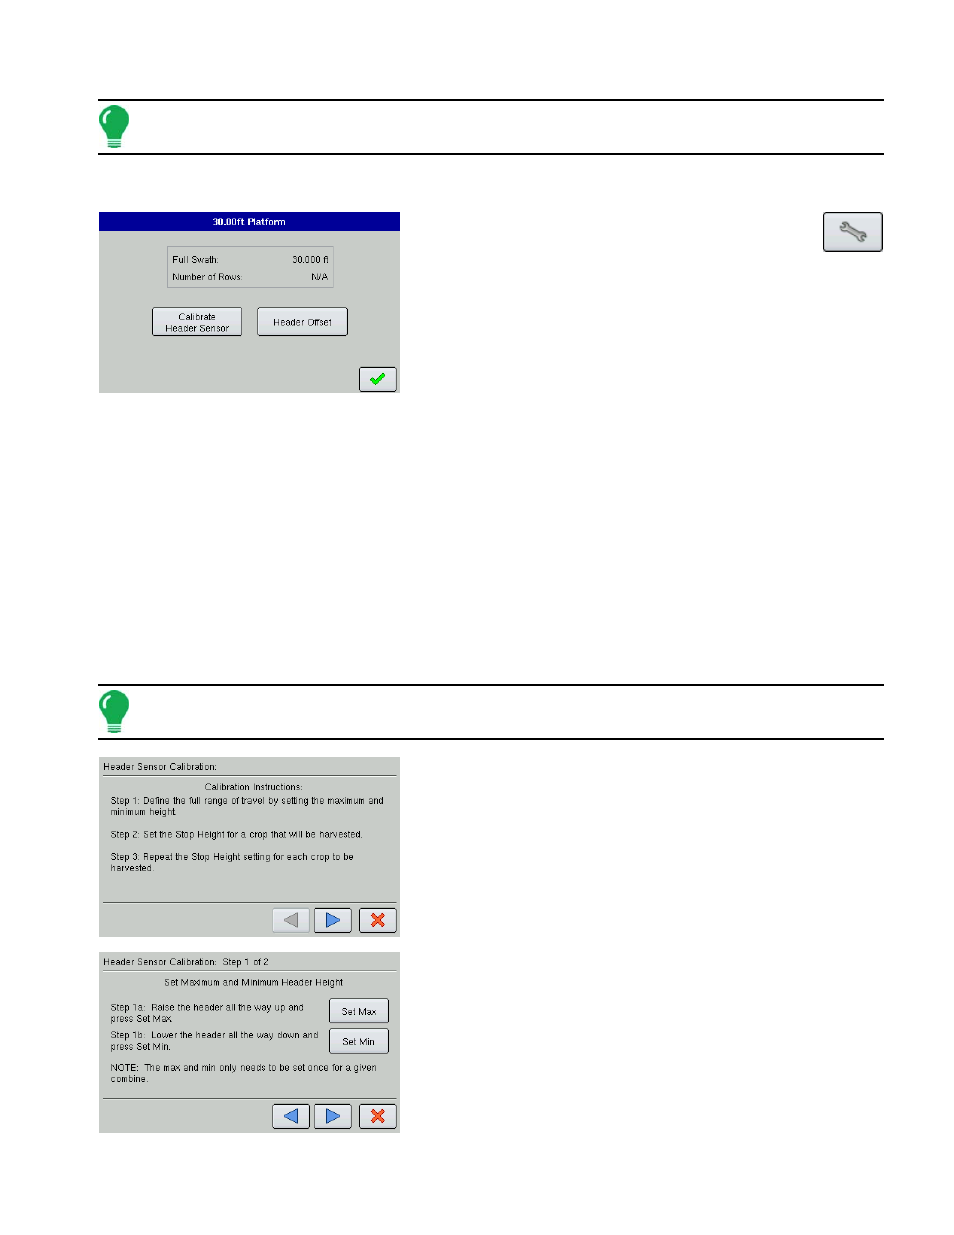
Under the Header Tab, highlight the header name,
press the Wrench button and go to the Header
Settings screen. At the Header Settings screen, you
can view the swath width and/or the number of rows on the
header, as well as calibrate the Header Sensor and adjust the
Header Offset.
• Calibrate Header Sensor
The Calibrate Header Sensor button launches the Header Sensor Calibration wizard, which will walk you
through calibrating the header sensor that turns area logging on and off. For more information, see
“Calibrate Header Sensor” on page
• Header Offset
The Header Offset button allows you to compensate for the distance between the GPS antenna (located in
the center of the vehicle), and the center of the header's swath. For more information, see
C
ALIBRATE
H
EADER
S
ENSOR
Prior to logging harvest data, you must calibrate the header sensor. To do this, first press the Header
Tab, select the correct header from the Header List and press Calibrate Header Sensor.
Note: To calibrate a header sensor, you must have first a crop defined. For more information, see
1. Read Instructions
Read the header sensor calibration instructions fully before
proceeding. Press the blue right-arrow button to start the
calibration process.
2. Set Max and Min
Set maximum and minimum header height settings.
- Raise the header all of the way up and press Set Max.
- Lower the header all of the way down and press Set Min. This
determines the full operating range of the header.
- Press the blue right-arrow button to continue.