Field management tab, Import and export boundaries – Ag Leader EDGE Ver.4.5 Users Manual User Manual
Page 24
12
F
IELD
M
ANAGEMENT
T
AB
A field consists of one or more outer boundaries. Each outer boundary can contain one or more inner
boundaries used to define any combination of roadways, waterways, building sites, or bodies of water. If
the display will be used for multiple Growers, enter each Grower business name and associate the field
names with the correct grower when the fields are setup within the system.
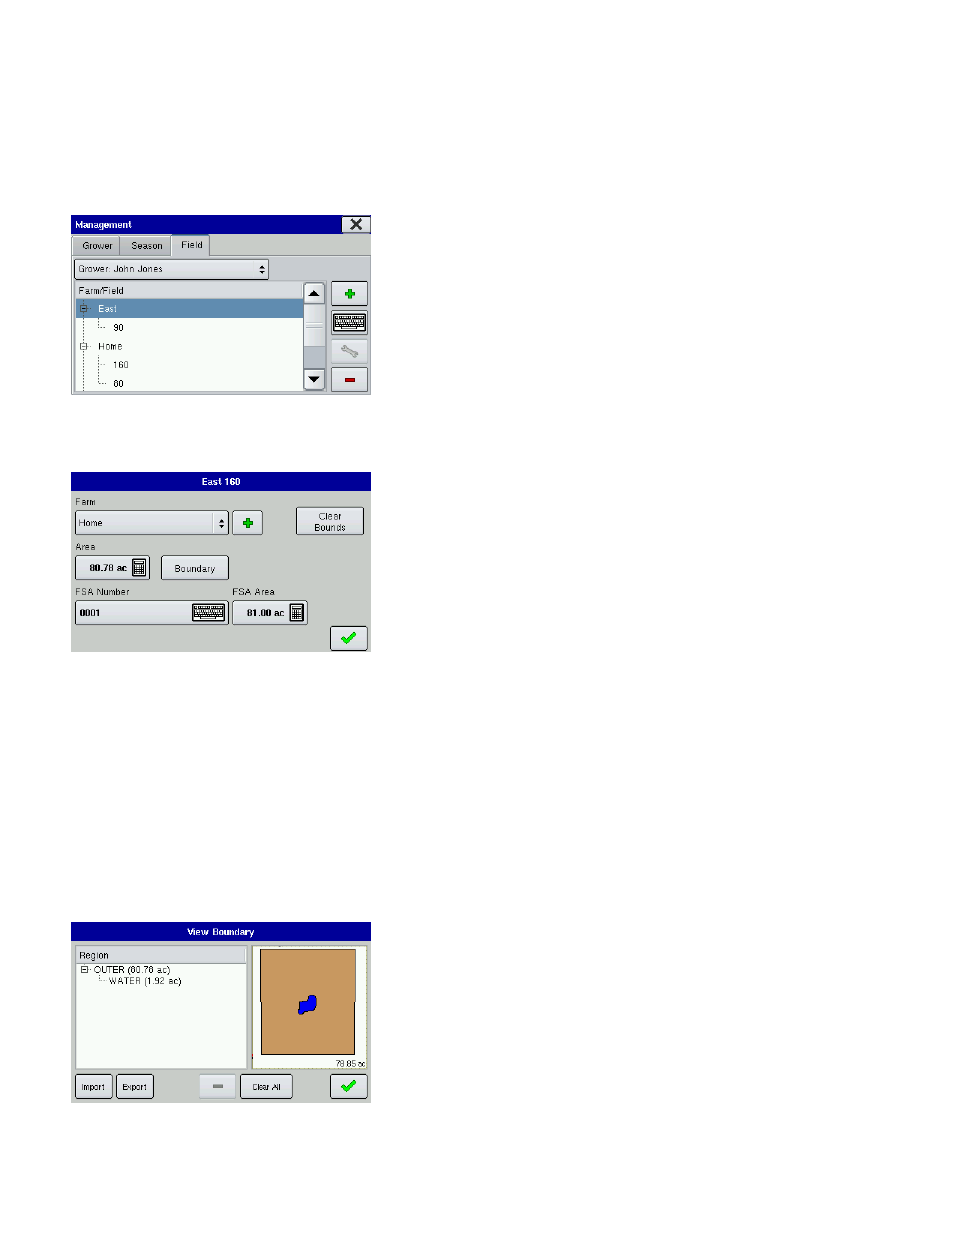
In the Field Tab, select a Grower underneath the drop-down
menu at the top. Each farm of that particular grower is shown
in a list, with the fields within that farm as subcomponents
within that list.
• Press the Add (plus sign) button to add a Field.
• Press the Delete (minus sign) button to delete a Field.
• You may edit an existing name of a Field by highlighting that
name and pressing the on-screen keyboard.
• Press the Wrench Button to add or edit information regarding that field and its boundary. The Field
Information screen opens, showing the name of that field in the Title Bar.
The example shows the “160” Field of the “Home” Farm.
• Farm
Name of farm.
• Area
Total acres of farm.
• Clear bounds
Press the Clear Bounds button to center the map on the current
GPS position. This is particularly useful if you have flyer points or
have logged a point outside the mappable range of your current location.
• FSA Number
The U.S. Farm Service Agency’s four-digit number assigned to every farm.
• FSA Area
Tillable acres as established by the FSA.
• Boundary
Press the Boundary button to import and export boundaries. A detailed explanation is described on the
following pages.
Import and Export Boundaries
Boundaries can be created with the display or imported from
desktop GIS software. For more information on creating
boundaries, see
files present in the display can also be exported for use in
desktop mapping software. Begin by pressing the Boundary
button on the Field Information screen, which can be viewed
after pressing the Field Tab’s Wrench Button button. The View
Boundary screen appears.