Pre-harvest checklist, Calibration sequence, Vibration calibration – Ag Leader EDGE Ver.4.5 Users Manual User Manual
Page 190: Pre-harvest, Arvest, Hecklist
178
P
RE
-H
ARVEST
C
HECKLIST
Calibration Sequence
Perform Harvest Calibrations in the following order:
1. Distance (Speed Sensor) Calibration
This calibrates the Ground Speed Sensor connected to the display. (calibrate a backup sensor even
when using GPS speed as the primary speed sensor must still ). For more information, see
2. Calibrate Header Sensor
This sets the height when the display stops recording area as the header is raised at the end of the pass.
Stop height calibration is required for each grain type. For more information, see
3. Perform a Vibration Calibration
The vibration calibration is used to compensate for the amount of force that is measured by the flow
sensor with no grain flow. For more information, see
“Vibration Calibration” on page
4. Calibrate Temperature
This sets the temperature offset to provide a correct moisture reading. For more information, see
“Temperature Calibration” on page
5. Calibrate Moisture
This sets the moisture offset to help provide accurate moisture and yield readings. For more information,
see
“Moisture Calibration” on page
6. Calibrate Grain Weight
A correct Grain Weight Calibration provides accurate readings across all grain flow ranges. Calibration is
required each year and for each grain type. For more information, see
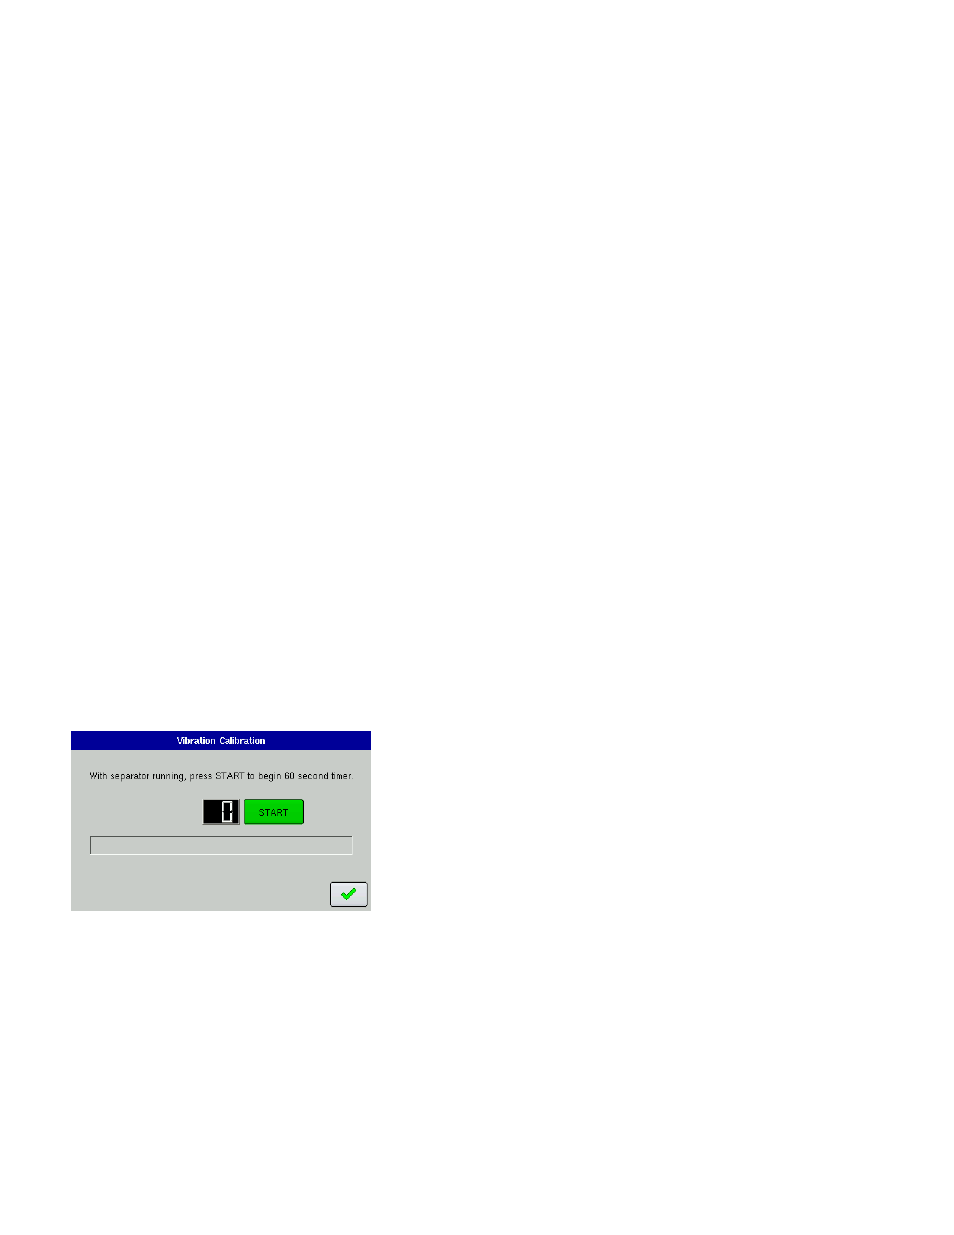
Vibration Calibration
The vibration calibration must be performed with the correct
head on the combine, and repeated for each crop harvested.
1. Run Separator
Start the separator and feeder house with the proper header
attached. Run at full speed.
2. Press Vibration
At the Calibration Tab, use the drop-down menu to select the crop
to calibrate. Press the Vibration button, and the Vibration
Calibration screen appears.
3. Press Start
With the combine separator running at full operating speed with the header engaged, press the Start button.
The display counts down 60 seconds.
4. Calibration Number Displayed
When the vibration calibration is complete, the vibration calibration number is displayed, and a message
appears stating “Calibration Complete.” Press the checkmark box to return to the Calibration Tab. You may
now turn off the separator.